Showing posts with label V8323. Show all posts

Monday, May 9, 2016

The Spring / Summer Sewing Capsule

I feel rather abnormal. I mean, usually, even if I'm exhausted, a weekend of extended sleeping and lying on the couch takes the edge off. Before I know it, I'm planning something - baking a pie, making some shampoo, sewing (remember that?), knitting a new garment, a long walk with errands, doing a me-tailored yoga practice...

Weirdly, it's taking all of my energy to stay somewhat engaged, and that just cuz I'm freaked out by apathy.

I decided those jeans I need to hem are going back to the store. They're too low-rise and I don't feel like spending half my life yanking them up over the puff-ball that is my lower abdomen. Not to mention that they cost 300 bucks. For 300 bucks jeans have got to be perfect.

I did finish that pair of striped (serious stash-busting) socks. I'll photo them soon and share some new feelings about striped socks. The short story is, just don't. Unless you really want to use up yarn in @25 gram increments, in multiple colours, why inconvenience yourself? Aren't socks about simple, wearable comfort?

This morning I went through my sewing cupboard to get a lay of the land. Given that I love buying fabric, I've got a bit of fun ahead of me this aft. Seems I don't have much in the appropriate yardages to accomplish any of my preferred projects. How does this always happen??

By preferred projects I mean this:
  • Garments that are tried and tested (to some extent)
  • Garments that I know I'll wear
  • Garments that are comfortable
  • Garments that I'm not going to have to mess with overly to make them fit
Here's what I've come up with so far. I can't say whether I'll get some mojo back and go on a tear, but I sense this is my plan until the reno starts, at which point all the sewing will be packed away till my house is done. Links point you to previous posts with pics...

Kristin Spring / Summer Sewing:
  • Harper Jacket - I wear this at least once a week so I think I may have found my match for the insanely gorgeous cashmere double knit Mardel kindly gifted to me years ago. This fabric is fuchsia on one side and grey on the other. It's a true winter fabric so I won't lead with this garment, but it would be so nice to have it at my access in the fall.
  • Who doesn't need a new, bespoke T shirt, made from one's personal sloper? I was hoping to make one of these using a remnant of electric blue bamboo in my stash but, given that I've only got 0.65 of a yard,  I'm going to have to shore it up with some extra from the store. Hope I can find the same bolt of fabric (or one, the colour of which, works as a match).
  • Hudson Pants - I wear these at home constantly. They're perfect for sleeping. They're perfect for yoga. I've got some cylindrical, thick t-shirt fabric that would work for another pair, even if it's not exciting. Of course, I'm compelled to make these with my beloved French terry, so I'm likely to be investing in another yard of that...
  • DKNY Dress (V1179) -  Lord, I've worn my 2 other versions of this dress into the ground, despite the fact that my workmanship left much to be desired. I could use a striped jersey in my stash (bought ages ago from Blackbird Fabrics) but I'm likely to hedge my bets and replace some of my modal or bamboo from Shu Ching. If I can find the same bolts, I can maximize the remnants I still have in my stash.
  • V8323 Very Easy Vogue Top - This is the one I haven't quite cracked (though I've made NUMEROUS muslins). Gonna buy myself a bit more nice fabric to give it one more go. I know I keep saying I've had it with this (after 6 toiles?!) but I see its potential and I've worked so hard to re-draft the pattern such that it can work for my narrow, short and curvy frame.
  • Another sleeveless version of V8790. Turns out I do have a fabric in my stash to make this one. It's the fun floral (see Jalie 2921 top in that link) that Gillian and I both bought (and which she gifted me her remnants of). Added to my remnants, it's enough to make this top. Given that I didn't love the construction process last time, I do hope I find a sanguine way, going forward.
I'm bummed that these aren't more exciting but I've got to stick to the straight and narrow right now. There's just too much afoot - and my body shape is too in flux - to go on a tailoring resurgence this spring. My goal is to make these items fit so gorgeously - in such lovely fabrics - that they'll thrill even if they're aren't new-to-me patterns. And I do intend to supplement with RTW. When one's all over the map, try-and-buy is the way to go.

Saturday, February 20, 2016

Finished Object (and Failure): Simplicity 1716 - Plus, A Sewing Recap

I just finished Simplicity 1716 and promptly threw it in the garbage. It's just not a nice pattern (as drafted) on me. It's very unlikely I'll ever make it again but, just to torture myself for an additional 30 minutes, I revised the pattern pieces to suit my shape. At least I think I did. One never knows until one tries.

My pre-sewing, standard alterations worked pretty well. The issue wasn't with the armscye or sleeves. There was enough room in the bust, but not too much. The length was pretty good. And yet, what a failure...

Here's what was wrong with it (on me):

It's simple: The proportion of the front band. The way the pattern works is that an upper front piece attaches to a band (folded in half) which then attaches to a lower front piece. These three pieces form the front of the top. The band forms a seamed segment in the middle of the front piece:
It's tough to see in the tech drawing but those wings that culminate at the the centre knot (views A, B, C) are actually seamed to the upper front and lower front pieces. In that pic, the wings seem like an overlay on top of a ruched front. It's not the case.

My issue is that, given projected boobs, the lower seam (the one attaching the lower piece to the lower band) falls half way over my bust apex. It's super unattractive. IMO, that lower seam needs to either fall above the bust apex altogether - or entirely below it. The issue (seam over bust), which I see on women all the time, just SCREAMS horrible fit. Ladies, listen to me: If you have any kind of empire seamed top that doesn't lie flat at the underbust, give it away. It just makes you seem like you don't know the size of your boobs. Frankly, it's disrespectful to the bust line.

I considered having the band fall entirely above the bust - I think that's how it's meant to be worn - but it was bulky with seams in an area where my body is proportionately short. Also, the upper front, as drafted, is too long from shoulder to upper bust on me, so I'd have to shorten the upper piece in order to get the entire band to lie above the bust.

The way I "fixed" the issue was to put the lower seam below the bust by adding 3 inches of length to the front band piece (may still not be enough because that piece is folded in half when you sew the front together). The piece is an odd, oblong shape that wasn't conducive to this alteration so I had to get spatial. We know how that goes. To compensate, since the rest of the front fit fine, I had to carve 3 inches of length out of the lower front piece. Lord, does it all look weird. But I walked the seams and it should fit together correctly. The only issue is whether or not I added enough length. I suspect I did not but it's dangerous to go crazy with huge alterations. Furthermore, I'm never going to make this again, so who cares? It was more an exercise in conceptual problem-solving than anything else.

To complicate matters (do I ever stop saying this??), the band is the piece that contains the segment that form the centre knot. Those pieces are already too bulky (see below). So my newly altered (and untested) front band looks completely different than the original. If my alteration were to work, I could actually easily modify the "knot" part of the piece to be quite a bit less bulky while maintaining the volume over the full bust. I could describe this in detail but I just don't care enough to.

Point is, I don't like the end result enough to spend a bunch of time on it. This construction mandates a very thin fabric to work at the centre knot and ruched upper bust. (Really there's a lot of fabric bulk drafted into this pattern.) But thin fabric is flimsy over one's less-than-willowy midsection.

Here's what's wrong with it (in general):

The upper front and band pieces, as mentioned above, create a bulky knot which is just not attractive, particularly if you've got an ample bust. Mind you, even if you don't, the bulkiness feels kind of "home sewist". It's not sleek enough.

Also, the knot doesn't come together nicely at all. This pattern is so Twister that it took me a long time to figure out how to get the specifics to come together in such a way that it looked right. I got the concept, but the wings that form the centre knot are too wide and it creates a messy join.

The pattern just isn't designed for a projected bust of any size given the aforementioned seamed front. Projection (not size, specifically) is what torques the lower seam. A wider frame with a wider bust would fit this top better.

The fact that one must use a seriously thin fabric to get the knot to work is at odds with the average woman's interest in wearing knits that slim and hold (i.e. those with more substance).

To Close the Loop on my Recent Sewing Venture:

I sewed 3 garments: The v neck version of the Jenna Cardigan, Simplicity 1716 (discussed here) and Vogue 8323.

Jenna Cardigan: The only wholly successful outcome was the cardigan. I wore it to work this week and got compliments. I don't love the hand of the fabric, frankly, but the fit is good and I can see that, in another fabric, my altered v neck version is going to come in very handy. One can never have too many of these and the pattern comes together easily with a yard of fabric.

V8323: I'm going to give myself half marks for V8323. It's not there yet but I know it has potential and I'm pretty close. Just wish I hadn't wasted the expensive fabric on what turned out to be an unwearable muslin. To mitigate this potential occurrence in the future, I went to FabricLand and got 3.5 yards of very adequate mixed-fibre T shirt knit in the remnants section. The lot cost me 20 bucks, including tax. I just don't get that place. Similar fabric (not in the remnant section) is listed at 24 bucks a yard. That's high on drugs, IMO, since I pay that amount on Queen Street for the good stuff. Well, at least I did a few months ago. Lord knows what the prices will be next time I go to restock. Fucking dollar.

The fabric I got isn't high-end but nor is it inferior. It would make a very nice T shirt, if not an upscale one. I think it's worth about 12 bucks a metre. So I got a very good deal and I can use it with abandon. At 5 bucks a metre it's muslin-priced. But who on earth would pay $24 bucks for it? BTW,  Gillian's the one who taught me to look in the remnants section. Since most of the offerings at FabricLand are shit (I mean really, really cheap) and the decent ones are over-priced, this is really the only way to go at that store.

Long story short, you'll be hearing more about this garment, likely in the near future.

Simplicity 1716: I enjoyed taking on a new pattern and I do think that this top looks lovely on some others who've made it. But it's a full-on failure as far as I'm concerned and I wouldn't recommend it unless you're on the small-bust end of the spectrum. Sure, you can alter it, but you can alter anything. I'd start with a pattern, the construction of which seems less homemade. There are many cute knit tops that'll work more easily for me. I'm going to spend my efforts on them.

So there you go. That's my weekend so far and my latest sewing expedition. Any thoughts on Simplicity 1716, if you've made it? Did it work for you? Let's talk!

Sunday, February 14, 2016

I Don't Have Good News

I don't know what made me think I could make a zillion changes to a pattern and have the end result fit perfectly. That is decidedly not how it went. But, boy, did it take a long time to get there. I know that you learn more from your failures than your successes but I'd rather succeed - at least more than occasionally.

I said I'd throw this pattern away if I didn't achieve greatness this go-round. I can't do it. I'm too captivated by the mere chance of future success. Today I made a zillion changes (if small) to the pattern as I went. I'll show you the pattern pieces tomorrow. Right now I'm fucking exhausted.

In brief, here's what went right:
  • The bust alteration was really sound. Moreover, I would win any contest at easing in bust fullness on a princess seam. If you can manage the spherical action I've got going on, you can sew any curve. 
  • The lowering of the waistline worked just as I hoped it would.
And here's what has to change:
  • The shoulders (minus the width of the side front and back - which I altered from shoulder princess to armscye princess) were an inch too narrow on each side - partially cuz they were just too narrow but also because I somehow didn't have enough height in the back collar. Somewhere along the line I started changing the construction at the back collar, necessitating less height, and I don't know if I finally sewed "as instructed" today or what went wrong, but now I need the height I removed at some point. The net result is that the shoulders are hiked up and the armscye is too high.
  • The surplice is now too closed (though this is no doubt exacerbated by a weird fix I did to get the front and back to align given that the back collar was too short and the shoulders were too narrow). As a new alteration, I removed a 1" wedge from the inner front shoulder (where the facing folds over), tapering to nothing about 4 inches down from the shoulder, so that it will be more open. Now I've got to remember to add an inch back to the outside shoulder or I'll have the same problem with the shoulder width that I had with this version . I so don't understand how you can take width from one place, only to add it back at another place (in the same plane?!) and it achieves the necessary change in fit. Or so I'm hoping.
  • My angles on the side panels (once shoulder princess panels, now armscye princess panels) weren't quite there. They weren't far off though! Of course, I might have done myself a favour by looking at some actual armscye princess seam side pieces on the web before winging my alteration. No mind. I will tonight (having already altered the pieces to fit as I think they should).
  • I had to alter the sleeve where it attaches at the underarm  (0.5 inches of additional width on each side, tapering to nothing half way down the sleeve) because it's now too snug under the arm, given all of the other changes I've made. This is something I NEVER have to do. I think I've been going a bit crazy with the high underarms and every time I make changes to some element of the pattern, it affects things in other places I can't predict (see bullet point 1). I should clarify, my altered armscye and sleeve are still higher  than the original pattern's because Vogue drafts for tall women with a smaller than average full bust. Of course, changing the height of the back collar may obviate the need for this alteration, but I figure I can more easily fix things, next time, if I have too much fabric rather than too little.
The irony of this is that I can't predict the outcome of these new changes but I'm compelled to give it one more try. Did I mention I wasted 35 bucks worth of gorgeous modal - again. It was the only fabric I had enough of in my stash (this pattern is a total fabric hog). I think I can eke out one more shirt from the @1.5 yards I've got left but, if not, I'm gonna have to buy some new fabric. Which is stupid.

Oh, I'm in that crazy post-sewing head-space where everything seems so huge and meaningful and intense. I need a bit of perspective. Or maybe a degree in fashion design.

Friday, February 12, 2016

Vogue 8323: Giving it Another Go

Vaguely mollified by this experience, I opted not to start the day with sewing but rather with pattern alterations. Yeah, I don't know if that's a good idea either, but my brain was 'fresh" after a night of sleep.

You may recall this garment, V8323, made in a gorgeous fabric, in September, and relegated to the lawn give-away pile after a series of compounded fit issues. What was the problem with that version? Well, you'll recall that I originally altered the pattern to fit when I was totally new to sewing. At that point, not really clear about what I should be doing (and given that this pattern is drafted for a giraffe having tons of length between the bust apex and shoulder shelf), I chopped off inches from the shoulder seam. I don't know that that's what I'd do at this point - but given the options, it wasn't the worst idea I've ever had.

The problem is that it messed up all of the other vertical proportions (bust apex height, waist height, length at the hem etc.) It also didn't fix the issue of insane shoulder width (a problem corroborated by just about every reviewer) or the position of the princess seams.

I was left with a pattern:
  • Still too wide in the shoulders by about an inch on either side
  • Way too high in the bust apex (even by small-busted young person standards) - like 2.5" too high (the amount I removed from the shoulder height given that I have a short span from my upper bust to my shoulder shelf). This is one of the perks of being a short, small person.
  • Too short in the waist (where the surplice crosses over). The over-high bust apex naturally contributes to the issue but it's like the whole garment rides up.
  • Weirdly proportioned in the princess seams. I've actually learned something during my sewing experiences over the last 2 years (which finally clicked over the past couple of months) that'll likely make my next foray into bra sewing the one that works, fit-wise (if potentially not support-wise). Yeah, Gillian, you read that right. It's not rocket science but I'll give the explanation a go:
    • I've always assumed that my significant bust projection, which really makes itself felt from the centre gore (i.e. chest wall over the breasts to the nipples) means that I need to add lots of length / width / fabric over the interior span of my breasts. In fact, I need to put the extra fabric over the outer breast (where I have very little fullness) from the edge of the breast root (at my side) to the nipple. Why, I really can't say. It's still melting my brain a little. But every princess seam adjustment that I've ever made has  has corroborated this fact. And, as I think about it, every foray into bra sewing has left me with fit issues (too much fabric) in the upper cup. I can see now, I'm going to need to increase the size of the outer cup substantively and decrease the width and length of the (already smaller) lower and upper cups.
    • All this is to say that my (as drafted) princess seams, on this garment, are positioned (over the bust only) a good 1.5 inches too far towards the side seams. 
And after 2 hours, I think I found the fix (or at least a move in the right direction - one doesn't want to get overly confident):


The two pieces that the photo focuses on are the side front and front. (The front has a cut on facing which is that flap piece to the right side.)

What I've done here - though it doesn't look like much - is:
  • Lowered the bust apex by 2.5 inches. This PDF shows you how to do that easily. 
  • Narrow the shoulders: I turned the shoulder princess seamed side front (and back, for that matter) into an armscye princess seam. This got rid of tons of width I couldn't manage, given how many pattern pieces converge at the shoulder. It also meant I had to re-widen the front piece (and back piece) by 0.5" in the shoulder width or things would have been too narrow (given how many times I've already hacked at the width of the pattern pieces).
  • If it works, this will also diminish the excess of fabric over my upper bust (where I'm short and proportionately flat).
  • The crazy new bump-out on the side front is my standard-issue princess seam adjustment to allow for extensive bust apex projection that doesn't extend to the side bust. It's even like a semi-sphere, cuz my breasts are evenly full.  This alteration is what's going to reposition the front/side front princess seam over the bust in the appropriate place (more towards my full bust, rather than the outside of my bust). I had to remove the equivalent fabric from the front piece to maintain the size. Effectively, I cut the bust curve (now on the side front piece) out of the side of the front piece. I then traced it onto new paper because things were getting messy. It's weird, I get it. But my full bust projection is more significant than most patterns ever draft for. Because you rarely see it, it seems that much stranger.
  • Finally (and I'm least sure of this alteration - having never done it on a pattern piece like this before), I lowered the waist (where the surplice and facing attach together to produce the cross over neckline) by extending the facing down by 1.5 inches (the desired amount). To maintain the basic shape of the piece, and the proportions, I added a bit of width, below the facing, at the front side seam, tapering to nothing at the hem.
  • I'm still trying to figure out how to manage the excess fabric (long, straight diagonal line) on the front facing. It doesn't match the concave curve I've created on the seam to which it will attach (the front/side front princess seam). Having just looked at the construction (on my finished top - the one that highlights all of these fit issues) I can see that I'm going to have to mimic the curve. (Off to fix the piece...)
So there you go. It's a Very Easy Vogue knit pattern (you know, the one hour kind) and I've spent 2 hours altering it (and that's just on this go-round). I wonder at what point one just starts to draft patterns for oneself. I guess it's when she's done enough successful altering of wacky patterns, that she feels confident starting from scratch. But then, why bother at that point?

I'd really love for this to work out. I have beautiful fabric with which to make it. I've considered as many fit elements as I have the experience and brain-power to manage and I'd so appreciate a new top that I've sewn (rather than another useful learning opportunity that ends up going to someone else or into the garbage). Wish me luck.

PS: Next up I need to actually sew that Jenna Cardi hack and cut the fabric / sew up V8323.

Monday, September 14, 2015

A Casual Monday

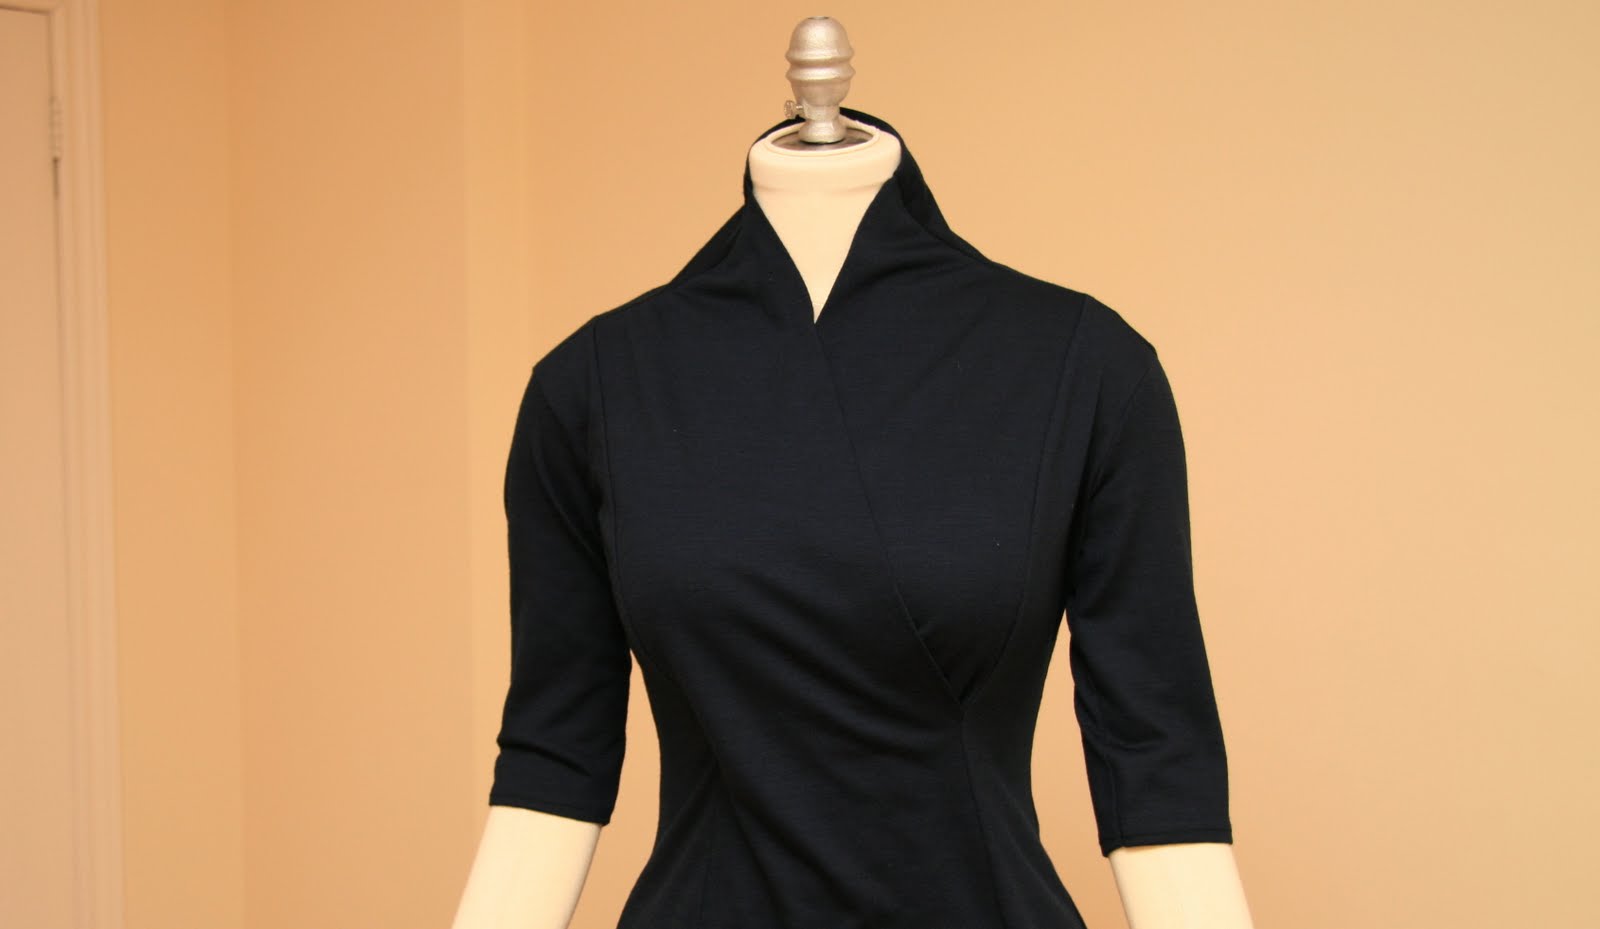
Here I am in my new jeans (tapered and shortened by me) and hand-made surplice top (V8323):

Thanks to my friend Jeanette for taking my photo at work...
I'm actually liking the look a lot but, on wearing the top for the day, I can see I'm going to have throw it out and start again.

What's wrong?

  • The shoulders are still an inch too wide. Problem is that the top is made of 4 shoulder-princess-seamed panels. I sense I'm going to have to take the extra fabric from the surplice panel (the front) which may have implications I've not yet considered. But I hope not. I can't simply merge the two panels into one (as my means of diminishing width) because the surplice attaches at the front/side front seam. Which means I need that seam. And I can't remove anymore width from the side front shoulder width because there would be no shoulder width left. The side panel would effectively become an armscye princess seam, not a shoulder one. Although, now that I think about it, theoretically that could work... But looking at the fit, I feel that there's too much volume over the side bust and the side front / front seam is falling too far to the outer bust. That implies, to me, that the place I need to take the fabric from is the front panel - to move that seam where I'd like it.
  • The bust apex is too high. That's probably because I removed 3 inches of height / depth at the shoulder seam (an alteration I made to the pattern when first I constructed it 3 years ago. I didn't know much about fitting then...). It would stand to reason that the fullest part of the bust would need to be re-set lower to accommodate this. I didn't consider that at the time.
  • Aligned with the bullet above, I'd like to lower the height of the surplice wrap (where it attaches to the side front seam) about 1.5 inches lower (so that it stays under my bust instead of riding up as I move around).
It's amazing that this top - which looks alright in a photo - is as messed-up, fit-wise, as it is. It's slightly more amazing that I seem to take 1 pic a quarter and I've choose to make it one in which I dis the fit of what I'm wearing - given that fit is what I pride myself on! You know I believe in keeping it real here. No sense in pretending I have achieved something I have not.This is a really lovely basic and I'm sure I'll wear it when it fits. Till then, this top is retired.

(PS: Too bad cuz the fabric is luxe.)

Monday, August 24, 2015

2015 Fall Capsule Wardrobe: The Planning Progresses

Thanks everyone, for commenting on my proposed fall sewing plans. Here's where things stand now (after one of those really "in your face" sew-planning days that yields as many questions as answers - and paper cuts):
  • I bought the StyleArc Danni Dolman dress, Emily Knit Top, Sunny Knit Top and Fiona Cardigan. (See here for tech drawings of each.) 
  • I put together one of those documents I like to make, outlining my fabric, pattern and pattern-with-fabric options. On page 2 you can see that I landed on these capsule collection choices: 
    • StyleArc Sunny Top (in Navy French Terry, if I can do it with 1.25 yards...)
    • Self-Drafted Kimono Sleeve Dress (Electric Blue Bamboo)
    • StyleArc Danni Dolman Dress (Lavender Modal)
    • True Bias Hudson Pants (in Slate French Terry unless I can't do the Sunny in 1.25 of Navy French Terry. Then I'll switch them cuz I think I can get short Hudsons out of a smaller yardage.)
    • Vogue 8323 (Lavender Modal or this blue (what a shock) Tencel/Wool jersey I bought from Fabrications a long time ago but don't seem to have any record of, like, anywhere. It's in my closet though. Should have enough of one of these.)
I dispute the required yardages given that I always shorten EVERYTHING by 3 inches. So I'm inclined to give some of my shorter yardages a try, if it seems possible.

What does this tell me about myself?
  • I'm embracing the knits big time.
  • I'm not into setting in sleeves, apparently, because every one of these options (that has sleeves) has a kimono sleeve of sorts.
  • I like making capsule collections of 5 items.
  • 4 of these will be work-worthy (if perhaps on Friday)
I spent Sunday aft making up documents, altering my TNTs (yup, if you go long enough, you've got to revisit and alter these things) and assembling downloadable patterns. Now I remember why I buy the ones in an envelope. Lord, what a time, paper, ink and tape suck. Still, it beats waiting. I think.

Here's a glimpse at what I was up to:

Sunny Cocoon Top 
StyleArc Sunny Cocoon Top. Yeah, those are my exceedingly brown feet (only part of me with colour).
Have you ever seen a pattern that looks like this? Seriously, I cut the 10 but I am vaguely afraid. It's very loose looking. I can tell (having done very prelim measurements) that I'm going to have to cut 4 inches off the length and 3 inches from the sleeves (or maybe the centre back?!) The sleeves are measured from the centre back and they're drop shoulder. This should be an adventure, she says optimistically.

Danni Dolman Dress
39 pages to create a dress that's 2 pieces and some ribbing. This is more than half of the floorspace of my sewga room...
Here's what's left after cutting - but note the cutting is rough. I've left space around the cut lines to make alterations...
More to the point, have you ever seen a dress that's effectively 2 pieces?? This thing may look hideous when finished (or not) but it ain't gonna take a long time to put together :-) I need to consider my alterations on this one. I think I'll compare my self-drafted dress (which is also a cut-on sleeve design) and consider shortening the sleeves, waist (to remove overall length), back piece (to remove fabric pooling at the low back and a slight restructure of the boat-esque neck. I'm really narrow in the shoulders so a boat neck for me is like an off the shoulder thing for someone else.

Vogue 8323: I had my biggest shock when I went to check on V8323, which I have only sewn once, back in 2012. OMG, people, in case I wonder if I've learned anything over the years, let this be my example. I am seriously scared by what I found, alterations-wise. Let's just say that I have no idea why I cut all of the excess length of the bodice from the shoulder height?! Actually I suspect it's cuz the armscyes were insanely long (a Vogue trend) and I didn't know what else to do. My originally altered sleeve head looked like a skinny disk. It was insane. I don't know how any of this could have come together into a tolerably adequately-fitting garment. I now understand why it was always so weird feeling to wear.

Strangely, I didn't start from scratch. The Vogue pattern paper can't take it and, really, the original garment wasn't a disaster from a fit perspective. Instead, I went back to my knit sloper and copied the arm depth and armscye shape. I suppose the original had a really long waist and a low-set bust apex - which is the only way my haphazard alteration could have worked. Being self-taught is dangerous, people. We'll see if my latest alterations give me a good result.

Hudson Pants: I don't envision any serious alterations to the Hudson pants (except for shortening) because I only recently fitted them and my lower half is much less prone to changes these days than my midsection.

Self-Drafted Kimono Sleeve Dress: I did alter the self-drafted kimono sleeve dress by adding 1.5 inches at the waist tapering at the full hip. That was a hit to my ego. The bodice (from a vintage Simplicity pattern) is so whack, I daren't do too much to change it (other than making sure the waist works with the skirt). The top was a very good fit in ponte though I cannot figure out how it comes together correctly. I guess I'll relearn as I make it again.

I hope to get started on this next weekend and then complete it over the September long weekend.

Wednesday, August 21, 2013

Autumn Crafting: What's Next?

Remember sewing and knitting, those things I used to do? I don't want you to think I've forgotten them. As it happens, my machine has been in the shop since the beginning of last week. I ended up sending it far away (to the other end of the city) by special courier, to the place where I bought my cover stitch machine earlier this summer. The store has a good reputation and an on-site mechanic. FYI, I don't know what the final bill will be, but the shipping (all in), will have cost me 60 bucks. That's going to save me upwards of 3 hours in transport time (2 trips, and back, to the other end of the city). Money well-spent, I say. IMO, it shouldn't take a week and a half for a tune-up. Alas, a  once-yearly, travelling amusement park - the CNE - is in town for the last 2 weeks of August and the shop owner runs an exhibit booth at the craft show. Quite a going concern, apparently. My call coincided exactly with the annual occasion that the sewing shop runs on skeleton staff. Figures.

In truth, I've been happy enough to stay the hell away from the sewga room, though last night my thoughts did start to wonder about what to do next.

I've decided my next thing has to be a) fun b) not complicated and c) practical. It's probably best to follow some kind of capsule formula, like the Five in Five. Not that I really need five of anything for the autumn. Autumn's a time I've got SO covered.

Some ideas I briefly considered:
  • Jeans - either Jalie or Vogue ones, which I somehow bought the pattern for (and then I realized that I have so many pairs of RTW jeans that I enjoy so much. Why make them just to make them?... Oh, and you may remember this.)
  • An elegant work dress (V1252):

(and then I realized that this pattern has but 5 reviews - from only advanced sewists - and they all say variations on: This dress is really hard and you should stay the hell away from it. Advice taken.)
  • A pair of pants (and then I realized that I don't think I like pants right now, only jeans).
Then, in a (presumably) useful turn, while looking through my pattern archive binder, I found a tiny little bug larva stuck to one of the pages which FREAKED ME THE FUCK OUT whereupon I scoured my entire sewing stash (and yarn stash and book stash) to ensure there was nothing eating my textiles. That took an hour. Did I mention I had a vile headache throughout this process - which was not brought on by fear of moths. Amazingly, and to my huge gratitude, it appears to have been the only one of these evil things. Nonetheless, I shook out everything and sprayed it all down with cedar water. And my guard is highly elevated.

This did give me a very useful opportunity to review what things I've got at my disposal.

On top of the zillions of (stupid) lingerie supplies I've amassed, I've got a variety of shirt-weight, drapey wovens aka georgette and silk charmeuse. You'll be pleased to know I could make 20 t-shirts with all the knits I've got stashed. Not that it's in the cards. Furthermore, I've got enough heavy ponte to make at least 2 pairs of yoga pants (aka the things I wear the minute I get into my house and don't take off until I leave). I've been loath to buy more yoga pants because a) they cost a lot and b) the rise is always wrong and the length is ridiculous. Mind you, the idea of making black yoga pants seems so drab. I mean practical.

On more careful consideration I'm leaning towards the following capsule collection - though I don't know if I have it in me to give this a fancy name. Fancy names make things so serious:
  • Kwik Sew 3115 yoga pants x2 - yeah, in black (cuz that's what I've got).
  • My bespoke T shirt pattern using one of my numerous shirt-weight knits - like the end of that great Modal I used to make the Coppelia wrap. While I'm at it, I might as well make two of these... (Note: the tops and yoga pants are terrific opportunities to get to know my cover stitch machine better.)
  • Another go-round of culottes - made in denim, perhaps. I mean, it's the only bottom-weight fabric I have lying around at the moment, so it's that or go buy stuff:
  • And, finally, I'd like to revisit this terrific top, V8323, of which I've made the green style (and to which I've added 3/4 sleeves). I've worn my current version many times but it really doesn't fit me in the shoulders as well as I'd like (just a bit too wide):

It would be really nice to make this in a fabric having soft properties (the wool jersey I used to make the first one is a bit stiff).

So, you can see, with this capsule "collection" I'm not reinventing the wheel. I'm in a phase where comfort and mobility are rather important to me. Chic comfort, natch. I'd like a couple of slim t shirts (in slightly dressy weight), some yoga pants (because truly my other pairs are dead), some culottes - cuz I didn't really nail those last time but I think I might do better on a second try - and a dress-up/dress-down princess-seamed top.

And lest you think I've forgotten about the triangle shawl or the knit jacket, they're on the agenda too. The triangle's almost done and I need a good weekend with the jacket, to sort out some fit issues in the shoulders and to seam/insert buttonholes/attach petersham binding.

Each of these projects will happen as it happens. I can't give time frames cuz my head-happiness must dictate the schedule. 

Today's questions: So what do you think of all of this? Do you have any of these garments on your sewing agenda for the fall? Any advice? Thoughts or feelings? Let's talk!

PS: Just realized that this may well be the second round of garments I'll make (not including the latest lingerie attempt) using stash fabric. That means I'll have made 12 garments out of stash fabric (and still have a reasonable amount left to spare). And my stash fits into one cupboard. Amazing how these yards add up.

Sunday, January 1, 2012

In the Navy

Meet my New Year's eve outfit:

Oooh, navy on navy. How do they look so different? These are the Clover pants and V8323.

This completely poseur-y shot was actually taken while I was adjusting my hair (all 1 inch of it). But it shows the lines of the outfit well, I think.


This equally poseur-y shot is for y'all cuz I think you all deserve a kiss!


This nice-girl photo is for my mother, cuz she loves shots like this...

I can't tell you how it thrills me to wear an outfit entirely of my own construction!

Now, you may know that I was taking some big time chances on the centre back (my alteration) invisible zipper holding up. I figured, in a worst case scenario it could be a fun "OMG, 2011 totally sucked" story: There I was, raising a glass of bubbly and my freakin' pants fell apart. At a party?!? I am SO ready for 2012...

I definitely need to slender out a smidge before wearing them again. But I do think they're going to be go-to pants when I lose a bit of volume in my derriere, post-Xmas.

The Good:
  • I'm super pleased by the pants crotch length and depth, which I altered to suit my shape.
  • I did really nice work on the facing at the back zip by morphing up the instructions for the Clovers and the Ginger skirt (which has a back zipper). I'm starting to get with that insertion technique Sarai espouses, which I didn't like at first. It really is freakin' clean, if you can get it to work.
  • I finally realized that, when you alter the waistline of your pants, you will absolutely need to alter the waistband and facing: where they sit, where they seam, maybe even how they're curved (slightly). It's not rocket science but it is finicky and time-consuming.
  • And let's give me a pat on the back for moving the zipper in the first place. Of course, it was probably harder than just figuring out how to get the zipper to insert nicely at the curved side seam, but you live, you learn.
  • I think that the adjustments I made on the second version of V8323 really do improve the proportions on me. The neck is notably less chokey.
  • I also like the peplum bestowed on the design by virtue of the drape of the fabric. It's nice and flowy.
  • I LOVE both fabrics - colour (obvs, if I had to choose 1 colour to wear for the rest of my life it would easily be navy) and hand/drape of each. Both sewed very evenly.
The Less Good:
  • I really don't love invisible zippers on stress points. I can see how they're a smarter zip for a side opening, than a centre-back opening.
  • The pants are too tight right now, but it's not a critical issue. I can tell that they're tight where I've gained a bit of mass over the hols.
What I have observed about my wardrobe is that I wear my own handiwork most days - sometimes one piece, sometimes an entire outfit including scarf and coat?! Also, can we chat about the hand-made coat for a second? I cannot believe I made it. I must have been high on drugs to undertake hand tailoring when sewing for less than a year. And, sadly, I can't wrap my brain around ever wanting to do something so complex again. But look, it's NAVY!

What's your default sewing colour?

Monday, December 19, 2011

Wherein I Brag and Why FBA Measurements Are Dubious Things

The Brag Part of the Post:

You know, when the inside of my garments look as if gerbils have assembled them, I confess. (No, I don't actually show you the evidence, cuz I do have a modicum of pride...) But when I make something and it's fantastically constructed, I'm not going to be all modest and coy. I mean, freakin' hell, that's the reason I spend half of my waking hours learning the craft.

To wit, meet Vogue 8323 the second:

I know it seems as if the arms don't fit, but I swear, on me they do.


Alas, whether it was the fabric or the lighting, this garment just would not take a good photo. There's no justice.

I would happily show you the inside seams, if I could bring myself to undertake the irritation that is undressing the dress form.

In this iteration, I did figure out some things:
  • Though I removed 2 inches of funnel neck, it wasn't enough. I'm starting to wonder if it's got something to do with the way the neck meets the front. Maybe this pattern is designed for a gazelle.
  • There's no option to roll down the neck and flip back the front v-pieces. The front does this very nicely but the seam going up the centre back piece prevents it from working at the back. I spent a couple of hours trying to figure out how to remediate this but, if it's doable, my brain couldn't crack the code. I even used some seam binding to try to pretty things up (you can see that in the photo with my rather unkempt thumb) but it was a no go.
  • The great thing about making half my wardrobe in navy is that I always have all manner of notions hanging around in the right colour!
  • In addition to altering the neck, this time I removed width from the arm by slimming the pattern piece at the centre. Unfortunately this made the shoulder totally pointy and I didn't think to smooth it on paper (really, I didn't know if that would wreck things). Now I know that shortening the shoulder by rounding the top of the piece is the right move. I was able to adjust this in the sewing, but it was a pain in the ass.
  • I shortened the sleeves.
  • I re-lengthened the waist (last time I made the "petite" modification) and I'm glad I did. After shortening the neck, I needed the extra in the waist. Does that even make sense?
  • This fabric likes my serger, and vice versa, much better than the coffee-coloured fancy fleece.
  • The fabric is beautiful - very slim. Totally elegant. I think it's a wool jersey.
  • Though I like this version, I think I'm done with the pattern. The neck thing bothers me. The whole shirt would look much better on me if I could roll open the v (and roll down the funnel).
The FBA Part of the Post:

At any rate, this is the other thing I did on the weekend: I rotated the dart on the FBAed bust piece of the Ruby Slip and I'm pretty sure I've got the same dimensions that I would have got if I'd simply followed Sherry's tutorial. Of course, I'm going to try her version to compare before cutting my fabric, but I find it endlessly fascinating that I might come up wit the same end result by using a completely different method.)

And apropos of the additional inches you'll need to add when doing your own FBA: The general rule is to add an inch for each cup size that your bust size deviates from the bust size that the pattern was designed for. Sherry designed for a B cup (as do many, if not most, commercial pattern companies). By this logic, if you have a D cup, you'll need to add 2 inches. This may work well for women who are not narrow in the back. But I can tell you from personal experience that the narrower your back, the less of an FBA you'll need to do, relatively speaking.

Think about it: The size 12 (which I'm making) has a full bust dimension of 36.5 inches. My full bust measurement is 37 - 37.5. My chest is, as we know, quite a bit larger than the B cup Sherry designed for. And still I only need to add 1.5 inches onto the pattern piece. My own version of the FBA (pinned to my dress form) bears this out. (Note - I've further adjusted the length since the version I posted photos of. Wait till my next post on this to see the side by side views.)

The point is that bust size in clothing is as much about the relationship between underbust and full bust as it is about actual dimensions. My underbust is 33 inches. My chest gets to pick up the fabric slack, as it were, that my back doesn't need.

I've spent a lot of time thinking about this - basically all the time I spend making clothing - and I'd love to know if any of you have discovered this principle works for you too.

Let's chat about any of the 8000 things I seem to have written about in this post. Please!