Thursday, December 29, 2011

Holiday Sewing: Ginger Skirt

Off to start another day of crafting soon (c'mon it's practically half over already), but I'll share with you a delightful finished project, the Ginger skirt, made yesterday:

Winter lighting and dark denim just don't mix... You have to trust me, it's adorable.

The inside is as lovely as the outside! I used mock flat-felled seams and they worked really well. Got to use my serger, to which I am very attached, but with a different finished effect. Isn't the contrast facing at the inner waistband lovely. It also helps to diminish bulk, which is an issue when sewing with denim.

I used some seam binding on top of the serged hem, just cuz. I wanted to do pretty-sewing techniques in support of the prettiest skirt in the land.

This is the most unapologetically, almost-teeth-hurtingly, pretty thing I have ever made. Hell, it's practically the prettiest design I've ever seen.

A few thoughts:
  • I love this skirt. I will, no doubt make all 3 versions. The drape of the A-line is lovely.
  • As always, Colette patterns are a joy to sew. Even if I hated the finished outcome, I would have enjoyed the process.
  • While a boob-reminiscent filigree waistband is probably not the best thing to put adjacent to my not-insubstantial chest, whatevs. I'll wear a slim top, tucked in. You can't go with boring-old "suits your figure" all the time.
  • The seam binding at the hem gives a bit of body to complement that of the denim's drape. Really like the heightened A-line effect.
  • This denim is not particularly soft. It's got a lot of innate structure.
  • The great thing about making a simple pattern is that it gives you mental space to do pretty finishing. I don't consider this often enough.
  • I made the size 8 with 1/2 inch seam allowances on side seams. It's not an overly long skirt. I wanted mine to be approx. knee-length and I didn't have to shorten it at all. Also, only turned up the hem by 1/2 inch. If you're tall, you'll want to add length.
  • The only bad thing I can say about this - and take note here! - is that one should NOT use invisible zips with denim. How many times do I have to do this before I finally learn?? I have concerns about the longevity of the zipper given the bulk of the fabric. Shhhh. Let's be really careful with it and hope for the best.
  • I must be a slow-sewist because it took me a good 5 hours to put this together - probably more. Who are all of these ladies who manage to make gorgeous "simple skirts" in 2 hours??
  • I stitched in the ditch around the waistband. Don't know why I haven't done that before. It gets rid of the riding up facing issue beautifully. Just make sure your facing is a smidge longer than the waistband itself.
What do you think?? If you've made this skirt, share your experience. If you haven't, is it in your pattern stash?

PS: The never-ending computer-generated croquis project continues apace. I'm making headway but, egad, what a labour-intensive activity. I've probably put 10 hrs into it so far... Stay tuned for more on this as I have more to say.

Tuesday, December 27, 2011

FBA Continued...

Today has been an interesting day. I was derailed by all the things I meant to do by lots of things I imagined I might do someday - namely the construction of a croquis.

This sketch of oneself is becoming quite popular, all of a sudden, it would seem. In the last couple of weeks I've read no fewer than 5 accounts of how to, and why and what. In truth, my husband has been doing the heavy lifting on the project. He's already spent a few hours trying to create a vector diagram from a photo of me, using Inkscape. The reason our aim is to do this, rather than hand sketching a close-cropped picture, is that the end result will be scalable. (Also, it's kind of cool to create an image the likes of which one sees assembled on high-tech computers in action films; you know, like when they're trying to create a composite of the bad guy.)

Why spend the time and effort? Really, why not? At the end, I'll have a customized me-shaped sketch onto which I can draw fun designs that will suit my particular shape. Why should I consider my next outfit in relation to a figure that's 5'8", long-waisted and boob-free? I hope that this will be the next step on my journey of self-taught fashion design.

If the dress form fiasco hadn't already cured me of vanity, lord knows, this little project would achieve that objective in a flash. I have become so comfortable with body as an object, it's bizarre. More and more, I am pointedly aware of my every asymmetry, of convexity and concavity as it applies to me. Now I just find it all technically interesting. Sort of like doing an FBA...

Apropos of that, I've completed the Sherry-prescribed version of the Ruby Slip FBA and compared it to the one I attempted last week. Both versions add 1.5 inches to the original pattern bust dimensions. The one I "developed", for whatever reason, feels like the right one to cut first. (Fortunately I have enough fabric to try both versions, if required.)

Both FBA-altered paper pattern pieces are very similar in the side back piece. However, my version of the front piece is, intriguingly, wider all over, and specifically by 1 inch at the under bust vs. Sherry's. I didn't realize that till I compared the two of them today. So glad that Sherry reminds sew-alongers to increase the under bust dimensions an equivalent amount to any increase in bust width.

As such, I added 1 inch to either side of the front skirt and tapered to the waist notches. (I didn't defray the total 2-inch amount over the entire size of the skirt i.e. front and back, because I really do want the increase at the front.) The front bust piece is longer in Sherry's FBA version, and overall it is quite a bit slimmer. I have a full upper bust so I sense I need more width at the top of the piece. It just doesn't look like the Sherry-version, as it stands currently, is going to provide the volume I need, despite the addition of width at the side of the front piece where it meets the side back piece.

Man, if you don't sew - hell, if you don't adjust for a full bust - that paragraph must have been totally painful.

I really have no idea of how this is all going to play out. That's the fun and anxiety of sewing. This may be the best thing I've ever figured out on my own, or it might be a mere stepping stone to the next version. Potentially a frustrating one.

Nonetheless, I will keep on.

Today I've also cut the Ginger skirt, version 2 and pulled out the pattern and fabric to make another pair of Clovers. I'm so tempted to alter them into culottes, I just don't know if I'll be able to stop myself.

Any thoughts on croquis? Have you done one? Has anyone done an FBA on the Ruby Slip yet? Thoughts about Clovers or Gingers you haven't had a chance to chat about yet? Please let's talk!

Friday, December 23, 2011

Winter Haven

Hello Friends: Things are about to go all Xmas supernova here, so I should take this moment to remind you us that it doesn't matter if your quiche is too cooked in the crust and somewhat raw in the centre. Or if your parents are about to arrive in the midst of their (rather ill-timed, let's face it) mid-winter spiritual cleanse. No mind if you have 12 (or 50) unwrapped gifts. Don't even fuss if you need 12 gifts and you haven't a one.

I encourage a fire in the fireplace if possible. And some hot chocolate or egg nog (but homemade pls - that stuff from the grocery store is diabetes in carton!). You could always skip the nog in favour of the rum. How about some Xmas jazz on internet radio? Got dinner cooking? No? Then step out to your neighbourhood spot and let someone else do the cleaning up. Be sure to tip well!

Let's say you feel you've dropped the ball on home decorating. I bet you've got a local place that sells boughs and wreaths and greenery you can vase-up Noel-style in a jiffy.

No need to feel Xmas angst. Don't go all mid-winter miserable. Worst case scenario: all this insanity will be over in 3 days. And even if it's not your scene, don't they say a change is better than a rest?

I'll leave you with my final knitting project of 2011, a fantastic shawl, the Glen Haven (see Ravelry for more deets):


Have a wonderful next few days. I hope you have a chance to enjoy or reflect - or both! Here's to the days getting lighter. xoxo

Monday, December 19, 2011

Wherein I Brag and Why FBA Measurements Are Dubious Things

The Brag Part of the Post:

You know, when the inside of my garments look as if gerbils have assembled them, I confess. (No, I don't actually show you the evidence, cuz I do have a modicum of pride...) But when I make something and it's fantastically constructed, I'm not going to be all modest and coy. I mean, freakin' hell, that's the reason I spend half of my waking hours learning the craft.

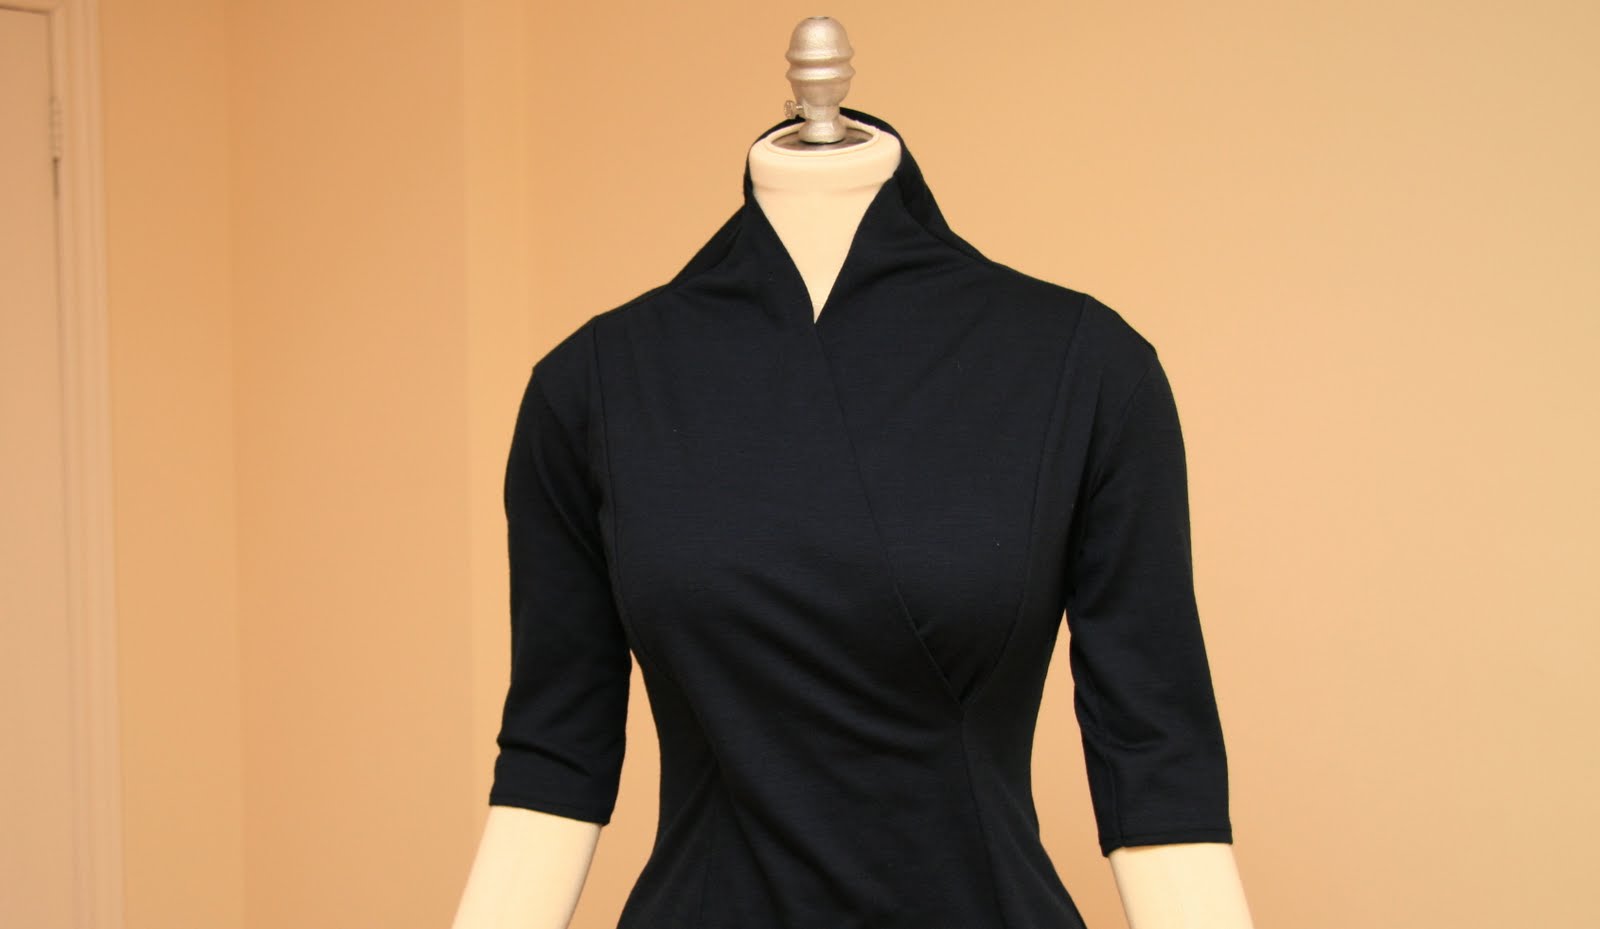
To wit, meet Vogue 8323 the second:

I know it seems as if the arms don't fit, but I swear, on me they do.


Alas, whether it was the fabric or the lighting, this garment just would not take a good photo. There's no justice.

I would happily show you the inside seams, if I could bring myself to undertake the irritation that is undressing the dress form.

In this iteration, I did figure out some things:
  • Though I removed 2 inches of funnel neck, it wasn't enough. I'm starting to wonder if it's got something to do with the way the neck meets the front. Maybe this pattern is designed for a gazelle.
  • There's no option to roll down the neck and flip back the front v-pieces. The front does this very nicely but the seam going up the centre back piece prevents it from working at the back. I spent a couple of hours trying to figure out how to remediate this but, if it's doable, my brain couldn't crack the code. I even used some seam binding to try to pretty things up (you can see that in the photo with my rather unkempt thumb) but it was a no go.
  • The great thing about making half my wardrobe in navy is that I always have all manner of notions hanging around in the right colour!
  • In addition to altering the neck, this time I removed width from the arm by slimming the pattern piece at the centre. Unfortunately this made the shoulder totally pointy and I didn't think to smooth it on paper (really, I didn't know if that would wreck things). Now I know that shortening the shoulder by rounding the top of the piece is the right move. I was able to adjust this in the sewing, but it was a pain in the ass.
  • I shortened the sleeves.
  • I re-lengthened the waist (last time I made the "petite" modification) and I'm glad I did. After shortening the neck, I needed the extra in the waist. Does that even make sense?
  • This fabric likes my serger, and vice versa, much better than the coffee-coloured fancy fleece.
  • The fabric is beautiful - very slim. Totally elegant. I think it's a wool jersey.
  • Though I like this version, I think I'm done with the pattern. The neck thing bothers me. The whole shirt would look much better on me if I could roll open the v (and roll down the funnel).
The FBA Part of the Post:

At any rate, this is the other thing I did on the weekend: I rotated the dart on the FBAed bust piece of the Ruby Slip and I'm pretty sure I've got the same dimensions that I would have got if I'd simply followed Sherry's tutorial. Of course, I'm going to try her version to compare before cutting my fabric, but I find it endlessly fascinating that I might come up wit the same end result by using a completely different method.)

And apropos of the additional inches you'll need to add when doing your own FBA: The general rule is to add an inch for each cup size that your bust size deviates from the bust size that the pattern was designed for. Sherry designed for a B cup (as do many, if not most, commercial pattern companies). By this logic, if you have a D cup, you'll need to add 2 inches. This may work well for women who are not narrow in the back. But I can tell you from personal experience that the narrower your back, the less of an FBA you'll need to do, relatively speaking.

Think about it: The size 12 (which I'm making) has a full bust dimension of 36.5 inches. My full bust measurement is 37 - 37.5. My chest is, as we know, quite a bit larger than the B cup Sherry designed for. And still I only need to add 1.5 inches onto the pattern piece. My own version of the FBA (pinned to my dress form) bears this out. (Note - I've further adjusted the length since the version I posted photos of. Wait till my next post on this to see the side by side views.)

The point is that bust size in clothing is as much about the relationship between underbust and full bust as it is about actual dimensions. My underbust is 33 inches. My chest gets to pick up the fabric slack, as it were, that my back doesn't need.

I've spent a lot of time thinking about this - basically all the time I spend making clothing - and I'd love to know if any of you have discovered this principle works for you too.

Let's chat about any of the 8000 things I seem to have written about in this post. Please!

Saturday, December 17, 2011

Saturday Morning Experiment

Oh, Friends, where are those Cinderella mice when you need them?

As I can't wait to read the upcoming tutorial on how to FBA the Ruby Slip - I've given it a few hours of, um, mega pattern alteration brain cells. In a strange twist, I've actually managed to use my dress form for its intended purpose, as opposed to its general function as "nice clothes hanger for photos". Disclaimer: I have no actual training, so today's hard-thinking might all be an interesting experiment.

Here's what you need to know. I'm not cutting anything until I see Sherry's methodology. My version retains a) the original size 12 pattern under bust circumference (though the side back and back pieces are now 1/2 an inch higher i.e. vertically longer) and b) v neck shape - but it does introduce a dart I cannot seem to get rid of by moving it out to the side. Maybe my imagination is simply failing me after hours of work. I suppose having attended fashion school has its benefits. :-)

At this moment, I am actually unable to articulate the scope of what I'm thinking and what I want to do. I wish I could plug you all into my brain for a few seconds like they do in scary scifi movies. It stresses me out, sometimes, to have so many things to say and do and to be incapable of making it all happen instantaneously.

But enough of my intriguing neuro-chemical landscape...

My sewing room is such a tip after 3 hours of doing practically nothing tangible that I find it hard to believe:


My altered pieces look rather different, and considerably larger, than the original size 12 pieces that I cut:

This is the side back. The one on the left is the altered version...

And here's the front piece, larger, altered version on the bottom. See how much smaller the unaltered piece is - admittedly, it doesn't have a dart, but still!


Side by side shot of the pieces..

Finally, here are a couple of shots of the fabric combos I intend to use to make 2 slips. I'm seriously counting on it that the FBA thing will work - mine or Sherry's! - or I'm sitting on some pretty expensive lace. That blue stuff cost 30 bucks a yard on sale. It's also quite heavy. I have no idea how I will dart or gather it. I intend to use lingerie straps with slides because I happen to have them and I like the look.

Note: I have underlining options for both the pink and blue lace, if extra structure is required.


Whatcha think?

Wednesday, December 14, 2011

Ms. Mojo Risin'

Quick post to tell you: I know what I'm sewing next. And next. And then after that.

My imagination, which seemed to vacate the sewing premises for a while, has returned in force.

If only I had time to indulge the impulse.

Will show fabrics anon but - with scarcely any time to blog, much less photo (I've been to 6 holiday gatherings since last Friday night), let me say that I had an hour on my hands in the garment district yesterday eve and I did some damage: silk charmeuse (navy), the most gorgeous square-patterned, modern-seeming lace (navy), some denim (navy), a very thin sweater knit with good drape (navy) (yes, I do see the theme)... Then I got some pink lace (not as special as the blue but well matched to the poly crepe I also purchased). I got some pink petersham at Mokuba - talk about selling the farm for dainties. Note: Mokuba has some stretch and woven faux fur in a number of great colours/widths/styles that are so lovely they're almost turning me to the fake side. But not quite. For 105.00 a metre, you too can own some of the wider stuff - and by wider I mean 12 inches (maybe). Finally, I bought a yard of really nice t shirt material in grey. Oh, and zippers and thread.

In brief:
  • Gonna use the lace / silky combos to make a pink and then navy slip with Sherry's great pattern. Good news, Ladies, she's going to do an FBA tutorial!
  • Gonna use the navy thin knit to make another version of this that drapes better and actually fits in the neck. It's a precursor to using Mardel's cashmere. I need to perfect things first.
  • Gonna use the denim to make another pair of Clovers that, hopefully, fit a bit snugger. I might even try to use the pink petersham to make the waist facing, if I can figure it out.
  • The grey will be for a T shirt for Scott, using the bespoke pattern I made him for his birthday.
I'm not in a rush. I have the whole holiday season to work on these. And to tell you / show you more about them. Please stay tuned.

Monday, December 12, 2011

Variations on a Theme


This is my third version of Stefanie Japel's One-Skein Shrug. Remember: You can actually participate in an awesome workshop (like a knit along) for FREE at Craftsy.com... (Note that the second version isn't up for viewing yet cuz it's a present for M. Alas, I think, by the time she opens it at Xmas, it will be on the outer edge of fitting. The child is practically my height now.)

I modified the pattern in one way - I made the sleeves longer. But, I learned something in the process which I will now share with you: The original cap sleeve (one which goes straight to ribbing for 8 rows) has a lovely proportion. However... if you add length without shaping the sleeves from the get-go, they are not snug. This would be fine if my upper arms were in need of some extra fabric but, as they are not, I feel the knit could be more fitted. I realized this 9 sleeve-lengthening rows into the process and, to ameliorate it, I started ribbing stat (and continued to do so for about 20 rows). Ribbing, people, it's not fun - esp. if you're a thrower...

Don't get me wrong - it's still a really nice shrug and I totally appreciate the cashmere content, not to mention the very practical black colour. See my Ravelry post on this for more deets...

The way it's constructed (all in one piece, top down, raglan-sleeved) means the alteration of the sleeve would be a bit challenging - not impossible, but might look odd if one were not careful. Mind you, I'm up to that challenge next time...