Showing posts with label Summer Series. Show all posts

Monday, August 5, 2013

My Brain Is Overrun with Ideas

Oh Lord. I cannot talk right now. Just finished 8 hrs of sewing (good news is I finished a whole bra in that time and it was FAR better constructed than the last one). It's so freakin' pretty/sexy. (Took pics but the camera died mid-way. Hope I can salvage the pics when the battery recharges.)

Bad news - it doesn't fit. In fact, the fit of the uppercups is actually bigger and worse than ever - despite my continued efforts (4 versions-worth) to take volume out of it with darts.

The point is - what I'm doing is somehow making the top cup bigger (don't ask me how - I've only the dimmest sense of it at the moment). This means, chances are if I do the opposite all will aright in the world :-) (OK, I am applying more analysis to it than this...)

I have so much to tell you. So many ideas about how to fix this issue. BTW, I'm totally making them up. I mean, I'm not following Sarah Veblen's book on lingerie cup fitting and alterations. (Don't you wish that woman would write a book on this?!)

In extreme briefness - to be revisited in the next post:
  • I nailed the band. It is the understatement of the century to tell you that this is a joy. Honestly, I want to cry from joy.
  • The lower cups fit my larger breast perfectly. Once I sort this out, I'm going to have to draft a right cup that's about 1/4-1/2 size smaller than the left.
  • I really improved with the straps this time. I mean, it was still a misery but it wasn't a nightmare. I did bang the shit out of the seams before stitching (btw, I did that on the last version too but it didn't work; this time it seems to have) and I made the part of the cup which attaches to the straps slightly less wide.
It's regrettable that one must make an entire freakin' bra before one knows if it really fits. (Yeah, I know I can make a muslin, but they just don't fit properly until all of the bits and pieces are attached to turn them into feats of engineering.)

I guess I only have opportunities to improve my form.

Let me leave you with this: I have not been successful but I finally reached a point of grudging optimism. This is a great mystery to be solved. I think I've got a couple more muslins in me before I burn out with this phase of bra sewing. And if I crack the code, just imagine...

Sunday, August 4, 2013

Not There Yet

Let's not bury the lead.

I made a bra:


It's really pretty (if shoddily constructed):


It does not fit.

You don't have to call the suicide hotline on my behalf. I'm over it. I was over it at noon, when the fucking straps almost did me in.

The part of me that's optimistic about the next version fitting better is well aware that the crapness of my strap application is almost a deal breaker to the success of any bra. Too many layers. I need to have my machine tuned up. I need to get one of those gizmos that you stick under the presser foot to keep it level. (Where do you get those things and are they machine specific?)

Part of the reason I've decided to live (:-)) is that I am really, really close. It's just the upper cup that's giving me trouble - so now I've taken another 1/2 inch dart out of the top (this one angled differently). I mean, my adjustment in the last version did improve the fit. But it wasn't enough, apparently.

I made a few more, rather small adjustments to the pattern based on this version:
  • The aforementioned new dart in the upper cup (close to the gore and angled)
  • Recurving the parts that the straps attach to (to make those areas narrower)
  • Recurving the upper back band slightly
  • Removing the 2 inches I added to the band last go round. That was unnecessary...
In the last version, I figured out how to put picot under the lower inner cup (to carry that line through the entire base of the cup. I'm pleased about that.

I've cut out the new (version 4) bra pieces and I will assemble them tomorrow (stat holiday). Gotta say, if the next one doesn't work, I may well loose my urge to continue.

The next one will be black and blue; go ahead and read any symbolism into that you'd like. Alas, I'll have to use 1/2 inch strapping on - not 5/8" which I've discovered is far preferable to me - because that's what I've got. I don't know if it will inhibit the support overly. The one I just finished is not excellently supportive but it's not horrible by any stretch (ha). Remember, the band is really too big.

It's amazing that I have hundreds of dollars of lingerie supplies hanging around and no black strapping in 5/8 inch... Hmmm...

Do say something encouraging please. xo

Saturday, July 27, 2013

The Summer Series: Perfecting the Clone Pattern (Prototype A)

So this is the weekend I'm holing up in the sewga room to finish prototype A of the Lola bra clone. The theory is that this will become the pattern I'll use to make the Cherry Bomb bra.

Wow, this has taken a long time. A little bit of work followed by a lot of thinking to lead me through the most truncated of processes.

At this point, prototype A should be done in a short time. I've got to add the upper elastic, straps and closures. In the process of making it, I've revised the pattern (one paper shaving at a time) to the extent that I have amassed a pretty collage which now sits on my cutting mat.

With all the emphasis on the technicalities of perfecting fit and the technique of merging all the pieces so that they sew up neatly, I forgot how intuitive the actual bra-sewing process is. You have to do it to know how to do it. It's all about cutting bits of elastic and managing negative ease. Mind you, that's the part I like (though not as I'm re-establishing a rhythm, natch!).

Here's what I want to say now, before the next round of chips fall:

I refuse to be optimistic about this. Optimism has got me nowhere in the past. Having said this, knowledge is most definitely power, my friends. With knowledge, I am 1000 times closer to creating a bra that fits. I can feel it and see it.

Because of what I know now about a) fitting and pattern alteration b) specifically bras and fit and c) sewing technique - not to mention confidence - these are some highlights of applied learning while making this prototype:
  • I've used fabric adhesive to attach layers of stabilizing mesh to the upper cup and to affix 2 layers of powernet together (for a stronger band)
  • I've been able to figure out exactly how and why seam allowances on partial band bras are very fluid (and depend entirely on the width of picot elastic being used).
  • I've determined how I'll insert boning into the bra (though that's something I'll tackle in the next prototype.
  • I've adjusted the flat pattern pieces in accordance with what I've learned while sewing up the bra.
I now know that there is NO way any commercial pattern I've ever come across would ever work for me because those bras are cut for breasts with a wide root. It appears that independent pattern designers are playing the odds just like everyone else and they assume that a woman who wears a large cup wears a wide cup.

I urge you, if you fall into the large cup / small band / narrow frame category - aka if you wear between a 28-32 F-H (just an approximation) - that you must clone a bra that you own - that you know actually fits. Otherwise, you're probably wasting your time. I would not have been able to alter any commercial pattern, by sight and with my current knowledge of fit and bras (which isn't negligible), to turn the pieces into the shape I require. They are in NO way the same size, shape or in the same proportion to one another as the pieces that comprise the bras I wear.

So that's today's bit of info. I do intend to show the next prototype and photos of the flat bra pieces - I'm not quite finished making changes and I don't want to be confusing by showing things at a zillion different stages.

Today's question (for the bra makers): Do you fall into the small back/large cup range and have you discovered the same challenge I've documented above? Or have the commercial patterns worked well for you? Please, let's talk shop!

Tuesday, July 23, 2013

Playing the Numbers

Though I'm not one for dwelling on the finished product (not that I don't enjoy it), I feel an urge to return, briefly, to this Summer Series' Five in Five.

Why?

Well, that capsule wardrobe is the best fucking thing I've ever put together - as a fulsome fashion endeavor, I mean.

You'll recall I searched my stash and made:
  • A denim skirt (New Look 6843) - very easy and so useful "basic", you should have one in every colour
  • A slate blue, ruched, sleeveless top (Vogue 8790) - so not easy, but still very wearable, it's a fancy, cool summer shirt
  • A slate grey, tailored, knit dress (Vogue 1287) - insanely tricky, but man, it's fine...
  • A floral sack dress (Vogue 1179), which still manages to be insanely chic for all of its sack-ness
  • A faux wrap dress (Vogue 1027) in peacock blue, with pockets!
At first I was quite dismayed because a) it was a fairly un-fun process making these garments and b) much of my stitching looked like the work of a person who's never sewn before.

However, as time has passed - and as experience has taught me - the stitching is almost irrelevant. The good drape and fit, I'm happy to say, are what has endured.

The Toronto summer began a mere month ago, and in that time I have worn every garment each week. Every time I wear one of these pieces, at least one person asks me about it complimentarily, in such a way that I know it's a solid hit.

Every time I put on one of these garments I feel terrific. Stitching notwithstanding, I would have been thrilled to buy any of them at the shops.

And what makes it utterly fabulous is that I spent less on the whole lot than I might have on a skirt or top. Including tax, shipping and notions/extra materials.
  • The denim was 10.00 a yard and I used a remnant of about .75 yards
  • The Tencel I used on the top and the sexy, tailored knit dress was 10.00 a yard and I used 3.5 yards over both garments
  • The floral, cotton jersey was 5.00 a yard and I used 1.5 yards
  • The blue Modal was 10.00 a yard and I used 2.25 yards
(I seem to be very comfortable spending 10.00 a yard...)

Even including the notions I spent only 80.00 for what I consider to be 7 garments - because the skirt and top are perfect worn together but they can also be worn with many other things. These are garments that fit my body in a made-to-measure sense.

Oh, don't get me wrong. I know that for every Five in Five there are 9 bras that don't fit. Hell, I'm the first to say I hated much of the process and the workmanship is crap.

But seriously, it doesn't matter. I wear it. I love it. It fits me. It suits me. I made it. Lord, I love this constellation of events.

What's the best (from the perspective of overall wearability) garment or capsule collection that you've ever made?

Friday, July 19, 2013

The Summer Series: The Cherry Bomb (More Precursor)

Ah, I've been managing a special kind of apres-vacation ennui this week, made somewhat more complex by new things afoot at work (namely an exciting, upcoming transfer to a new branch) and a freakin' heat wave. You are correct in your assumption that I will complain about the weather, whatever it is. It's a thing we Canadians do. But honestly, I feel like I'm living in the rain forest.

At any rate, things have been busy and sweaty. The weekend will be full with socializing and reclaiming the child, but I've been working apace at my Empreinte rub-off (clone) and here are a few new things I can share:
  • I don't know how it is that I have an entire shelf of bra-making supplies and fabrics, and somehow I still had to spend 100 bucks on new lingerie supplies. Partly it's that I've made 9 bras and numerous prototypes and those things eat through bits and pieces (which one doesn't buy overly much of in any given colour). Sure, I have zillions of straps and lots of picot. I just don't have enough of one thing to match with another. Y'all know I've got a kit for the final version of this new bra, but I'm going to have to make a couple of muslins first - which I cannot stop myself from believing might be wearable - though not if I make the 3 cups in different fabrics with elastics that don't match. So yeah, I bought new stuff for that purpose. (Feel free to roll your eyes - I can't see you.) Moreover, I am SO desperate for a new beige bra (I have a whole story about how I found 2 options and they've both got lost in the mail) that I'm buying the materials to make one "once I perfect this pattern". We really better hope this works or I'm going to have to bonfire the lot.
  • A propos of this, don't buy more than 1/4 yard of any given fabric unless you really know that the bra you're going to make a) fits perfectly and b) will be made identically more than once. I wish I didn't have so many fabric ends. Mind you, if I had a pattern that worked, I could probably find a way to repurpose many of these bits. Another challenge is, alas, that many of the supplies I've bought (aka 8000 pairs of wires) have turned out to be flimsy and just don't work. I've tried 3 types of (inadquate) power net and so much useless lace. Sure, you may be able to make your own bras for 15 bucks each. It'll just cost you $1000 to get there.

  • As always, and for this I am SO grateful - when I move into the bra muslin phase, a community of wonderful sewists comes out of the woodwork to assist me. So far, this time, Amy (she of the recent, fab blog bra-sew along) and Norma (she of the recent, fab bra-making book) have been invaluable supports. Y'all know how I spoke (last post) about the potential requirement to stabilize the cup seams with some kind of channeling? Well, they've both advised me on a couple of different ways to go about this. Once choice is to get 15 or 40 denier tricot and cut it in bias strips (the method of attachment is currently open to discussion and, as I have a few ideas, I'm going to wait to tell you which one I think is best). Another option is to use flat wire channeling, but it might not be discreet enough. Again, so much depends on available supply.
  • It's finally occurred to me that, among other things, a reason I haven't ever been able to make a bra that fits is because (bra pattern instructions being mediocre as they often are and given that I've often modified patterns without a depth of experience) I've been using the instructions for full band bras while I've actually been trying to make partial band bras. That means I've been ignoring the extra width of seam allowance required to enclose the channeling into the cup. In a full band bra, you attach the channeling to the band frame. In a partial band bra, you attach the channeling to the interior cups. 
  • Finally, I should advise that - to make a rub off (aka clone of an pre-existing bra that you do not take apart first) of a bra that is in a larger cup volume - it's tough (understatement x10) to pin the original bra in such a way that you can a) maintain an understanding of grain line and b) so that you can pin incredibly curved, sewn seams in the flat plane. Grain line establishment - when cloning a working bra - is still a mystery to me. I know that pinning the full bra to a board with grid lines should help but, trust me - I did that and the shape of these pieces has required much reworking. Like a week's worth. This time, though, I'm not fucking around. I have walked every freakin seam line (not cut line, peeps, seam line) and I will not cut fabric until every paper line matches and the shape of the pieces yields the shape of the finished bra. Furthermore, you can decide whether you think I'm an idiot or a genius, but - having bent numerous pins beyond recognition - it occurred to me that I could put on the freakin' bra and hold the partially traced pieces (on a larger piece of tracing paper) up against my actual body in order to ensure I was getting an accurate measure. Sure, you can't pin this way, but with a helper you can easily find the seam lines of any given piece and trace them adequately. I didn't even have a helper and I managed it with a mirror and a lot of trial and error.
So, that's where we're at now. I can't say I expect to complete a bra this weekend. I don't think the time will present itself. But I do hope to make some headway with a toile, if possible. Please stay tuned.

Today's questions: Have you had challenges dealing with the curved seams when trying to clone a working bra into flat pattern pieces? How have you managed?

Sunday, June 16, 2013

The Summer Series: Reflection

You know that I'm not the most patient person. I come up with an idea and then my entire being is propelled in the direction of its completion. Sure, I think a lot about it. I try to resolve issues. I read and ask questions. But in my house we have a saying (as we wake in the mornings): What are you still doing in bed?? That crafting isn't going to do itself.

Whenever I'm forced by circumstances to wait, I'm ALWAYS amazed by how useful it is. Had I cut my bra fabric yesterday, when first I wrote my post, I would have missed out on two additional paper alterations that may really improve the fit, the absence of which might have had negative fit repercussions. (See yesterday's post for the updates - they're marked as such.)

This doesn't mean I'm likely to change my ways. I'm bullish by nature, when you get right down to it. Though I do like to flirt with consideration on occasion.

The truth is that I've been working for the last couple of weeks in a very focused fashion on the Fitted Boucle Jacket (remember this?). Clarification: When my head has allowed for it, I've worked on this. There was a period of a few days where it wasn't possible to do much more than get myself from A to B.  Furthermore, I have been working on the project, in one capacity or another, since the beginning of April if you include all of the fitting math I had to sort out - and I most definitely DO.

Here's a rather meh shot of the back piece blocking:


It actually blocked to proportions perfectly and became super soft, but not loose. I highly recommend Finch yarn (by Quince). I think it will provide this jacket with optimal structure and the right amount of give.

I think you'll agree, unflattering shot aside that, after washing, you cannot see where I changed needle size. (Note that the fabric looks a bit mottled because it's still wet in this pic.)

I actually blocked this over a week ago. Since then I've made 2 pockets, the left front and (hopefully today - the most miserable, wet day yet again) I'll finish the right front. I'm going to machine the buttonholes so I haven't been working those into the fabric, fyi.

You may think: Hey Kristin, you're doing really well. It's almost done!

I urge you to consider what remains:
  • The sleeves
  • The collar
  • The cuffs
  • Seaming the entire thing together - peeps, on fingering yarn, mattress stitch is a production
  • Hand sewing petersham to the hem (wonder how this is going to work, in truth)
  • Hand sewing petersham to the button band areas
  • Practicing hand sewing petersham onto the gauge swatch and then practicing making the buttonholes using my new machine.
  • Actually inserting the buttonholes
  • Sewing on the buttons
Fuck. This thing is really endless. If I don't complete it before I go on hols at the beginning of July (and finishing the pieces is the only part I can take with me on vacation - much of the work that remains is actually sewing), then I'm not likely to finish it before the end of July.

Peeps, that'll be 4 months of regular activity (albeit done in waves) on the same garment. We know I'm not a procrastinator when it comes to knitting. My point is, this project is huge.

So, today's questions are: What's the most complex knitting or sewing project you've undertaken? How long did it last and are you happy with the results? Are you a reflective person when it comes to your crafts? Do you wait and think after making alterations, before you cut your fabric? Let's chat!

PS: I'm likely to be MIA again for some of next week. Without getting into it, I'm in the midst of performing a civic obligation and it requires all of my attention.

Saturday, June 15, 2013

Updated (Again): The Summer Series: Yeah, I'm Gonna Make Another Bra

Since I seem to be all on about bras, let me tell you how I'm approaching the Cherry Bomb (bra and undies set), the second sewing bracket of the Summer Series. (The first bracket, The Five in Five, is now complete.)

You may recall that this is the kit I'll use to make the set - or just the bra if I cannot perfect the fit. I don't wear unmatched undies:


I intend to make a modified version (info to follow) of this pattern. Interestingly, it's from the same vendor from whom I purchased the kit (though I've had the bra pattern for a long while).

I've made the bra before. It was a fit failure. Every bra I've ever made has been a fit failure for the following reasons (women of fuller bust, who want to make their own lingerie, take heed):
  • The materials were inferior - specifically the wires but really many of the materials are not up to the same standards as high-quality RTW bra materials. Materials available for home use tend to have too much stretch and are not designed, necessarily, to work together in the same bra.
  • My sewing skills may have been lacking - I say "may" because I've made many bras at many stages of sewing ability and I don't think that this is the case in recent bra-making. Sewing bras is not difficult, but it's finicky. It requires patience and a steady stitch. The ability of one's machine to sew through many layers equally well is pivotal.
  • I've been making bras designed for a bust of a different shape than the one I have. Sure, in the time of my pattern purchasing, I've moved more towards bras that work on a larger, deeper bust, but Ladies, they are far and few between at a certain cup size. Add in the variables provided by material ease and it's a very tricky proposition. There's a good argument to be made that I should draft bras from my own stash (I've actually done this before, and it wasn't successful - not that it wouldn't be in the future). I'd say, till you've made a few bras from a pattern, and you learn the steps / how the seam allowances must be added, it's tricky to make your own pattern. It's very easy to miss a step.
Now, the fact that I've spent the last two years intently interested in a) fit and b) RTW bras in general and c) fit of RTW bras puts me in a very good position to try again. Not that I'm getting hopeful. The variables are endless and there is NOTHING one can ever make that requires perfect fit as much as a bra. Except shoes, maybe.

For purposes of being able to picture this, here's a nice 3-piece, seamed bra:

Y'all know this is my fave bra, the Empreinte Roxane. Honestly, the curve of the side cup where it meets the strap is JUST gorgeous on this style - I may adapt my pattern further if I can ever get it to fit.
Note how the 3 pieces all converge at the nipple height. Specifically the two bottom pieces seam together at a point. The top piece floats above that seam but, of course is seamed at an alternate angle to the under-pieces, connecting on the one side at the band or side cup where it moves up towards the strap, and on the other side at the centre gore. The reason the Roxane is so supportive and able to lift (different than support, peeps) is because the strap attaches to the under cup, which also goes up the side of the breast. It's not merely attaching to the floating top piece.

Alas, on the CUPL16, the strap attaches to the floating upper cup, which will diminish the lift it's able to provide... I will aim to fix this if I ever work out cup depth. One thing at a time... Updated: I couldn't resist making this change in this version - see bullet below ** for more info.

Depending on the construction of a bra and, presumably many other features - some of which I may not be aware of - the best way to add depth is by increasing the amount of fabric where the 2 lower cups adjoin at the centre of the cup unit (aka the full bra cup). If you add the extra fabric to the outer lower cups, where they join the band, you'll just screw with band dimensions and actually find yourself making a shallower bra than that defined by the pattern you started out with. Ask me how I know.

If you increase the length of the top cup - and you're not also aiming to widen the bra / you do not have full on top breasts - you'll get gaping.

With this in mind, here are the many adjustments I've made to this version of CUPL16, may the lingerie goddess be with me:
  • I shortened the gore by 1/2 inch. Now it's at 3.5 inches in height - at the upper limit of height on my frame and given my preferences.
  • I narrowed the gore at the band base by 1 inch and tapered to nothing at the top of the gore. This is a risk, but the original version was so unnaturally wide at the base. It didn't suit my shape and it was clumsy looking. I also sense it leads to a shallower cup shape, though I can't describe how.
  • I stayed with the original back size pattern piece I'd cut for a previous version (80) because the side cup height is good with that band size and I didn't want to have to redraft every piece. Instead, I chopped 2 inches off the back band (1 inch which will apply to each side) and graded the curve towards the closure areas. Depending on how firm I'm able to make the band - Seraphinalina gave me some great Powernet that's very firm so I'm hopeful - I may have to cut more.
  • *I cut half an inch off of the top cup piece at the centre front (to match the amount I shortened the gore) and tapered to 1 inch at the side cup because, really, the top cup was too much bra for me. (See below for an update on this - turns out I didn't stop here...)
You'll note, so far, every adjustment has been to diminish the dimensions of the bra, the original version of which I've already mentioned was too small. Hmmm... To increase the size of this bra to fit me - a woman of very deep breasts that are not wide on a narrow frame aka projectile boobs - adjustment of the lower pieces is necessary.
  • Keeping in mind what I said, above, I increased 1/2 inch on each lower piece where it joins at the centre of the cup - that is to say I increased an inch in total at the vertical seam that runs towards the nipple. I presume this will increase the cup depth by an inch, without widening the cup, so the extra fabric can be taken up by the volume of my centre and lower bust.
  • Updated: OK, it has occurred to me, while all of these alterations swirl in my mind, that by deepening the centre of the cup as per the bullet point above, I will also need to increase the length of the part of the cup that attaches to the upper sides of the lower cups aka the part where the upper cup is seamed to the lower pieces. I did a little bit of seam checking by 1. pinning the 1" deepened lower cup pieces together and then 2. walking the upper cup seam (that attaches to the lower pieces) along the length of the pinned lower cup pieces - effectively I pinned it together as I'll sew it. And, as I suspected, the upper cup piece was about an inch too short. It makes sense. However, I don't want to increase the upper cup at the top of that cup (the part that supports the upper breast in the cup) because, as stated above*, I don't want too much fullness there, or any additional height. The solution I've come up with is to vertically slash the upper cup piece where it meets the vertical seam of the lower pieces (about half way along its length) all the way up to the top, leaving a little hinge (you know, like you do with an FBA). I'll spread the slash by 1" and tape some paper behind that wedge. Then, I'll tape some more paper to the top of the pattern piece (which will be distorted by the creation of the wedge on the lower side) so that it regains the original shape. This alteration, added to the initial upper piece alteration*, will give me the depth in the centre of the cup, without adding any fabric or additional volume to the top of it. At least that's my theory right now. 
  • Updated: I decided to take the plunge (no pun intended!) and to adjust the side lower piece so that the strap will affix to it, and not to the floating upper piece. I looked at my Roxane and tried to approximate the lines. Then I added .25" seam allowances to the new cut line (cuz I will have to attach the side lower piece to the upper cup piece, albeit in a new place. I really hope I did this right.
Of course, I could be wrong about this. It wouldn't be the first ninth time.

Additionally, I intend to make the band as firm as I can (with new materials) and I'm going to use wires reclaimed from an RTW bra. I've got stretch-free underlining I could use for all cups, including the upper cup I'll make from stretch lace. It's really not a problem for me to have stretch in the upper cup, as long as the lower cups fit perfectly and the strap attaches to the outer, lower cup. In this instance, depending on how I attach the strap, I may need to reduce the stretchability of the upper cup.

So, there you go. I haven't cut anything (but the new pattern pieces). I'm hoping that, if any of you have thoughts or advice about what I've written, that you might provide some useful additional info I can take into the process.

Today's questions: Bra-makers - have you ever successfully added depth to a 3-piece cup (not width) and, if yes, how did you accomplish it? Everyone: Given that bras like the Roxane already exist in the world, and the manufacturers of said bras have access to all the best materials and machines, do you think I'm insane to pursue bra-making, yet again? Feel free to be honest!

Sunday, June 9, 2013

The Summer Series: Five in Five, Take Five

OK, brief intro on other matters - the next in the Ask The Bra Fitter series will be up tomorrow. Veronica just moved house and she's been getting settled...

But back to the Five in Five. It's done. It's over. I've met the terms of the challenge I set for myself (five garments in five weeks). Can't say I had much fun, all things considered, but I learned a LOT.

Here's Vogue 1287, a dress that does not photograph well on a mannequin (alas):

I swear I steamed the shit out of this thing and it still looks like a pile of wrinkles
Oooh, pretty pleats (and a little shot of the coverstitched sleeve hem). Man, I love that coverstitch machine.


The piece de resistance is the back - particularly the pocket construction:


I'm about to say a lot about this thing, so apologies in advance.

For starters - as you can probably tell, this is a wearable muslin. One might argue barely wearable.

My new Viking is not handling knits well at all. I believe I'm going to have to take it for a tune-up because all of the top stitching (not done by coverstitch) looks like the work of drunk mice. It's very distressing to spend 20 hrs making a fucking knit dress only to find the final seam makes it look like crap.

But never mind the mea culpas, let's get down to the crux of the matter. This is most definitely an advanced project, amongst the most advanced I've ever tried. It's as close to tailoring as you can get with a knit dress. The instructions, as always with Vogue knit patterns, are horrible, and given the complexity of construction, I would have been lost without this video tutorial that shows, very clearly, how to insert the pockets. I am so grateful for these resources...

On the body it is a Grecian delight. This thing is so, so gorgeous. I will most definitely make it again, now that I've ironed out the kinks. It's elegant. Sophisticated. Intricate. Interesting. And it fits me like a glove.

You'll recall, most of the (few) reviews of this pattern are not complimentary. I sense that's because the minuses of construction far outweigh the pluses of the finished product for most wearers. While I cut anywhere from a 10 to a 14 in Vogue patterns, this one does fit large. Mind you, I made my standard Vogue knit size - a 10 - and with very few alterations this fits me very well. Honestly, I shortened the skirt by 3 inches (I could have stopped at 2 or 2.5 inches, in truth) and I shortened the bodice by 1.5 inches. That's it. There's no other project I've made in the last year that required so little fit fussing.

Why? Well, my friends, this is a dress for a true hourglass with a substantial rack. I mean, seriously, if you're not in an E cup or higher, just give it a miss. In light of the pleating complexity, and the way the shoulder and neck unit is constructed, it would be painful to alter it to fit a smaller bust. Furthermore, if your hips are on the wide side, stay away. It gives a lot of profile to the derriere, in light of the volume of the pockets. There is no hiding from your curves in this dress. If you don't want to show them off - or if you don't have them - just walk away.

I'm not going to talk about the many issues I had - namely on the neck/shoulder unit construction, the pocket construction and the waistband construction but said issues were numerous - and I made much of it up on the fly, given that the instructions are just short of useless. When I said my spatial reasoning is alright, I overstated the case. Apparently, it sucks. In the end I had to remove (by a tuck on either side of the back seams) 4 inches of fabric from the skirt. I must have missed something because it was a very specific sort of excess. As a result of the drape, you can't really tell, but I mean - I worked hard and I still don't understand how this thing turned into a dress.

I'll also admit that this garment reflects some of the poorest sewing I've done in a long time - from the serging to the regular seams, it's a dog's breakfast. I'm actually embarrassed by the workmanship and, at a certain moment, I just had to give into the idea that what I've made is a legitimate muslin and the interior shows that. The fact that I may wear it a couple of times (just to test it out in the real world) is beside the point.

Here's who should NOT make it (like I'm the arbiter of who should make what?!):
  • If you're small of boob - or really, even if you're on the small end of moderate of boob, just say no. Gotta say, it's nice to find a pattern that's only for the ladies with the sizeable rack.
  • Those having a wide derriere or bulky hips.
  • Those who don't wear bras that fit properly. This dress requires breasts that defy gravity.
  • Those without all of the knit-sewing gizmos - serger and coverstitch. Sure, you could make this but it's going to look homemade on the inside and, given how complex and professional a pattern it is, it's unfortunate that the inside will not reflect the outside.
  • Those who don't love working with knits. I mean it, you've gotta have the love cuz this is TRICKY.
  • Those who love knits but haven't made numerous varieties of knit garments in the past. This is not like making a t-shirt or a pair of leggings. This is tailoring that requires a real sense of how to drape and how to apply a variety of techniques. You don't want to try to learn any basics on this one. All of the other shit you have to learn will keep you adequately busy.
  • Those who don't have access to the appropriate fabric. Don't try this with an ITY knit. You need something like a silk jersey or a firm rayon. Even a ponte would work (if it weren't too thick and spongy). I used Tencel and it was perfect - though the fabric was on the cheap side for Tencel and it is, alas, vaguely see-through.
Everyone else, I urge you to try it! :-)

Final Thoughts on The Summer Series first bracket - The Five in Five:

I'm happy that I set and achieved this goal. In the end (btw, use the search feature with the search term "Five in Five" for more info), I made:
  • a denim skirt
  • a surplice sleeveless top and 
  • three dresses: one with a cowl, one with a mock wrap and the one profiled above
I used only stash fabric and I've decided that, from now on, I'm buying 3 yards, as a standard, especially when working with knit fabric. I had to recut many pieces because I "muslined" as I went (as one "optimally should" with stretch garments). Not having to worry about how much fabric I had to use really helped to calm me down. The only garment I made, working on fabric fumes, was the simple denim skirt and it was stressful!

I learned, in this process, to keep my cool. I encountered numerous issues which would have, even a year ago, derailed an entire project. Sure, I have more skill now than I did then. But my greatest resource was my ability to stay calm when things went wrong. It's pretty rare to be completely unable to find some way to fix a problem. Even the mystery extra 4 inches of skirt width in the dress you see above, was easily managed with a clear head. Is it perfect? No. Is it a solution that worked? Yup.

With the exception of the mock wrap dress (the weather has been hideous, rainy and cold this spring/summer), I've worn every garment at least once - and some of them on a few occasions.

This palette is sensible (weather notwithstanding) and suitable for my lifestyle and my sartorial tastes. I like things that are stylish, basic (which is to say a well-fitted, elegant back-drop for accessories and my natural personality :-)), made of good material (I'm getting better at sourcing these) and easy-to-wear. All of these items fit the bill.

My biggest disappointment in the process is that I didn't have as much fun as I would have liked. I encountered a lot of set-backs and they undercut the pleasurable aspects of sewing. I also feel that much of my construction (esp. given how my new machine handles knits) could have been better.

Another lesson I can take from this experience is that, as long as the fabric is good, the style is attractive and the fit is excellent, the quality of sewing doesn't really matter (she says, trying to make herself feel better). Even I don't care as much about imperfect seams as I did when first I completed these garments (and I care about these kinds of things). What I notice most is the drape and hand. Of course, here's hoping I can pull it all together in the long run!

Next up, some knitting. And the Cherry Bomb bra and undies set. But I need to chill on the sewing for a couple of weeks. I'm spent.

So, today's questions: Which is your fave of the five? Do you have any interest in making V1287? What are the elements of your handmade clothes that you appreciate the most (and therefore wear the most)? Let's talk!

Friday, June 7, 2013

De-pleated

I'm home today, working on V1287. Sure, it took me an hour to consider alterations and to cut the pieces. Then it took an hour to cut. Then an hour to mark. Then an hour to baste in the pleats. But I think my low fun-expectations are standing me in good stead.

There really are a LOT of pleats:

This is the actual colour of the fabric...

This is the weirdness that happened as my flash died (following which, my camera wouldn't take any non-blurry photos)
In the end, I cut the size 10 and I don't think it's going to be too large. I altered it minimally, by shortening the skirt 3 inches and the bodice by 1.5 inches on the front and back pieces. There are lengthen-shorten lines on all of the relevant pieces, which is the only way I could figure out where exactly to make these alterations. The pieces are very tricky to interpret before the pleats go in.


So, whatcha you think of pleat insertion on knits? Do you hate it? Do you find it kind of fun in an "it never ends" way?

Sunday, June 2, 2013

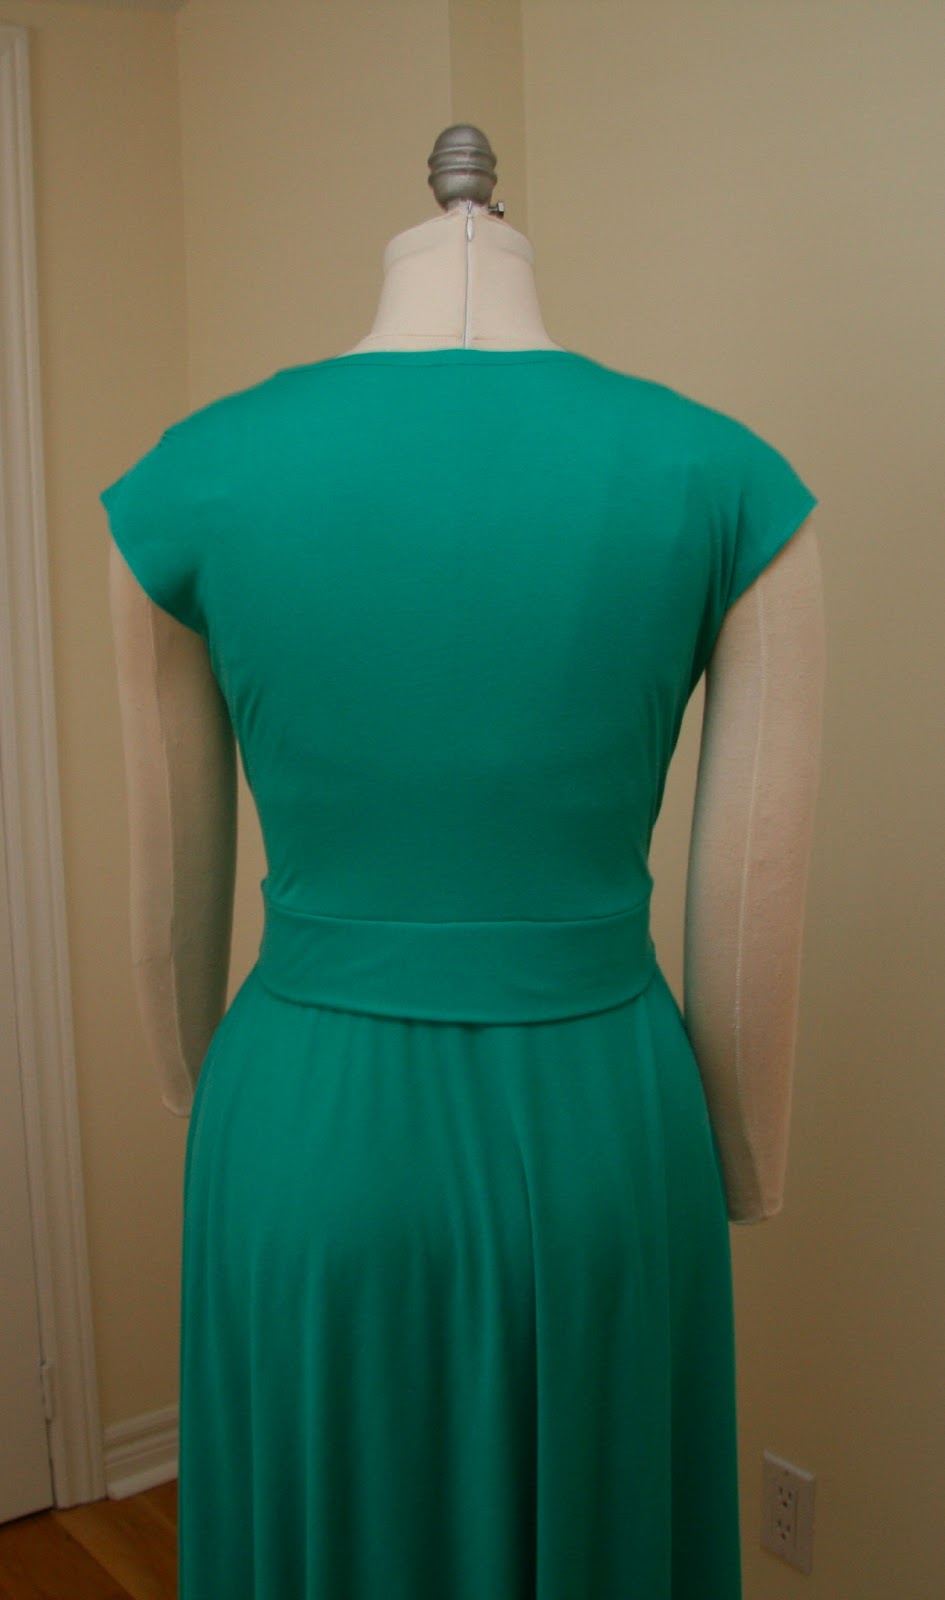
The Summer Series: Five in Five, Take 4 (Finished)

I'm really glad this is over:


 Vogue 1027

Bizarrely, as I was finally finishing it off (trying it on), Scott saw it and freaked out (in a good way). He was all like: That's really nice! Apparently he thinks very highly of this colour. I don't, so much, but I have to admit it complements my blond fairness.

A few things:
  • Roni - sorry but I had a lot of trouble with this pattern and I didn't have the wherewithal to take pics of all the places on this dress I interfaced with knit fusible: the entire neckline/surplice, the armholes, the sides of the dress where I attached the pockets and the pocket bag fabric (where it attaches to the side), maybe I'll interface the hem (it's hanging right now to allow the bias drape to settle before I hem it, if I hem it). It's very easy to do and Sunni has a few great tutorials on it (go through the Sewing School link). 
  • In the end, I didn't use either the serger or coverstitch to work the armholes because my fabric was really unhappy in that area and I didn't want to tax it with anything I might have to rip out. I opted for finished garment rather than perfectly finish. Can't tell you how that irks me.
  • If everyone but me finds this pattern easy, then it must be me. Am I off my game? I feel so wretchedly bad at sewing right now. I end up having to redo everything (despite the fact that I'm paying attention). A bobbin runs out. Or I sew something together inside out. Or the shoulder seam elastic decides to eat the fabric (almost) where its seamed in. It's really no fun.
  • Mind you, recent end products are turning out to be very wearable. Is it much harder because I'm working that much more consciously (while yet I still lack experience and many skills)? I have to admit, my fit is really improving lately, especially with knits (which are so forgiving).
  • My alterations in this pattern were pretty on, gotta say. I managed to give more ballast to this dress by adding an inch to the neckline and the bottom of the front and back bodices. It works very well. Next time (and I will do this again, despite the challenges I've had - because I think those challenges were circumstantial more than anything), I will add another half an inch to the front (tapering at the sides). The front on this garment pulls up very slightly. It's wearable though.
  • Keep in mind that, even if I'd cut a size 16 in the bodice, it still would have been too small (except in the sides). And the skirt is marginally too big. So, what, I'm like an 8 in the skirt and an 18 in the bodice? (Even though I'm not entirely of one Big 4 size, unaltered, I'm not a range of 6 sizes between bust and hips.) This thing was cut for a body very different than mine. I managed to make it work and I'm proud of that.
  • One of the Pattern Review reviews I read showed a great pic of how the waistband affixes at the back waist. It's actually only attached on the topside. The back band (a double layer of fabric with wrong sides together) floats on the back body between the side seams. You can actually lift it up from the bottom. I would not have been able to figure out, from the instructions, how this works so I'm grateful to the writer for the photograph. I really find Vogue patterns (especially the knit ones) to be INCOMPREHENSIBLE. And I'm not horrid at reading and interpreting instructions. I mean, I'm not great at it, but I'm fine. All the independents write totally clear instructions that I have no issue with. It's a combo of Vogue's horrid technical drawings and its mediocre descriptions that throw me off. They seem to contradict each other.
  • In the end, as mentioned, I interfaced with fusible interfacing. (It's the kind that's cut on the bias and rolled into a tape). It was better than the fusible web I used which competed with the fabric for drape.
  • Oh, I should mention that I cut 6.5 inches out of the bottom of the skirt (on the paper pattern, prior to cutting fabric). It's still long on me and, though I'm short, my legs are not. Don't waste the fabric unnecessarily. You may end up cutting the bodice 3 times. :-) Mid-calf is almost universally dowdy (whether it works with your proportions or not). If you are over the age of 40, do not make it much than an inch shorter than the knee or it will likely age you.
The final garment for Summer Series: Five in Five is this one:

Vogue 1287 (Photo from the website)
I'll write more about this soon but, I have to say, I'm a bit concerned. This dress has relatively few proponents. I can't find many reviews and those which I have found are not overly complimentary.

Of course, everyone's problem is that the bodice is swimmingly huge. Hmmm, I wonder about that.

In truth, I can't see how my next project will be any easier than the last. And this pattern is Average (aka Vogue-speak for Advanced).

The only settling influence is my belief that my mind doesn't see "easy" and "hard". It's all a bunch of instructions to me. If I can figure out what they're saying, generally I can do it. Sure, not necessarily so well (the first few times), but with increasing skill.

Today's questions: What do you think of V1027? If you've made it, do you wear it? And V1287... Do you think I'm crazy for taking on something potentially tricky at this juncture?

Thursday, May 23, 2013

The Summer Summer Series (Knitting): Stressed Much?

WTF is going on? I appear to be knitting with CRAZY tension on the fitted boucle jacket. My original stockinette gauge was 7.5 stitches per inch. I did lots of swatching. I blocked the swatch (it softened but didn't much grow).  I started the back piece. Again and again, I got 7.5 stitches per inch for a number of inches.

Lately, it seems things have been looking a bit, um, tight. I re-tested gauge below the ribbed waist (the first phase of knitting). It was 7.5 stitches. I tested gauge above the ribbed waist. It was 8.5 stitches an inch. If you don't knit, that won't mean much. If you do, you'll know this makes masses of difference to a finished garment. Which is particularly problematic when you're trying to achieve 0 ease (aka perfect fit). 8.5 stitches per inch will make my garment inches smaller than I've planned on. It's even smaller than the pattern's original gauge which I couldn't get, despite all of my efforts, and on the basis of which I drastically altered the pattern.

I've debated what to do. I'm not much of a ripper-outer (obvious mistakes excepted). And, aside from the waist (which I was concerned about enough to knit in the same needle size as the rest of the garment, though the instructions advise you to size down), I'm fairly sure I can sort this out between blocking and going up a needle size. Fortunately, I've made this decision prior to reaching the back-piece underarm section (the under-arm / chest area is the place where I need the most room). As of now, I've switched from the 2.25mm (US1 needle) to the 2.5mm needle (a needle that doesn't seem to correlate in US sizing. I think it's a US1.5?) and this is how I intend to continue. Unless my gauge changes again.

Depending on what comes next, I may opt to increase the dimensions of the front pieces. More likely, I'll keep changing needle size, if necessary, so that I'm sure I've obtained the gauge according to how I rescaled the original pattern. It seems like the wisest approach at this point - though I can't go up or down more than one needle size without risking a weird-looking end result. And of course, as vertical gauge changes with new needle sizes, I continue to make adjustments on that account.

Gotta say, this isn't the mindless knitting experience I was hoping for (after the major, week-long math project that was the original pattern alteration). But it is what it is:

We're getting somewhere - though not at a great pace...
Today's questions: How do you handle knitting projects of varying gauge? (While I certainly have my share of unexpected challenges, this isn't one I've experience before.) Do you leave them for a while? Do you rip back? Do you use a variation of my methodology? I generally knit with lots of negative ease - which means I've got lots of latitude on gauge. This time I'm putting my sense of balance to the test. Sure, I practically always wish I'd made things smaller. But you never know when that's gonna change.

Monday, May 20, 2013

The Summer Series: Five in Five, Take 3 (aka the knit top that warrants a muslin)

Ooh la la. Let's talk about V8790, shall we?


Get a coffee. It's gonna take a while but I promise to make this the most thorough and exposé-like of all the reviews of this top that you might ever read.

It's hard to know where to start. I kind of love this top (at least on others!), despite how badly my muslin turned out. I kind of think it might not be for me (or those having large breasts - despite how the surplice design leads one to think the opposite). I kind of think the pattern may be flawed. I kind of adjusted the crap out of the pattern so, I suppose, that's what could be flawed. (Note to reader: I don't think so. I was very careful and considered while altering. And the knits are my spiritual people. When it comes to stretch-fabric, I have intuition on my side.) I definitely think the instructions are mediocre.

But let's go back to the second sentence of the last paragraph, the one wherein I tell you that I deliberately made a muslin of this top. Um, in what world is that "quick summer knits-ish"? Do I just like making things difficult?

Actually, I think it was the best idea I've had in a long time. And this is why:
  • The instructions are crap. I mean, the written portion is ok, but the photos are SO cryptic that you oughtn't bother.
  • I didn't know how the gathers were going to work - or the sizing (I cut a size 10 and it was definitely on the snug side) - or the facing (I freakin' hate facing) and, really, I spent a lot of time learning about them in the course of the muslin construction.
  • It's nice not to care about ruining something as you're trying to figure it out. Furthermore, I had this yellow tencel that was never gonna be used for anything else - it's 100 per cent see-through - but it's the same fabric I have in my stash in two other colours (that, I really hope, are less see-through). This was a chance to know I'd be able to a) get rid of unwearable stash while b) making something that I'll be able to remake in a fabric having the same properties. Sweet.
  • I altered this pattern quite a bit (the topic of another section of this post, below) so I wanted to see if I'd maintained its integrity. I believe I have.
First let me tell you some neutral observations about V8790:
  • This is not a pattern for a beginner! Or even for an experienced sewist who really doesn't dig working with knits. I can't believe the Vogue people have put it in the very easy category. That's high on drugs, IMO.
  • It's cut for an Amazon princess with a waist that's 4-feet long.  OK, I'm exaggerating slightly, but if you're short of waist, you should know you'll need to alter it or you're gonna have a tunic on your hands. I removed 3.5 inches and I stand by it.
  • This top is all about the fabric. The instructions advise a 2-way stretch knit only (I've seen other reviews that say it requires 4-way but it's not the case.) I think that Vogue peeps are worried about excessive vertical drape stretching the surplice neckline all to hell. In truth, unless you're working with a very stretchy fabric (like rayon jersey) and you make a size that's on the large end of your normal size (i.e. the exact opposite of how I like to wear my knits), excessive drag is unlikely to occur.
  • That's because this thing is constructed such that the surplice attaches under the arm at the top of the side seam (where your underarm starts). The net result is that this thing is apt to strangle you with its insanely high cut. I say, go crazy with the stretch-factor. Note: On me this was unwearable - as well as tremendously uncomfortable. I had to alter it. (See below) Egad: I just had another look at the technical drawing and, either I totally misinterpreted the instructions (possible) or the photo is inaccurate?! It shows the front surplice panel attaching at the waist, not under the arm. I've so got to go back and see whether they suck or I'm an idiot! Yet another reason why making a muslin was a good idea.
  • It won't work with a thick fabric. The front is two layers thick (as both sides of the surplice attach under each underarm). If you have a thick fabric, not only will it get bulky fast, but it will be ridiculously hot. Even the sleeveless version. The thinner the jersey, the better.
What I Changed:
  • I cut 3.5 inches of length from the lengthen/shorten line at the waist. Given the complexity of the front piece, this made it quite difficult to true at the neckline-side of the front (the part with the facing). It took a long time and, in the end, I compared the curve against the original and just did my best to recreate it. Let's call this a workable change.
  • I interfaced the facing. I thought it would be too baggy, particularly at the back neck. As it happens, my instinct at the neck-edge is probably sound (as it was in applying interfacing where the neck unit of this top is sewn to the shoulder unit - it's a bit weird, but you'd know what I mean if you were making this). It was not a good idea to interface the facing because that part really needs optimal opportunity to drape. Let's call this a mistake.
  • How the surplice attaches to the side seams at the underarm (See above for the part where I might have read the instructions wrong.) Is it shocking that I can't even be bothered to go look at them right now so that I might clear this all up before I press Publish on this post? Hmmm...
  • The length of the facing. I found it too long at the side seam (even as the neck was too high). I know - whack. This is possibly because the interfacing altered the drape of the fabric and altered the way it eases over the bust. As I fit and sewed, I ended up removing 2 inches of its length, where it meets the side-seams. I suspect the need to do this will depend on the fabric used so I won't alter the facing length out of the pattern.
What's flat out dubious about this pattern:
  • The way the back piece attaches to the neck unit is totally weird and it's as if the pieces aren't meant to go together. Instead of being curves that attach, the attachment is with a series of right angles. Hard to explain. And just as hard to sew.
  • I was gonna say, the way the surplice piece attaches at the underarm seam but that could backfire on me. :-) What I do know is that at least one side of the surplice (the one that goes underneath) is supposed to attach at the underarm - that much I'm sure of. I didn't like this. It was very bulky over the thickest part of my chest. So I lowered it - as I did the surplice panel at the other side seam. 
  • The facing?! Did I say I hate facing? The only reason why I'll let it go here is that, presumably - were I to have left off the fusible interfacing on the facing, it would have draped better and looked less like a facing and more like an extension of the front side of the neckline.
Why I utterly love my serger and would suggest you give this pattern a miss if you don't have one:
  • I finally decided to figure out some of the more fancy features of my serger. In this instance, ruching/gathering. Seriously, it is SO not hard. Essentially, using 4-spools of thread and a longish stitch length, you crank up the differential feed to the highest number (2) and the thing takes care of itself. It took me about half an hour of experimenting with my fabric to determine how I wanted to proceed (with clear elastic to hold the gather, rather than without). Without clear elastic, potentially, one must pull on threads to redistribute the gather - like one does with a regular machine. Note: should you decide to avoid clear elastic, the serger still makes it easier to use the thread-pull gathering method, than a regular machine, and and it maintains the initial gathers better, those created without thread pulling and by the differential feed action). I now realize that, with the serger, I could have done all of my gathering at the last stage of the project, when sewing up the three-layers of side seam fabric, by switching from regular serging to gather-setting serging (at which point I'd feed my clear elastic into the little groove), and then back to regular serging all on the same seam. It's a bit finicky and it takes courage, but it's totally possible. Keep in mind, I serged the side seams after basting them together! Don't just start hacking away at your fabric with a serger before establishing that the seams align.
  • If you intend to work with clear elastic (which, admittedly, is not what the pattern calls for but which is the best material to a) gather the sides and b) stabilize the armholes, especially if you're doing the sleeveless version, then doing it with a regular machine is a nightmare.
  • This is one of those patterns that really is bound to look homemade on the wrong side, without a serger. There are lots of layers atop one another. There are facings. There are strings for gathering (or else clear elastic). I mean, it'll look nice from the front, but the inside runs the risk of being untidy. And, without a serger, the likelihood is that your straight stitches might skip or inadequately hold the fabric. There's a lot of stress on a lot of seams and I think a serger will contain everything much more securely.
Is anyone still reading??

Will I make this again? Yes, next weekend, likely. If it works, great. If not, I gave it a good try and learned a lot about my serger, sewing with knits, surplice tops and clear elastic.

So, today's questions: Have you made V8790? Did you find the instructions challenging? Did the top fit you nicely? Did you alter it in any way? Let's talk!

Sunday, May 12, 2013

The Summer Series: Five in Five, Take 1

Lord, I've had an irritating day. Yesterday, I prepped for the first of the five in five - V1179:


This is the one I've made before - once for myself and once with my friend Nicole.

I'd forgotten how much I hate putting it together. Which is just as well...

For such a simple sack of a dress, it sure is a pain in the ass. This time I made such a fuck up of the cowl attachment that I had to pick it out 3 times and then serge the pieces together and top stitch the serged edges down about .25 of an inch from the cowl seam. So much for stitching in the ditch.

If you looked at the guts, you'd probably say it looks fine. That's cuz I wouldn't let you look for long.

It's still not done, if you can believe it (10 hrs later), because I've had to rip out the hem. Finally, I rolled some wooly nylon for the bobbin (you can only wind this by hand but it does tend to help even out hems on stretchy fabric). My new machine is not adapting as quickly to knits as I might have imagined. The tension is challenging, despite much testing. Even at 3mm, the stitch looks much tinier. Tiny stitches on knits tend to get wavy and ugly. I'll have to come back to the hem tomorrow. I've been really struggling with headaches lately and the last few days have been a bitch. There's just no more juice for sewing today.

I've been very critical of my sewing lately. I sense I've got to park the perfectionism. I mean, I'm only as competent as I am. If I don't intend to stop doing this craft (and I don't), then I'm going to have to manage occasional mediocrity. I don't know why I'm so much more forgiving of my knitting than sewing. Is it that I have so much time with the garment before completion that I come to terms with it?

What's interesting about this dress is that it's very flattering, bad sewing technique aside. It drapes beautifully. I made the 10 and it fits well what with that being my size from the vantage of shoulder width. Given that my rayon jersey is mega stretchy and the dress has a lot of wearing ease, it's just the right size.

I did two things differently this time and I think they're going to stand this garment in good stead:
  • Last time I made this, I didn't own a serger. As I do now (and it's got a little spot built into the presser foot wherein one can feed in stabilizing tape like that clear stuff that's almost impossible to maneuver on a regular machine), I stabilized the shoulder seams in a jiffy and with the optimal material. It was so easy! (I do love my serger.) I also used this on the wrong side of the armscye to stabilize it. I folded over the serged-with-stabilizer edge and topstitched it before sewing up the side seams. Looks good and feels firm.
  • Then I stabilized the (very inclined to wave) hem by fusing some interfacing to it. Note: You have to fuse the interfacing from the bottom of the hem to the point at which you'll sew or it won't provide the integrity you'll have spent that extra 30 minutes to achieve. I intend to sew a 1.5 inch hem, so I used 3 inches of interfacing width.
In truth, I've worn the original (badly made) version to death and it's held up really well. The wide hem, uninterfaced, is just lovely and the shoulders are solid enough. But this version's rayon jersey is its own thing and I want to treat it properly.

Today's questions: If you've made this dress, did you find it fun to sew? Or was it really unpleasant? Do you hate sewing rayon jersey? (I'm starting to feel really pissed off by it. Modal, double-knit, tencel - they all sew very nicely. Even though rayon jersey has a great drape, it's SO tricky to stitch.) What's your fave knit from a sewing perspective? And finally, do you sew with headaches? What are your strategies for managing the pain while doing finicky work?

Tuesday, May 7, 2013

The Summer Series: Which Five are the Five in Five?

Fucking hell! Blogger just ate a post I'd spent 30 minutes writing and I'm finding it very hard to bring myself to rewrite it. And it was a good freakin' post, dammit.

Alright, Cole's Notes version: I've chosen the Five in Five (the five easy, namely knit, pieces I will make to tide me through work and play over the summer).

The One That's Not a Knit (but is a skirt): NewLook 6843 mashed up with an RTW skirt I own


I'll make it straight and mini - but not too much of either. Fun fact: This is the pattern I used to make the first thing I ever sewed. It took 15 hours.

Fabric: Denim I used on the skinnies I made recently

The Chic Top: Either Maria Denmark 103:

You can find this in Craftsy Patterns
or a shortened (for my hourglass and short-waisted frame) version of Vogue 8790:


Please use your imagination with these photos. It's hard to see past some of the styling...

Note that all Vogue Patterns photos can be found on the website... Individual linking is a luxury of the woman who hasn't worked all day and then written 3/4 of a post that opted to disappear.

The Fabric: My remaining yard of this fantastic Modal:


The Fancy Dress: V1287 by DKNY

Don't worry, it's not so fancy that it isn't made of jersey with hidden elastic shaping at the waistband.


Fabric: Tencel in slate blue


I sure do hope this fabric isn't too sheer...

What you'll notice is that Vogue and DKNY make some very wearable summer dresses, as evidenced by the fact that I'll be making two others:

Le Sac: I've made V1179 twice before and it's terrific with a belt:


Yeah, everyone and her sister's made this cuz it flatters so many shapes.

The fabric: The remainder of this floral, last used on Jalie 2921


And finalement...

The Dancer Dress: V1027


The Fabric: That peacock shade of Modal that I suspect isn't Modal (no pic available, apparently - I'll photograph my stash when I start working with it...)

I have a couple of other pattern ideas up my sleeve but these top the queue.

Today's questions: Which of these do you like best? Have you made any of them and, if so, how do they wear? What summer projects are in your plan?

Saturday, May 4, 2013

Summer Series: A Picture Tells A Thousand Measurements

I'm not gonna lie. This is the biggest and most complex pattern rescale that I've ever done. I mean, I might as well have just thought up a garment and written down the instructions because I ended up turning this:

In truth, this is half of the pattern instructions for the full garment...
into 11 pages of this:


Kristin's version of a garment long since in the public domain...
You've gotta appreciate how I included the photo in my reworked version of the pattern!

BTW, I do realize that starting this pattern from scratch is well beyond my current drafting abilities - but, in the name of hyperbole, sometimes you've just got to be glib.

Let me recap what I did:
  • I decided to use the a new gauge (one that I could get on my needle size of choice and which would facilitate customizing this knit to my shape), not the one the pattern recommends.
  •  Then I carefully considered how I wanted this to fit (with 0 to slightly positive ease, in order to maximize the jacket-effect):
There are actually several additional pages of this scribble - those showing the dimensions for size 34 that the original pattern provides, and those showing my modified requirements which I'm calling (unsurprisingly) "the modified 34".
  •  In order to keep my focus (which really started to waver as I freaked out many times over the 5 days and numerous hours that it took for me to work this out), I wrote myself instructions on writing the instructions:

  • My express goal was to do all of the thinking (aka fitting) before I started to knit because, really, those are two entirely different activities.  It took a long time because I wasn't merely changing one element (the fabric, based on gauge - which in and of itself changes the vertical and horizontal dimensions of the garment) but two inter-related elements (the fabric, based on gauge AND the proportions, via stitch count, of just about every part of this jacket to, theoretically, accommodate my body shape exactly). It also took a long time because I had to quadruple check every measurement. And yes, I found errors in my original math.
  • But let me tell you, it didn't start to get seriously scary until I redrafted the sleeves:
  • I have to give a HUGE thank you to knitter and teacher extraordinaire, Alexandra V. She sent me a template on how to do all of the insane non-Euclidian geometry  - a 7-freakin' page template! - which turns this piece (about the theory of sleeve drafting) into something one can actualize. I should clarify that the reason I could make use of this template in this instance (A actually sent it to me when I was making the last sleeve-modified sweater but I couldn't make heads or tails of it at that point) is because I redrafted this entire pattern and, as such, I have ready access to the numerous pieces of data one requires in order to use the template. 
  • My point is, unless your pattern gives you extremely detailed instructions (which vintage patterns never do), you're going to have to deconstruct it to determine the following key pieces of info: the height of the armhole (not the length you speculate, but the length gauge is actually going to provide), the width of the initial bind off in inches and stitches, the width of the decrease in inches, one half of the upper sleeve width desired, the initial bind off number of stitches for the sleeve... You've got to be pretty close to your (as yet unknitted) pattern to know these things or to determine them. And this is just the jumping off point! The thinking comes next.
  • Once you determine all of these things, you can't go off-road in the knitting. In fact, your only job at that point, is to follow the instructions (and to have a glass of wine).
People, this was really hard work. Harder work than I like, truth be told, but I am apparently incapable of doing anything without customizing it. As much as I TRULY just want to get going (with a tweak here or there), how can I knowingly spend 100 hours making a jacket that will be a little too big in the waist and then too small in the bust and perhaps too wide in the shoulders and, worst of all, too long in the armhole (giving a droopy, untailored profile to a totally tailored garment).

This is a tailored suit jacket. Sure, it's one wherein I'm making the fabric - rather than molding it over my body (as one does when one sews) - and that adds a lot of extra work up front. Once I've made the fabric, there's no going back (unless I want to rip it all out, which I seriously do not).

Alas, one doesn't know, until one spends the 100 hours (on top of the 30 already spent on the math), if said math is actually correct and if the jacket will fit to the degree of precision that the planning warrants. That's the joy of being a novice.

But damn straight, I will have learned something.