Showing posts with label The Spring Suit. Show all posts

Tuesday, April 23, 2013

Updated:So Many Updates...

About a million little things happen (all the time) that lead me to think to myself: I have to write about that. Apparently, I place a high value on some pretty trivial things. (Which is probably how I've averaged 5 posts a week for almost 6 years...)

But, continuing apace - here are today's updates:

About the Suit: Here's the thing. I've pinned the buttons on the suit (much closer together than I had originally, to buy me the wiggle room I removed from the side seams erroneously). I can't bring myself to sew them on yet. Why? Well, the truth is, I'm fairly critical of my work and, if I end up not liking this thing, I'm apt to throw myself off a bridge - which wouldn't be good for the likelihood of future posts about truly important things. I don't know if I'll do it tomorrow evening or the next. I need a bit more space. A bit of time to see the suit for what it is and not the series of life lessons I associate it with. Believe it or not, I haven't even tried both pieces on together yet. What kind of nut spends 2 months agonizing over a suit and then doesn't bother to try it on?!

About Other Sewing: But no fear. I've somehow managed to determine how I'm going to spend the entire summer sewing - even as I can't bear to think about tomorrow. I've broken it down as follows:

The Next Suit: I'm always amazed to discover (upon waking from a dream, like, 5 months after completing a project) that I solve a (huge-to-me) problem related to that very project like magic. You see, I'm not a patient person. I am a compulsive person - and those two qualities lead me to work so quickly that I rarely see the benefit of said epiphanic problem-solving because I act (rightly or wrongly) in the moment.

I don't want to do this with my next suit. I want to be able to enjoy the process at a reasonable pace, having resolved some challenges I'm still not clear about (2-pages-worth). And - ridiculously - I want to redraft the front piece so that it isn't double-breasted. Yeah, you read that right. How I'm going to manage to make the next suit relaxing when I'm re-drafting whole freakin' parts of it is beyond me. Especially in light of the fact that I've never done such a thing and I have no sense whatsoever of the challenge that potentially awaits me. All the more reason, I suppose, to take some time to let my brain do the work in its own way. Happily, I want a new suit for the fall, so I can really take my time and work on it amidst some other exciting projects.

The Bra I'm Going To Make (Again): You know how I like to say: Ninth time's a charm! Lord, here's hoping or I might have to go throw myself off that bridge again. I've managed to learn many things about bras and breasts and my breasts and my bras over the last 2 years and I think it's time to apply those lessons. I've also culled numerous RTW wires and bought Norma Loehr's new book, Demystifying Bra Fit and Construction. (Note: It's very new. I've read it through once and I do think it's a good addition to the bra-making catalogue but I sense that Ms. Loehr is a woman who makes bras primarily for the D and under set. The book gives me that vibe. I also disagree with a couple of its premises, but I'm willing to suspend my disbelief until I've had more experience.)

I've also found an Etsy vendor who does some terrific kits that include cup fabric with no stretch (in addition to fun, stretchy overlay fabric), such as this one:

Photo from here
Yeah, I succumbed. Seriously, though, it's pink lace and a wacky pattern. Who could resist?? Merckwaerdigh is the company run by the woman that makes the CUPL16, in my opinion, the best-shaped balconette for full-busts on the market. No, I haven't yet got it to fit but it's the one I'm starting with. I'm just going to alter the shit out of it.

The Summer Dress Palette: It occurs to me that, 4 days a week, from May till September, I wear a dress to work. Many of my own handmade dresses have been worn out in this process, I'm happy to say. So I don't see why, given that I managed to buy 17 yards of different knit fabrics a couple of months ago?!?!?, that I shouldn't do 5 dresses in 5 weeks. I ordered a bunch of new patterns from Vogue during the recent 3.99 sale. I'm sure they'll arrive by next month, what with this company's terrific reputation for mailing patterns within 2 weeks of receiving one's order. (Yes, that was sarcasm.) Lots more to come on this, so please stay tuned. (Note: I need a couple of weeks away from sewing to actually deal with my life so this won't begin till mid-May, realistically.)

The Package I've Been Waiting On for Freakin' Ever: And speaking of hideous shipping, I'd love to tell you about the Ewa Michalak lingerie set I bought on March 28, but it still hasn't arrived. Nor has the company had the decency to respond to any of my tracking-request emails over the last week. Gotta say, I knew, going in, that the customer service reputation of this company utterly sucks, and at this point I'm pretty sure it's well-deserved. This bra is going to have to rock my world in order to inspire me to bother with "boobs on a plate" queen, Ms. Michalak, ever again. I've read in numerous places that her son, Dominik, is the weak link. He's the customer service face, from what I can tell. I can corroborate that it's been radio-silence from him (after an email which advised me that I'd have to wait a certain period of time before they'd look into the whereabouts of my order). Anyway, I'm having the full experience, and you'll be sure to hear all about it when the time is right.

Updated: Dominik has sent me three messages today to apologize for taking so long to reply to my emails and to reclaim the original order and send out a new one. While I'm very happy to hear from him, and I do appreciate and accept the mea culpa, I do wish things hadn't conspired to put me into the mindset I was in when I wrote the paragraph above, yesterday. We'll see how long the next order takes. I think it would be particularly good client service to courier the new package to me, not that I'll suggest it.

Phew. Are you still here??

Today's questions: Do you think I'm insane for not having tried on my suit yet? Do you think I'm insane for trying to make another bra? Do you think I'm insane for having ordered that nutsy-patterned bra kit? Do you think I'm insane for having tried Ewa Michalak, despite the many dicey reviews? Let's talk!

Monday, April 22, 2013

The Spring Suit: Skirts and Buttons, Oh My!

What I can't show you is a finished suit.

What I can show you is the contents of a package that arrived today - self-fabric covered buttons, from California:


This photo best captures the colour of the suit fabric, btw.

I've got to put these on the jacket, currently sporting pretty (but not optimal) rose buttons. I have to say, they're likely to elevate an imperfect garment substantively. I got all of these for 13 bucks, btw.

(Totally off-topic, but a propos of not having any time to sew on new buttons (much less the inclination): When I'm going to have 5 minutes without a headache is beyond me. Did I mention that my gardens are not going to spring-clean themselves?)

I can also show you a bunch of gratuitous skirt shots (is there any other kind??):

The higher left-shoulder of my dress form drives me INSANE

You can see how the fabric has not responded optimally. I've treated it with kid gloves and it's still kind of crappy (where I've underpressed it, to avoid what happens to it when I press it right)

The waist is rather well-executed. Note that the little wrinkle on the right side of the photo is just that - it's not a permanent flaw.

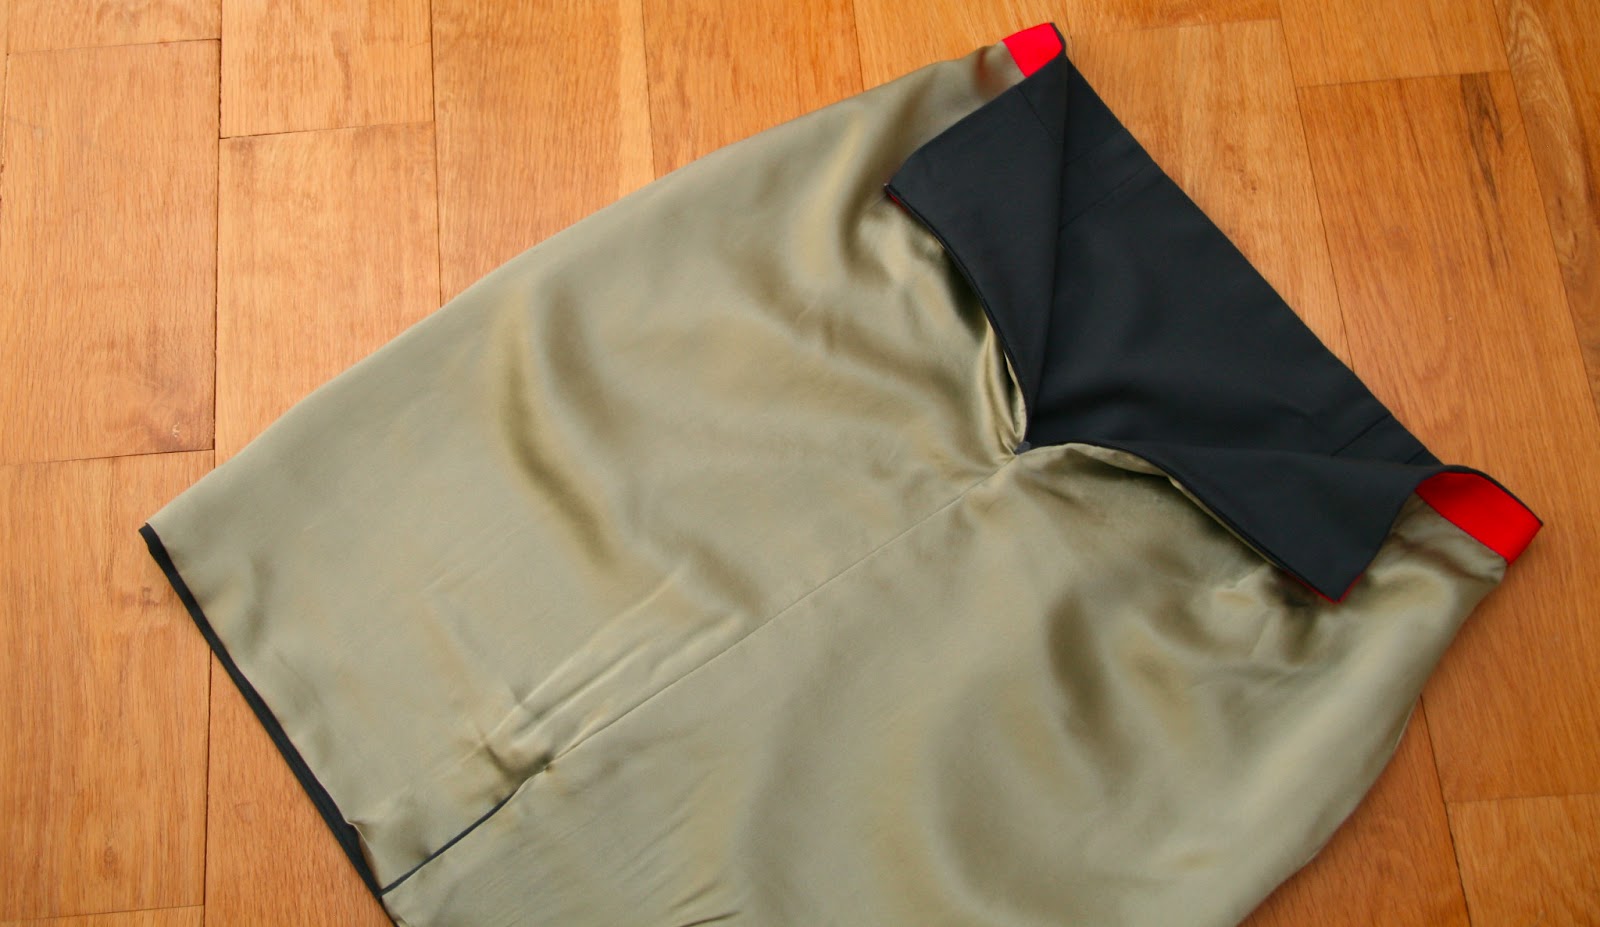
Ooooh, sassy! Gotta love that colour combo, yes??


Oh, the zipper looks alright here... Just don't pull too hard.
True story: When your notes tell you that you need to use 2-inch petersham ribbon at the waist (as you did once before) - LISTEN! I looked at the previous version and thought: That ribbon's not 2 inches - it's 1.5 inches. (Alas, that's the thing about a half-inch seam allowance is that it eats up half an inch.) I am one of those peeps who really benefits from a wider waist-facing because I have a little tummy that begins below my natural waist. I can only assume that this skirt isn't going to last too long (vis a vis the zipper-insertion stupidity), so I'll have a chance to try again.

Sunday, April 21, 2013

This Way Up

One of the challenges in sewing in a lining of just about any sort, is that you really only have 2 kicks at the can. Oh sure, some people might be able to eke out 3 or 4 tries (I suspect the correct term for that is "eek"), but if you're working with a fabric that frays (charmeuse - I'm looking at you, bitch) or a zipper insertion, you're likely asking for trouble the first time you unpick.

Of course, when one beautifully sews a zipper into a lining, and then just as beautifully sews that into the outer garment only to find that the zip insertion in the lining is inside fucking out, well, then (s)he has no choice but to use up that second life-line.

Ask me how I know.

Now, let's add some fuel to this fire: Let's say that you originally used double-sided wonder tape to "baste" the zip to the lining. (On the first try, that works beautifully, fyi.) On the second go, after you've picked the stitches and the zipper off the lining and the double-sided tape stays seriously affixed to the frayish, floppy lining fabric, then you've got some issues. (Non-sewists: No technical skill is required to understand this scenario. Quite simply, it's a royal fuck-up.)

Word to the wise: At this point, throw out the original zipper. Give it to the sewing goddess and get a new one. Cuz if you flip the old one over (with some of that adhesive still stuck on that side), you're going to wreck a couple of needles and then - even when you get a nice-looking finish - the charmeuse is going to stick to the zipper in such a way that every time you try to open or close the fucking garment, the lining is going to get sucked into the teeth.

Cuz if you don't do it before you start the second insertion, you won't have another chance. And then your "looks pretty good" skirt with the zipper sandwiched (professional-like) between the lining and the fashion fabric will merely look good.

Personally, I prefer functional closures.

Now, if you'll excuse me, I'm going to drink something strong and eat an ice cream bar before dinner. More reflections on this suit are pending. And lots of shots, natch.

PS: I grabbed the camera to take some pics - I mean, it doesn't look half-bad - but the kid (amateur photog that she is) burned out the batteries again. So we'll have to wait till tomorrow for that.

Wednesday, April 17, 2013

The Spring Suit: Some Pics of the (Almost) Finished Jacket

For starters, the jacket is finished, more or less (for deets, see below). Let's take a moment and be grateful about that because I won't have to think about it for a week or two, and you won't have to listen to my bitching anymore for a week or two (theoretically).

To forestall mutiny :-), here are some PREVIEW pics of the jacket. I still have to make the bottom part of the suit and a few adjustments to this jacket version and, really, I'm kind of ambivalent about it at the moment. I wasn't up to modeling it today.
The piece looks pretty meh on the dress form, which is too wide for it, so I thought it would be better to show it flat:
The buttons, while temporary, are very sweet. They're vintage - little roses.
Oooh, pretty lining (and bagged!)
Trust me, the buttonholes are very nice. They don't look it here, but you'll have to take my word.
Here's a shot of the sleeve facing where it meets the lining. I particularly love this part of the construction.
I won't lie - I'm conflicted about the Burda suit jacket. On the one hand, there are things about it I hate:
  • the quality of the shell fabric (it actually looks cheap, horror!)
  • the slightly-too-long 3/4 sleeves (um, I've spent 2 months on this thing - could they not have drafted it with full-length sleeves?)
On the other hand, there are things that I love:
  • the lining fabric
  • the way the lining falls in the shell garment
  • the proportion of the altered lapels
  • the placement of the sleeve in the armscye and the fit at the underarm (these were real liabilities, and hard to fix, so I'm proud to have largely resolved them). Intriguingly, while I worried as I was making this, that I'd altered the armscye "too high", once I clipped the extra fabric under the arm and inserted the lining, the fit became very pleasant - it provides mobility and adequate ease.
Then there is that catch-all basin of things that aren't great as they stand now, but might be alterable (in this version) - here's hoping or I've got bigger issues than I care to address:
  • the placement of the upper button unit which lies against the body - it's causing weird pulling which, I guess, shouldn't surprise me overly as it isn't actually part of the original pattern design, but my ad hoc work-around to address excessive gaping above the one set of buttons that the pattern actually does instruct about.
  • the external buttons - they're placeholders and I think they're too heavy for the fabric, and the wrong shape (lovely thought they are). I'm waiting on my self-fabric buttons from California. Here's hoping they fit the buttonholes I made in their absence. (I think I ordered the right size, but only time will tell... At least I have more fabric in a pinch.)
  • the internal buttons - I forgot that the internal buttons on the left side (which I used to merely to stabilize and to provide a clean finish) are actually for use so I'm going to need to replace them with ones in the correct size to fit through the buttonholes. The current ones are too tiny - if cute (and they all match).
For all of this learning, and working, I still don't know if I like the finished design. It's vaguely, um, twee on me. And a bit boxier than I would have imagined given all the work I did to "hourglass it up".

I do suspect that this is one of those suit jackets than needs its counterpart (pants or skirt) in order to look its best. Alas, I can't confirm that till I make the skirt, which won't happen till this weekend. (Note: Even as I write this I am reminded of Clio's fantastic leather version which definitely goes with everything and requires no matching bottom. But leather is not fabric. And her version has a zipper and a peplum. In certain ways it's only notionally the same pattern.)

Insecurities and ambivalence aside, I do feel very satisfied with this process and by what I've achieved. I'm a MUCH better seamstress, tailor, pattern drafter, fitter, human being... I've learned skills I will not forget, things I'll bring into every future project I take on, such as the next version of this jacket which I suspect will begin at the beginning of May. (I need a bit of a break and my family really suffers when I do a project requiring so much engagement... I also need to wear this as much as possible over the next while, so that I can begin to understand it in motion.)

Next up, the pencil skirt - my standard, Vogue 8640. I intend to line this vented skirt (the pattern instructions don't include a lining) and to face the waist with petersham ribbon in a crazy contrast colour. (I am such a fashion bad ass!) Stupidly, I've managed to lose the incredibly useful package of notes, photos and instructions I created when I made this as part of the Tailored Suit project (the one with the Starlet suit jacket). Fortunately I have a soft copy of my basic instructions and I know which posts provided the required tutorials (thank you Sunni and Tasia).

When the skirt is done, I'll show off the whole suit in a formal photo shoot. Till then, hopefully these pics will have given you something to go on. Stay tuned for more about the skirt construction. Something tells me I'll have things to say about it.

Sunday, April 7, 2013

The Spring Suit: Construction Update (More)

OK, just finished today's stint on the Burda jacket and I've learned a lot. Much of which I don't feel particularly good about right now but I'm just going to get it out there so that I can process it and move on. I've got one of those mega-intense, think-headaches. Maybe if I write about it, all the thoughts that are crowding painfully will leave. I can hope.

The garment is most definitely another muslin. Will it be wearable? I suspect yes. Is it where I want it to be? No. And the worst part about this is that it means I'll have to go back to my pattern pieces and adjust them yet again. Even though I'm not exactly sure of how, right now. (My brain's gotta chill... You know when your headache gives you an earache?)

The things I'll need to change going forward, but which can stand in this version of the jacket - let's call it garment 1:
  • The armscye is a little bit high. I need another .5 inch of space between my underarm and the lower armscye seam. It's not a deal-breaker. I can certainly wear the jacket, but it's a bit too snug in the underarm. Mind you, the mobility is good!
  • Scott noticed that the back is pooling at the mid thorax. It goes away when I pull the jacket down slightly but, needless to say, that's not a long-term design option. The thing is, I don't know if it's the back stay (made of hair canvas) that's contributing to or even causing this. The issue wasn't present in the muslin but then the muslin didn't have any fabric ease to speak of. Now I've got a very drapey fabric against a very firm one and it could be causing the problem.
  • Man, this merino faille suiting takes a deft hand. Potentially a defter one than mine, I regret to say. It's not taking to my pressing very well. Probably my iron's not up to it. Possibly, it's not the kind of fabric that does well with fusible interfacing. I'm going to go out this week to buy the fabric for my next version. I'm going to be exceedingly careful about what I choose.
The thing I've absolutely got to change in this version:
  • Why is it that, when you find a good alteration - like rotating the sleeve in the shoulder to manage forward rotation - it's so tempting to overdo it? I managed to make my left sleeve a whole extra inch more forward rotated than the right sleeve - which was already forward rotated by an inch (and even that might have been too much).
The last thing I did today was rip out the left sleeve (after having inserted the shoulder pad and slip stitched the ease-bias strip). That's a tough end to a long day.

But let's focus on a bit of good:
  • The fabric managed remarkably well through the removal of the first dart, re-cutting of the front armscye, and resewing of a new dart. That's the one thing this fabric seemed to like.
  • I do think that my sleeve fix - the one wherein I moved all of the extra fabric to the front sleeve (vs. my original, crazy idea of having half on the sleeve and half on the armscye) - was successful. It might seem ridiculous that I didn't realize, right off the bat, how to add fabric to this seam. But I've got to tell you, it's all theory till you make a mistake.
  • I calm myself by remembering the wise words of Mardel, one of my first sewing teachers: Sometimes you need space between you and the work. What seems horrid now, may seem very adequate in 2 days. It's almost impossible to believe that right now, but I know from experience that it's true.
  • My interest in making this work is in no way daunted by my latest challenges. OK, that's a lie. But I'll get over my dauntedness and live to sew another day. And when I finally process everything I'm learning, I'm going to be much better at this craft.

The Spring Suit: Construction Update

I'm going to make this post brief because my head is all up in the jacket construction, but I want to give you a status update (and share with you some of my mistakes to date).

While this is definitely a final garment - I've worked very carefully with my materials and I've aimed to make the assembly very "professional" - there are some elements to it that still feel quite "test garment". That's not to say that I started putting together the final garment too quickly. I really think I chose the right moment. The thing is, there are no real instructions associated with this specific garment. Burda's are ridiculously non-commital and, were I to have used them, my jacket would be in bad shape. The tailoring book is super useful, but it doesn't address my pattern, simply technique.

(I will second Clio's perspective that to sew the facings onto the jacket - having already attached them to the lining - would be insane. I don't know how one's delicate lining could sustain the kind of pressing and clipping of the facing, after the fact, to attach it to the garment shell.)

Now, having said all that, I really should have sorted out my sleeve situation before I started making the final garment, but not for the reasons that you might imagine...

The sleeves, I sense, once I get everything redrafted and I re-cut the the upper sleeve, will be OK. After all, as far as the bodice shell is concerned, I'll only be removing fabric from that area. Alas, and listen to this one cuz it's important: The extra fabric - once I remove it - has no bearing on the final sleeve. But it does impact the angle of the dart I sewed into the armscye.

Fuck. That dart is now sitting wrong and I've spent the last 12 hrs trying to decide whether to try and lengthen it a little, and live with it. Or to - at this late stage of the process - unpick the original dart and redraw/sew it.

The benefit to the former option is that the integrity of the fabric will be retained. The negative is that the fit will be imperfect. By contrast, the benefit of the latter option, unpicking and realigning the dart, is that I might be able to redirect it as per the original intent. The negatives though, they could be extreme: my fabric might not be up to it (I really pressed the crap out of the original dart), The shell is sewn. What if there are impacts I can't envision on the basis of the sewing that's already been done?

And, the time to make the decision is now. I won't be able to do it once the sleeve is in (my next step).

I suspect I'm going to unpick and take my chances. So give me some good sewing vibes please!

Whatever goes down, I'm remaking this jacket almost immediately after I finish this first effort. I need to understand the construction better and to write my own instructions (for use in a year, once I forget what I've painstakingly learned these last few sewing sessions).

While this is not going perfectly or smoothly, the way one hopes a garment will after having made 4 muslins, it's a complicated garment and those muslins were for fit, not construction. I'm still feeling very optimistic about the long-term potential for this jacket. It just remains to be seen whether I debut this one, or the one I intend to make in two weeks.

Wednesday, April 3, 2013

The Spring Suit: Construction Begins

There are those days - you know them: You work so diligently to be organized, to think intelligently, to accomplish what you've set out to do, and yet the sewing goddess has other plans.

Those days are hard. In the moment they're actually heavy on your body. You come to question why you try, why you want to sew, how you're going to avoid ever having "another one of these experiences".

And then there are days like today.

I started in my sewing room at 9 am (on hols till tomorrow) and just emerged (with a little time away for lunch). Every freakin' moment was productive. I'd even go so far as to say 80 per cent of my day was pure pleasure.

Here's where I'm at - about 8 hours farther along that I hoped to be (not that I'm tempting any fates):
  • I decided to "tailor lite", using fusible interfacing with some hand-work techniques thrown in at certain points (stay tape on roll line, back stay - basically, all the stays will be hand-worked)
  • Machine prepped, bobbins wound, swatches tested
  • Tested my Singer for buttonhole capability. Gonna go this way...
  • Pulled together scraps of appropriate dimensions to mail to the lady who makes fabric-covered buttons in California
  • Sorted out how the buttons are going to be positioned on the front of the jacket  - which only yesterday I finally realized (consciously) is double-breasted, albeit double-breasted below the breasts :-)
  • Cut out all of the pieces (40-something of them) - except for the lining which I don't want to cut till it's time to assemble as the fabric is silk charmeuse and it likes to go wonky if you let cut pieces sit around. I also marked them.
  • Iron totally cleaned and used to interface all of the pieces (except a shoulder stay - I lied when I said all of the stays were going to be hand-tailored) - it was hand-drafted though, if that counts!
  • Sewed the darts into the side fronts (after interfacing it with the dart cut out of the interfacing)
  • Sewed the fronts to the side fronts
  • Assembled the lapels, graded and turned the fabric, then hand basted it to the jacket front
Seriously, I was like a fucking machine.

It helps that I have no instructions worth looking at so I'm actually constructing this from memory, my tailoring tech book (when necessary) and the occasional glance at the Burda "directions" (aka 3 sentences that seem translated from another language). I'm following Clio's advice which is not to follow the Burda directions too carefully - esp. when it comes to the facings and lining (2 of the 3 sentences).

I cannot tell you what a JOY it is to sew simply from my own experience and skill-base. It's like magic and I love it and it thrills me and I'm so grateful to have times like these.

But don't let me give you the impression that it's all puppies and daffodils. I've encountered a couple of situations that are potentially problematic - to the extent that, after I make this jacket I may opt to call it yet another muslin and go buy a whole new whack of fabric and start again.

(OK, that was dramatic. I'm gonna make this another 12 times, I suspect, so what's the harm in starting 2 weeks from now.)

Here are the potential problems (which may also be totally resolvable, it's just unknown at this moment):
  • I don't love the interfacing (at least I don't think I do). It makes the fabric very responsive to pressing and I've managed to make one of the side front seams a bit crunchy and overdone. Of course, I tested a whole bunch of interfacings to see their effect on the fabric. But little flat swatches are not the same as long, three-dimensional garments. At first I thought this was a disaster and I'd have to scrap the whole project. But as I've come to understand the interfacing and its relationship to the fabric, things have improved. Here's hoping my learning curve is not overly noticeable. The challenge is that you have to get that stuff to stick forevah. So you have to steam the shit out of it. But then you run the risk of making the fashion fabric seem brittle. Tip: Definitely steam and press both sides of the fabric (with a pressing cloth!). Bubbling on the right side (fashion fabric) will disappear when you do this. Who knows if it will do it permanently. Man, weft interfacing makes a HUGE difference to wool suiting. In its own way, the impact is as profound as hair canvas, if totally different.
  • It would have been smart to make another muslin, cuz (following my last muslin change, wherein I added a bit more fabric onto the front armscye and front sleeve) my dart didn't align at the front-armscye cut line. This could be a very bad sign (if there's not enough fabric) or just fine (if there's more than enough fabric or just the right amount). I have to continue as if it's one of the latter 2 scenarios because I spent a fuck of a lot of time considering this situation before I finalized the pattern. Thing is, I don't really know what I'm doing when it comes to pattern drafting, so I may have messed it up. Only time is gonna tell. Note: At first I was paralyzed with horror but, as I continue to think about this, I suspect I'll be able to sort it out, even if the fit isn't optimal. (See: This might be a wearable muslin but I'm making the next version ASAP.) 
  • Fuck - it (just this minute) came to me. I should have added all of the extra onto the SLEEVE and none onto the armscye. If I end up recutting those front sleeves (to add another .5 inch onto them), it's gonna eat into my remaining fabric big-time. I spent 2 hours wondering how the hell to add that fabric in and it's SO simple. Really, this corroborates that there is no way to learn except by making mistakes.
You know you're developing as a sewist when you can keep on with equanimity knowing that it might end well or less well. The truth is, it always ends well or less well. And we never really know until it's over. Right?

Sunday, March 31, 2013

The Spring Suit: Spoiled for Choice

One of the things I've been debating since I changed tacks (aka opted to make the Burda suit jacket vs. V8333) is how to tailor the jacket.

On the one hand, the materials I've purchased are of good quality, and I have just about every sort of interfacing known to man. On the other hand, the Burda jacket is of an entirely different style. It's softer-looking than the Claire Schaeffer jacket, at least to my eye.

I don't want to use crisp interfacing and underlining just for its own sake, and because I love the process of hand tailoring. I also don't know if I'd be better off hand-working the buttonholes with silk twist and gimp (I've bought both at great expense), or by just using a machine. On the topic of the machine: I've had numerous good experiences with my vintage Singer on this account (it's the only thing the machine actually does well, probably cuz it needs a recalibration, the likes of which my husband and I are unable to undertake ourselves). I mean, I've machine buttonholed numerous sweaters at this point - at the very final moment after having spent weeks on them. So I do trust the Singer. But machine buttonholes, after a very bad experience that torched an entire project, are scary to me. The one option has me learning a new skill (perilous, I suppose). The other has me machining into my finished jacket at the last minute. At least with the hand-worked buttonholes, I will have practiced, it will go slowly and I'll be slightly more in control, she says knowing, um, nothing.

Observe my interfacing options:


From left to right, that's hymo (hair canvas), silk organza, weft interfacing and another weight of weft interfacing (I think that's what those last two are called but, in truth, the interfacing is harder to identify than to use. The first 2 are sewn in. The second two are fusible.

Here's another quick shot of my fashion fabric and lining (in case you've forgotten about them):


I'm ticked that these fabrics look wan and inaccurate in photos. In real life, the slate blue of the fashion fabric is mesmerizing. And the celery-shade of charmeuse is an excellent complement.

In order to keep it all straight (Lord knows Burda "instructions" don't give you any means by which to organize yourself), I've written lots of notes, amongst them all of the fabrics I've got to cut out (by pieces) and ways to prep those fabrics:

These notes go on for pages - didn't want to traumatize you...


BTW, I took this great pic of all the re-traced (clean and beautiful) pattern pieces (including the ones I had to make from scratch cuz Burda doesn't provide them: facings, interfacings, stay, lining - when distinct from the pattern pieces) and then my computer ate it. Fuck. There is no way I'm setting them up again today for another shot. There are like a zillion of them.

Um, talk about burying the lead. I finished the final muslin yesterday afternoon. I returned to the original muslin's sleeves which were much closer to what I needed than the ones I spent hours creating on muslin 3. I did some more tweaking (namely taking lots of height out of the sleeve cap) and decided to call it a day. Is it perfect? Only time will tell. The front armscye is going to be interesting because I ended up needing more fabric there than I'd originally expected (to optimize motion). I altered the pattern pieces accordingly, but I'm not making another muslin. (I did leave more seam allowance in that area, just in case).

Intriguingly, I happened upon the one paragraph in Sarah Veblen's tome in which she urges one to know when it's time to stop fitting (at the risk of overfitting a test garment the properties of which are, needless to say, quite different from those of the fashion fabric). I took it as a sign.

Today I'm off to Hilary's for Easter dinner and tomorrow morning M and I are going for manicures and out for a pre-birthday lunch. I've opted to take Tuesday (M's birthday) and Wednesday as holiday days - in which to sew more - but I will have certain responsibilities and activities that will impinge on my being able to give it 12 hour blocks of time, as I have been able to for the past 2 days.

By Wed, I hope to:

  • finalize where the buttons should go on the front
  • get the fabric prepped
  • get all of the pieces cut
  • decide about what kind of tailoring I'll do
  • fuse pieces (if that's what I opt to do) 
  • get set for the sewing (to start next weekend): check my machine and test fabric scraps with needles to ensure I know what my best stitch lengths and tension should be.

Exciting times, peeps.

So, today's questions: Do you think I should hand-tailor or use fusibles to tailor this jacket? Regardless of whether I use fusibles, do you think I should use my machine for buttonholes, or hand work them? (FYI, the pattern doesn't indicate what kind of interfacing to use, as far as I can tell. You have to look at tiny pictures simply to determine which pieces are to be interfaced at all! I'll be using my tailoring book to walk through the steps - be they hand-tailored or fusible.


Friday, March 29, 2013

Pointing In the Right Direction

There are learning moments that are doubtless game-changers. Don't get excited, I'm still deep in the middle of fucking irritating confusion, but I sense that I will, hereafter, know something critical. In a fitted woven bodice, I need an armscye dart:

Remember - this is a work in progress AND the dress form is not of the same dimensions as me... Note: The shoulder pads are inserted.
Yeah, I suspect I'm one of the 10 people on the planet who have to alter the princess seam at the bust (to give more room) AND THEN add a dart. When the freakin' jacket is already open over the full bust?!?!? That's what you get when you're fairly narrow everywhere but in the boobs - if the boobs go straight forward rather than out towards the sides.

I don't know why I resisted this for so long. It's not hard and it freakin' works! Finally, there's no puff at the armsyce seam on the front bodice and the slope of fabric that lies over the bust is flat. And, theoretically, I should have an increased range of motion at the shoulder joint. Maybe I'll even be able to raise my arms over my head! :-)

Apropos of that, fitted jackets aren't the garment known for full range of arm motion. But maximizing motion is important.

FYI, it's a 1.25" dart that I angled towards the full bust (where the plus sign is diagonally to the right) but stops quite short of it because I don't want to overemphasize the apex. Plus, that is its natural end.

You can see that I've had to remove still more fabric at the waist, about another 0.5" at each side seam.


The back is looking pretty good, IMO. I still have to press the centre back seam (I took another .5 inches out of it at some point and didn't press). It's quite hard to see - esp. as the shoulders on this form are NOTHING like mine, but on the left side I have taken an extra .25" out of the back armsyce (brought the back seam of the armscye in line with my own). I don't know if I'm going to go with the left-side alterations or stick with the earlier-iteration right-side.

The pattern was drafted with no centre back seam but S smartly suggested that I add one. If you are curvy, I feel that a centre back seam is de rigeur. It gives you another seam to fool around with, which is very useful.

Time was, I thought seams were kind of remedial. Crazy, I realize. I thought the whole idea was to make as few seams as possible because that's how you show the fabric off to its best advantage. What I've learned over the years is that seams are totally unobserved by the average viewer. People notice good fit, not the mechanism used to achieve it.

I suppose it's the subject of another post, but I really have improved as a sewist via the 8000 muslins I've made recently. It's tricky, to put it mildly, to ease the princess seams (front to side front and back to side back) when you're dealing with a fairly intense curve. I've done it so many times lately that, at this point, I intuitively know where and when to clip the seam allowances. I've also determined that it's truly necessary to sew (slowly) over the pins on those seams (bad practice though it might be) because removing them as you come upon them, but before you sew, completely skews the fabric.

I loathe making muslin after muslin but I guess, even here, there's a silver lining. Don't misunderstand. I'm SO done with this phase of the project, even as I (miserably) keep on going. I don't know where I find the tenacity. But - to understate things excessively - I'd really hate to make a suit that just doesn't fit.

Blessings

I've decided to feel genuinely grateful that the universe wants to give me every opportunity to internalize this pattern alteration process.

Meet the beginnings of muslin 3.5 (those green lines represent where the next test garment's seam allowances differ from the, now sliced up, current one):


I just can't bring myself to call it muslin 4.

I honestly think I might have a nervous breakdown if I have to draw all of those markings one more time. Though it does occur to me that I can do whatever I want.

Fuck it. I've got the grainlines running straight and the HBLs are level. Next round, I'm not drawing the seam allowances. I REFUSE.

I was all smug and ready to move to the real fabric when I talked to S on the phone. She asked me to send her a pic of me wearing the muslin, arms raised over my head. I told her I didn't think that was actually viable (but I didn't care).

Turns out I care.

Of course, once I redraft the armsyce (and tinker with other seams), I'm gonna be all back to scratch on the sleeve.

Which is why I'm so pleased that the universe knows I'm up to it.

I feel very special.

Saturday, March 23, 2013

The Spring Suit: Muslins Apace!

Muslin 2 - Burda 07/2010 - 119
Gotta say, this pattern is never going to be known for its catchy name: Burda 07/2010 - 119. From here on in, let's call it the Burda suit jacket or the Burda jacket, 'kay? I'm making the version with the buttons and without the peplum, fyi.

What you're looking at in the photo, above, is my second muslin shell having made the following alterations:
  • Removed 5/8 inch from the width of the armscye at the shoulder seam, tapering to nothing under the arm
  • Raised the waist by 1 inch (this one's standard at this point)
  • Added 5/8" of fabric to the bust point of the side front (the "FBA")
  • Slashed the front piece above the bust to allow it to fall - thereby a) getting rid of bubbling fabric above the bust and b) leveling the HBLs
  • IMO, the most ironic of alterations - I added an inch (removed by shortening the waist) to the jacket hem - because I want to retain the original length of the jacket (which isn't long to begin with, ending at the high-hip).
A few considerations:
  • This is the first time that I've actually altered a woven pattern muslin of this complexity on my own - and I owe it all to my fitting friend, S. Please keep in mind, I haven't sewn it, so don't be congratulating me quite yet. :-) I take this as a real sign of skill development, regardless of how muslin 2 comes together, because I finally found my confidence. (Given how I'm feeling these days, in general, no proactivity can be trivialized.)
  • The tailored suit jacket is absolutely, positively, unquestionably the most difficult garment for me to fit on my own body. Arguably, suit jackets are amongst the most challenging things to make (from a tailoring and technical complexity perspective). But for me, sewing skill is barely on the radar - well, till I ease the side front piece to the front, and then the sewing is a fucking feat!
  • My point is that this process is complex and every part of it pushes me forward to new understanding of how my body is shaped (and bodies in general are shaped) and how this influences our final product.
 S has reminded me so many times now about:
  • Walking the pattern before everything, to ensure that the markings are accurate
  • Determining where to put the horizontal balance lines (one above waist, one above bust)
  • Remembering to mark the HBLs, waist, grain, all pattern markings and seam allowances
  • How and when to make a wedge alteration
  • How to mark the working muslin in such a way that the alterations can be applied to the pattern pieces accurately
  • How to use that blue paper and the roller thing with the spikes to make sure that new seam allowances are exactly reflected on the pattern pieces
  • How to "look" at the muslin mathematically
I'm not going to lie, this process doesn't really thrill me. Well, it doesn't thrill me till I get all of the horizontal lines to lie horizontally and the vertical lines to hang straight and the notches to all intersect where they should. And, when the freakin' thing fits over my boobs, that's pretty thrilling.

You'd be amazed by the way in which all of these hard-drawn lines tell you what you need to know. (And by that, I don't simply mean: Stick with knits, idiot. :-))

Despite all of this, I'm not an "in the weeds" sewist. Just ask S, who is frequently amused (if not horrified) by my slap-dash interpretations. I do not want to make 7 muslins of a jacket. I kind of resent my last suit jacket on that basis (though that process was unavoidable). I'm committed to constructing one more muslin after this one - to tweak fit further and to figure out how the freakin' sleeves are going to intersect with the armscye - and then I want to make something.

I'm actually very intuitive. For what it's worth, I define intuition as "instinct, refined by a keen awareness of the technical on a conscious and subconscious level". Most definitely, I bring this quality into my process. What delights me endlessly about making things, is that I get to spend quality time with my intuitive self and, let me tell you, she is FUN. I love it when my fabric tells me - in the moment - what to do. In truth, intuition is always the final arbiter, for me, and - while I recognize how critical it is to be scientifically precise - there ain't no fighting who I am.

It's taken me (never mind the V8333 jacket I've since scrapped) approximately 15 hours to get to this stage of muslin 2. And I haven't even considered how my significant armsyce adjustments are going to impact a 2 piece sleeve that, Clio tells me, starts out fitting bizarrely.

Though I've brought little ammunition of consciousness to it, armscye and sleeve adjustments seem to be an alteration I come across again and again - probably because I haven't been able to get my brain around making the size that actually fits my shoulders. In the case of this jacket, I do think the shoulders are strangely drafted, which is to say super-wide, and that I chose the best starting size. I am a standard EU40 in a woven top in RTW and this pattern is also a 40. It does seem to fit nicely and narrowly everywhere but in the shoulders.

Most definitely, despite all of my alterations, this jacket fit better, "out of the envelope" than any pattern company's offerings ever have in the past.

So, today's questions are these: How many muslins do you have in you?? Do you use the fitting axis approach to muslining (using the grain and HBL lines as a guide)? Are you a technical or intuitive sewist first? Can you overthrow perfection for action? Can you stand to be more precise? Let's talk!

Sunday, March 17, 2013

Remember That Spring Suit?

You'd be forgiven for thinking that I've ditched the project altogether - and not merely my original jacket choice. (Hopefully, I'll be forgiven for my delinquency.)

One of the great things - side bar, but on point - about meeting the glamorous Clio a couple of days ago, is that she was able to give me some info about my new spring jacket pattern because she made the peplum version in leather (aka best project ever):

Burda 07/2010 118-119
 Would it kill them to photograph the jacket in such a way that you can see what's going on??


The technical drawing gives you a little bit more... FYI, in truth I'm confused at the moment. I don't know if I'm making the version with the zipper or the one with buttons. And I don't mean "I haven't decided". I mean, my fitting friend (aka "the nicest person on the planet") traced the pattern for me and it's only after I write this post that I'm going to go upstairs and see the pattern pieces for the first time, draw all of the seam lines and then make the muslin. So let's see what's coming! Happily, I love both options.

Clio did infer that it's one of those jackets that attracts men from far and wide. Mind you, she is so gorgeous, I'm sure she finds that happens wearing many outfits! And on the topic of outfits she wears - this dress really is as chic in person as it is in pics. Lest you think she's just a pretty face, we had great conversation about politics, work, careers and family. You know it's a good meet-up when you barely have a chance to speak of the hobbies that brought you together for all the other things you want to discuss.

I sense that I will redraft the lapels slightly. They are wide for someone of my proportions. Mind you, that's the joy of the muslin, yes? One gets to see how everything's been drafted and then to change it if she chooses.

As I was considering new jackets to make, I did come across a very exciting vintage option on Etsy. Yeah, I bought it (though it was a pricey, unprinted vintage pattern). It's not where I'm at for this project. I don't have the energy to learn about how to make a jacket with barely any instructions and no printed markings - especially given the complex tailoring involved, but I will post about it soon - cuz it's very lovely and who doesn't like to look at a pretty vintage pattern envelope?

In the meanwhile, today's questions: What do you think of Burda patterns (this will be my first)? What do you think of this jacket (very different from V8333, yes?)? Is Clio's version not a thing of beauty?? (I want to steal hers, say I made it and call it a day.) Let's talk!

Monday, February 25, 2013

In Sanskrit, Yoga Means "To Yoke"

Where to begin, as I sit here nursing a martini? I am all over the place. I should be knitting. I should be planning. I should be cooking.

Instead, I'm blogging. What can I say? I'm a writer first.

Let's start with an update on the Spring Suit. I can count the number of times I've done this on one hand, but I gotta level with y'all: I am leaving V8333 behind.

Don't fear! I'm still going to make a tailored jacket (if one that's slightly less "couture"). And I'm also going to work with S on her V8333 - cuz she's still into it. But I'm moving on because, quite honestly, I don't much like the look of this garment on me.

In truth, we had a better-fitting muslin of this garment before I made the drastic changes leading to where we're at now. It's now far too big everywhere, having added onto that side front piece like a nutcase. S and I recognize we took a bad turn somewhere. (Um, hello, this IS kind of rocket science.) The fix is to a) start again at the very beginning (given the insane shape of the current muslin) or b) say goodbye and make another jacket (starting with a totally new muslin, natch!) that might actually suit my shape better than V8333.

I'm conflicted. You know I don't like to give up on things. Mind you, I do realize that I could persist, spend another 40 hours on muslining (that's how much I've spent so far), use 200 bucks-worth of materials and not love the end result because, really, on me this thing is kind of dowdy.  It emphasizes my widest parts and de-emphasizes the small and nicely-proportioned ones.

The point is, with the benefit of a test garment (and a fuck of a lot of work), I'm opting to do something that will turn out better. I'm not giving up because I can't do it. I'm moving on because the process has served its purpose.

It's not my fault, neither is it the pattern's. In fact, I'm glad I get to go through the V8333 process with S, because this jacket looks much nicer on her frame.  Mind you, I still feel kind of crappy about this turn of events.

I've chosen a new pattern, by Burda, a brand I've never tried because I'm afraid of the overlapping patterns. S says the drafting is superior, in her opinion, to just about any other company. She also offered to trace it for me - which is outrageously nice of her and I didn't even try to resist out of politeness. I considered it briefly, then realized I was really grateful not to have to do it, and said thank you very much. BTW, more to come on the new pattern soon, natch.

OK, onto the next thing... I went to a lovely TO blogger and sewist meet-up organized by Gillian and Adrienne and I am so thrilled to have met some wonderful peeps. I had no idea there are so many representin' for this town! Of course, I bought new fabric and notions that I probably didn't "need", let's face it - which I'll no doubt discuss in coming posts. Crowd mentality is dangerous! :-)

And on the topic of stuff I don't need, the Fabric Mart Modal arrived. What a disappointment. It is entirely different from the original order (aka the batch I bought last year) - to the extent that I almost don't believe it's Modal (not like any I've seen before). Furthermore, it's peacock green! Like crazy, light-green meets blue (sort of). Aquamarine, my ass. I might even have returned it, what with my recent purchase of Tencel that has basically the same drape and fall, but that would be way too much effort. Who can say. I may find a great use for this stuff and recant my current bitch, but you're just gonna have to wait for it. The colour is out there, though.

OK, finally (presuming you are still reading), here are a few shots of the Indicum Pullover as it stands currently:


This is my first yoked sweater and I find it fascinating... It's all wrinkly cuz of the front (which is underneath it) but I assure you it's a lovely, old-school look.

Whatcha think of my first attempt at stranded-colourwork?
In a totally bizarre turn of events, I've managed to accomplish most of my 2013 "goals" in the first quarter of the year. Phew. Now I can get on with the under-functioning! :-)

I'm going to write about this project in more detail, of course, but I will point out that I should have made a smaller size - as always... And I made the second smallest size. And I'm not exactly a waif.

Also, there's not as much shaping as I prefer, nor is there any stretch to speak of in the ribbing at the neck or hem. Plus, they curl (as others have mentioned). I do hope this blocks out.

On the plus side, the fabric isn't nearly as ugly as I thought it would be. It's insanely soft (though, here's hoping there's good recovery in the stretch once one wears and blocks it). For once I made a sweater long enough. And, it's got lovely lines. Very lovely lines. Plus, it fits in the shoulders which is the arbiter of fit, IMO, as you know.

Lord, this is rambling...

Today's questions: Have you ever begun a project and stopped after the muslin stage cuz you didn't like what you saw? Do you feel bad or like you "failed"? Or, on a totally different topic, whatcha think of my Indicum Pullover? Have you made a yoked sweater in the past? Do you like the lines? Let's talk!

Sunday, February 3, 2013

The Spring Suit: Muslins Galore

Oh, where to begin... Yesterday I walked over to S's for our marathon session and she was feeling a bit off. By the time I left, a few hours later, she was horrendously winter-sick. You know when you watch a person get ill?  Of course I am concerned for her - having a virus completely sucks and hurts and is horrible. Alas, my highly illness-anxious side spent last night having a long shower, mainlining whatever supplements I could find and trying not to focus on how viruses hurt and are horrible.

Now, S may have been descending into blurgh, but somehow she managed (like a consumptive Victorian, surveying her domain) to completely rip apart (figuratively and then literally) muslin 2 - the one I spent the whole morning constructing on the basis of our first round of changes. Note: We did start on S's muslin but standing up wasn't in the cards given how she felt as the day wore on.

Here's the result of muslin 2 alterations:


Let me interpret this for you. Everything gets smaller, yet again, except for the join of the front and side front pieces at the bust - which gets bigger (yet again). For those of you who like to go by markings, those dashes to the inside of the thinner, black pen line (seam allowance marking) indicate that I need to remove about a quarter of an inch from each side of the side to side-back, side-back to back and side to side-front seams.

And then, just to call extreme attention to it in red fabric, I have to add a whole whack of extra curve over the bust point. (Our first muslin alteration was a dart at the full bust point with some extra curve and then extra length below the bust. It didn't quite work.) We've also added a wedge of extra length on the front piece, over the curve.

Here's how the side front pattern piece looks now:


OK, before you yell at me for not tracing the pattern pieces when, we got started, I know, I know, I was an idiot... I'm in an anti-tracing phase which is, natch, about to end. As I re-trace these pieces today.

It appears that I'm a "big four" size 10 everywhere but in the bust, where I'm a size 16 (I estimate, but not in a standard fashion). Seriously, you need to be a master sewist just to ease the side-front into the front along that curve.

Frankly, I'm scared because I'm going to have to do the muslin to paper alterations by myself today - no doubt, S is safely tucked up in her bed. Although, in truth, whenever we're together, I rely on her. The only way I'm going to sort out how to do this is because I have to.

I want to say that muslin 3 is going to crack the code, but who wants to invoke a visit from hubris? We really can't go from the princess jacket I made last spring, although elements of that fitting process inform this one, because that pattern was challenged. So it's like we're starting from scratch, making a jacket TNT.

On my rather short continuum of "bored to out of my depth", I'm on the out-of-my-depth side right now. I know that, as soon as I sort out the shell fitting, I've still got to reflect a massive number of alterations onto the lining and interfacing pieces (and adjust the collar, potentially).

Today's questions: How have you managed the lining and adjunct piece alterations on the basis of alterations to your jacket shell? Is there mystery to it? I suspect the lining acts as its own garment, more or less, and you just need to make the adjustments on those pieces in the relative spots and to the same degree as in the shell. In terms of interfacing and underlining, those will have to mimic the revised pieces exactly because they are affixed to the shell. Any feedback would be so appreciated.

And, holla if you happen to have one body part that is proportionately outsized. If you've got a (relatively) huge ass or wide back or large arms, I wanna know! How do you handle pattern adjustments? We're the ones who do the heavy lifting with alterations - cuz we have to.

Saturday, February 2, 2013

An Expert Is Someone Who's Seen It Once Before

If it's Saturday I must be off to work on a tailored suit muslin. S and I are going to try to push through to get her first muslin alterations done, to review my second muslin (reflecting alterations from last week's marathon). Plus, hopefully, marking up the adjunct pieces to the 8 from the shell, given that we've made wholesale changes just about everywhere and none of the notches (after altering those pieces) will line up between lining, interfacing and body.

I cannot tell you how much I loathe marking up the muslin. Eight pieces will take more than 2 hrs to mark accurately and with all the lines required (including seam lines?!)

I REALLY hope that, after this weekend, I'll be ready to prep and cut my fashion fabric. Of course, there's no point getting excited. It's going to be what it's going to be.

In the meanwhile, allow me to remind you of my fundamental insanity. I finished the cashmere sweater (it was a HIT, peeps) which, the entire time I was constructing it and dealing with challenges, was the theoretical obstacle to enjoying life focusing solely on the suit.

I kept telling myself that if I could figure it out and get it done I would happily focus only on the jacket, till its completion, and make socks as my quiet, calm-down craft.

Well, I am making simple socks:

I'm getting faster at these...
 ...but I cannot stop thinking about making another sweater. Or a pair of high-waisted denim leggings with that new denim stash I bought. Or a new dress with my navy wool jersey.

I even bought the hilariously-titled "Sockupied" online-magazine to dream about complicated things I'll have to figure out on the fly.

OK, on the topic of making socks, I'm completely converted. They're so methodical. Now that I've memorized the simple pattern, I can just pick up from where I've left off. And, having washed my just-made socks and having worn them just about every day in this freezing weather, I can say that I don't mind the waffle-feeling (which has toned down substantially, if not entirely) and they really do stand up to everything. Plus, people think they are the cat's ass. I love being popular!

I'm actually going to teach a work-mate how to knit socks in the next couple of weeks. She saw me making mine and, though she could care less about knitting on the whole, she cannot stop thinking of wearing her own socks. It takes all kinds, peeps.

Plus, it's pretty hilarious that I'm about to teach someone how to knit.

Monday, January 28, 2013

Strong Arming

Lord. This weekend will, no doubt, go down as a cross between Survivor and Project Runway and, seriously, my brain hurts.

Of its 48 hours, I spent a full 24, not crafting (as such), but working out the math that underpins the complicated garments I'm constructing. It was Kristin and geometry and crazy-ass angles from dawn till night.

In truth, it was Kristin and knitters from around the world and S from around the block. Did I mention that I could barely move my head this morning when I awoke to go to work? That I went for an emergency massage?

I wish I could immerse you in my consciousness for a few minutes - like those scenes in creepy sci-fi movies - so that you could feel the jolt of all the things I've learned (or been massively overwhelmed by). I can't begin to tell you all the tales, though I imagine they'll come out as they take word-form.

Briefly, I believe I figured out the sweater sleeve. It looks barely like a sleeve but it basted into the sweater armsyce's very nicely.

Have you ever seen a set in sleeve that looks like this??
I'm working on the second sleeve now. I've sewn the sweater shoulders and will insert the sleeves before sewing up the side seams - after ribbing the neck.

Ah, and then there is the tailored jacket muslin. I wouldn't have imagined that anything could test me more than that freakin' knit sleeve. But that's the beauty of complicated garment-making. There's always something exponentially harder around the corner.

All I can say is, thank the universe for S. Perhaps now is a good time to remind you - though I'm quite sure most PhDs out there couldn't begin to fit a tailored jacket - that she's so freakin' smart, she has a PhD. Honestly, I spent half of the 4 hours that it took to mark the 80 trillion muslin changes onto the paper pattern, simply trying to keep it together. I think it's safe to say that I am a fine fitting apprentice. When I'm not hysterical.

I came up against so many of my challenging qualities this weekend: impatience, hyperness, ignorance, the inability to stop thinking long enough to assimilate new learning. I really must step back before I write more about the jacket muslin experience. It was seminal.

I will tell you that it blew my mind. My shape is SO fascinating :-) and so unique. S has convinced me that next time I will need to make the size 10 (not the 14). I don't think I can wrap my head around anything smaller than the 12, but she's got a point: You can resize a waist and a bust in a snap. Reworking the armscye and sleeve is a fucking production. Really, arms and armsyces - for S and me - are like the leg and hip complexities that torment certain pants-makers. It's all "one tube, fitting into another", requiring maximal range of movement.

I wonder how I will possibly help S to the degree that she's helped me. I mean, I am learning a lot, but I'm learning about managing curves, not angles.

Last night I had a nightmare about how to reflect the jacket muslin changes on the paper pattern to the NUMEROUS underlining, interfacing and lining pieces (that we haven't even touched). Really, it's hard to grasp the wonder and novelty of draping. I'm always worried about the next thing.

Today's question: What's the coolest or hardest or most meaningful craft thing you've learned about recently? You can keep it high-level or dig in. I want to know!

Sunday, January 20, 2013

The Spring Suit: An Update on Muslin 1

Oh, my pretties, this is a serious project. S and I intended to come armed with pre-made muslins and to work out all the kinks, but it didn't go that way. Instead, we spent the better part of 8 hours making and reviewing and pinning our partially-complete muslins 1, observing where markings aligned and where they didn't (even in this beautifully-designed pattern, we found some notch misalignment in both of our sizes when we "walked the pattern*").

Here's what I can say so far:
  • We both have finished muslins that, for the most part, align at all of the notch points or which are knowably discrepant at some (but which we've accounted for in terms of overall fit).
  • We have the sleeve muslin sewn, but not inserted as first we need to sort out the bodice.
  • Intriguingly, though we have very different body types, when first we tried on our finished shells, they fit us both, in broad strokes, very gracefully. Of course, we're going to need to adjust each, but this is a beautifully drafted pattern. 
  • I'd tell you that the pattern is drafted for a curvy shape, what with how it practically fit, out of the envelope, in the bust (unheard of for me!) but it also fit S's bust quite elegantly and she has but an inch of difference between her under and full bust dimensions (compared to my 7"). We were both amazed by that. On her the jacket is quite equestrian, IMO. On me it's kind of 50s-lady.
Here are a few pics on the dress form (yeah, yeah, inaccurate, but the muslin doesn't fit me either at this point):
You can see how we've already opened up the princess seam to allow for a bit of extra full bust ease. Note that the amount it opens, on me (narrower and having more projectile breasts than the dress form) is about 0.25" on either side. Not a lot. What we intend to do next is to slash above the HBL (that horizontal line above the bust) to allow the fabric to drop slightly which will account for the extra length I require over the bust...

I have to resew this seam because, as you can see, the pieces do not align. (They did on the other side, intriguingly, so it's likely my sewing that's at fault here.) The seam lines - that black pen on the underside of the pieces, should be matching up.

The waist HBL is totally level (my dress form is a bit askew here) and the waist of the pattern fits beautifully. I've got the centre fronts pinned here.

Waist HBL on the back is also level.

Observe how the waist of the jacket does not sit at my waist (or that of the dress form). I will need to shorten all of the pieces above the waist by 1.25 inches - not as much as I usual...


Adjustments to follow on muslin 1:
  • Shorten all pieces at lengthen/shorten line by 1.25".
  • Increase full bust at princess seam (the one currently open) by approx 0.25" on each side.
  • Slash above the bust to allow the fabric to fall. In the top pic you can see how the HBL (horizontal balance line) is not level. It arches up toward the centre front on each side. Allowing the fabric to fall should mitigate that. In an irony, that means we'll probably add back the 1 inch we've removed above the waist on the front. This particular alteration will be a wedge alteration, unlike the shortening above the waist which is a tuck. Wedge alterations start at a seam (where they're closed) and end at another seam (where they're open) but they aren't even at both sides, like a tuck.
On S's muslin, which is all around 1 size too big as she accidentally ordered the 12-14-16 when she really needs a 10:
  • Take in every seam by 0.25".
  • Make an SBA at the princes seam. This will likely be the exact opposite of my alteration i.e. we'll subtract fabric at the princess seam and then shorten the bodice above the bust.
  • We may or may not require an alteration at the upper back to account for breadth there.
Seriously, that's not a lot for either of us, in the scheme of things - though marking up the muslin and then altering the paper pattern is SO not intuitive for me (aka the most painful and confusing part of this entire process, IMO). Thank goodness for S who will work with me to make the adjustments on the pattern piece from the once-altered muslin. She has a really strong grip on the technical elements.

When we've got the shells working, then we'll insert the sleeves. We've read a variety of reviews of this pattern which indicate that inserting the sleeves can be tricky. In certain instances puckering has ensued. Since I haven't read the sleeve insertion instructions in detail, as yet, I don't know if Claire Schaeffer suggests the bias strip easing method. If not, that might be a way to mitigate challenges. However, if she suggests that method and still people have had issues, we may have to consider altering the shape or rotation of the upper sleeve. Mind you, that's a concern for another post!


*What's walking the pattern? This is simply aligning the edges of the seam allowances (on the paper pattern) of adjoining pattern pieces. For example, your side seams on your actual garment, will need to line up when you sew that seam. Perhaps you take it for granted that this should automatically occur. However, some patterns contain drafting or grading errors.

All you do is stabilize a knowable intersection point of both pieces, one on top of the other, and then move the pattern pieces over one another, to the next intersection point i.e. a notch (noting whether it lines up). Start at the hem, move to the underarm. It's 2 parts engineering, 1 part intuition. Sometimes it doesn't work on the first try so you try again, factoring in ease, maybe sewing up the muslin (which is easier to ease than tear-able paper), and verifying how accurately the pieces come together.