Showing posts with label Balboa Waistcoat. Show all posts

Friday, July 29, 2016

Crafting Towards Autumn (But Happily Still Deep in Summer!)

This is the finished outcome...

Circular Vest Take 2


...of the pieces shown in a photo I posted on Instagram the other day:


I started this in May and really never got into a groove.

I truly have no idea why the slightest sign of rain makes me crazy - but this flinty/stormy sky colourway fills me with happiness.

It is by no means my most capably-knit garment. And yet I don't care. It's a really versatile and cool piece, IMO. It's also got more drape and weight than my version 1. Mind you, I don't know if that will make it my fave of these 2 garments in the end. The blue one has more heft in some indefinable way. I think the key to giving this the appropriate fall is to make it too big. The dilemma with that is that the collar of this garment is the same depth as the rest of the waistcoat piece (it's a circle) and that's already on the voluminous side in a modified medium. It's not a perfect garment unless you fit its proportions perfectly. Oh well, it can still be pretty good.

I used 2 different yarns (diff brands, weight and fiber) and yet they worked together almost seamlessly - each one being a variegated shade of gray. It was for reasons of yarn gauge, more than colour, that I opted to stripe these yarns every other row (or every 4 as I began to run out of the Biscotte). Man, that was a total pain in the ass. As the circle of knitting began to grow, the yarns got mega-tangled, every row, in the already-knitted section of the waistcoat piece.

If I don't end up wearing this often enough, you can bet it's going to a friend. I would never try to unravel it. 50 per cent of my effort was in the invisible striping! I can't say if I'll make this again (certainly not any time soon- it's a bit of a production, though not difficult) but I do recommend it.

This morning I cut out the Charlie skirt and marked the pieces. Tomorrow I'll start putting it together. Right about now, I do wonder how it's going to fit. It could easily be too big or too small, I really have no sense of it. The good news is that I have just about enough of the rayon denim to try again, should it be necessary.

I'll let you know how it's coming along...

Tuesday, May 10, 2016

Finished Object: V8790 aka The Bouquet

It took me hours, but I've killed it with this top:

Vogue 8790, highly modified in every way
 I'm not too scrupulous to brag - that's some damn good ruching!


It didn't come fast. I now remember that the deal with this top is to ruche the flat pieces (where instructed). But, instead of pulling up on basted thread, as the instructions advise, I turn up the differential feed on my serger and hold the gather by simultaneously inserting clear elastic 1/8" in from the raw side edges . And that's not all (though the instructions would leave it at that). To get a really nice drape, then I ruche the whole thing as I sew up the side seams (again, using the differential feed in the waist zone). Second time round, however, I don't use clear elastic cuz it's not necessary and it would add bulk. This whole process, while involved, is easier than pulling up a bunch of basted thread and trying to get it to hold on a stretchy, thin fabric.


This is my third time making V8790 and I really came to understand it via this go round. The technique to attach the neck to the shoulders and the back piece is batshit crazy, but if you just go along for the entirely non-intuitive ride, it does work out with some fiddling.

Last time I made this, I opted to modify the pattern by bringing the shoulder slope forward slightly. I also took some more width out of the shoulders to suit my narrowness. I might actually remove another half inch of width from each shoulder next time.

And though I don't love many aspects of making this top, I cannot deny that the fit is spectacular. It sits perfectly at the low hip (it's almost a tunic). It skims everything gorgeously. Now that I've figured out where to attach the surplice at the side seams (a good 3 inches below the underarm), in a stretchy fabric, the surplice drapes below my bust in a really flattering way.

The back is cut on the fold so there's no seam to interrupt the line (which is useful if you're working with crazy patterning on your fabric).


Just remember to make this with a reasonably thin knit or the double layer on the front body will be thick and hot. Note: by thin I don't mean cheap. You're going to want something with good recovery.

A long while ago, I did a lot of work to make this pattern fit me. I more or less changed every element, from surplice length to shoulder width to back collar height to waist length and more. And now I'm reaping the benefit. (This is why I'm not ready to give up on V8323 quite yet. Though V8323 is proving to be much less pleasant to perfect.)

If I saw this in a store, I'd pay a lot of money for it because it fits well, it's versatile, light-weight, great for layering AND it's so freakin' cheerful!

I do love a floral pattern and the colour scheme, loud as it is, works really well with my skin tone. Gillian can attest that this fabric, despite being from FabricLand (where some really bad jersey knits are sold), is lovely and structured.

One other thing - I finally decided it was time to give my coverstitch machine another kick at the can. When first I bought it, we just didn't click. This was before most of the current surge of coverstitchers started blogging about their machines. Today I followed most of the very helpful instructions suggested by Cashmerette. I bolstered these with info from a couple of videos showing how to cut the threads, upon completion, to ensure that they don't get stuck in the machine or unravel after the fact (both were previous issues for me because I refused to engage with simple directions on how to finish the seam).

Is my finished hem gorgeous? Decidedly, no. But it'll do the trick. I find the Janome 1000 stitches insanely quickly, even when I try to work the foot pedal methodically. The net result was some waviness, but it won't be visible unless I point it out to you. I mean, that's the joy of working with a crazy floral, right?

So that's what I've done today so far. Next up, back to work on my second version of the Balboa Waistcoat. I'm LOVING knitting with the Tosh and the Biscotte et cie. I find it somewhat hilarious that I've managed to take yet another striping project (because, even though this vest is knit in a solid colour, I'm interspersing 2 different - but almost identical - yarns every other row to ensure that if they drape differently, or if the colour is slightly askew, my finished garment will look intentional). So much yarn carrying-up! On the plus side, this pattern is worked flat so it's pretty easy to keep things straight.

I'm totally amazed that more people haven't picked up on that circular vest pattern. It's so elegant, so (relatively) easy to fit and so fun to knit.

So whatcha think? Not a bad day of crafting, even if I was quite inefficient...

Sunday, April 10, 2016

More is Less

The key to staying on top of the yarn stash is in the planning. It doesn't pay to think one-project at a time. It also doesn't pay to be too spontaneous about one's next knit. Cuz it's only when you plan that you will have the ability to consider how to use up the entirety of your newly purchased yardage.

My fussiness just gained a new dimension. Now, not only must I love the yarn (and must the yarn be gorgeous to the feel and having the appropriate drape) but I've got to be able to apply it to at least 2 projects, lest I get stuck with half a skein I cannot easily repurpose.

For example: Usually, when I want to make a pair of socks, I go for the wackiest yarn I can find. Sock yarn tends to come in 425 yard skeins. I never use more than 275 yards (and generally I use 250) to make a pair. That means I'm stuck with half a sock worth of crazy-coloured, variegated yarn that will sit there till I come up with some sub-optimal, stash-bust hat or mitt project.

Here's what I've learned from looking at 15 or so of these skein remnants:
  • I'm not interested in using the sock yarn for hats. It's a rare hat project that interests me, particularly in crazy colourways. 
  • I can't find sock yarn in 250 yard skeins. I've tried. I can find 175 yard skeins (Koigu - and they come in gorgeous solid colours, see that purple below) but even as I love Koigu, I don't find that it wears particularly hard. 
  • That's something that I'm going to have to try to get with because Koigu is awesome for other projects and - remember - I really don't want leftovers.
  • Solid colours are much more practical than variegated yarns because you can mix and match them (particularly if you're using the same brand/yarn in an alternative colour). Stripes are endlessly chic and they keep a project interesting. Furthermore, choosing your own colours to stripe is engaging and you get to make it up.
  •  Using 2 colours on a sock may be the way to go because it's easier to find 125 yard remnants than 250 - as long as the yarns coordinate.
  • Yarn coordination really is the key. So, my goal in the future is to either buy 3 skeins of Koigu KPM (to get 2 pairs of socks) OR to buy enough fingering-weight yarn for one project (i.e., a sweater) so that there's enough left over for another project (namely, a pair of socks). That's tougher than it sounds because sock yarn is generally superwash (pref. with a bit of nylon for strength) and I don't want to make a sweater out of superwash yarn, ever again.
In the end, I landed on this combo to make, first, another version of the tremendously enjoyable Foolproof cowl. :


I do love the colour contrast going on.

That's madelinetosh Tosh Sock (in Antique Lace) and Koigu KPM (in 5414). It's a spectacular combo - each yarn is 2-ply twist with more or less the same feel. They're exactly equal in girth and spring. The only discernible diff is that the Tosh Sock has more slip (it's a bit drapier). Both are 100% merino - not superwash but also no nylon.

The remainder of yarn from the Foolproof should get me, more or less exactly, a pair of socks. And then I'll see how well this combo wears (nylon-free and non-superwash). I mean, they're both designed for socks, after all.

Seriously, isn't this yarn gorgeous??


I also want to make another Circular Vest. This garment is so versatile and so complimented! But I want to make it with a drapier yarn than Lett Lopi, per my last post on the subject. I was considering Quince Osprey (I've never yet worked with aran-weight Quince yarn) because I need drape, but recovery. Quince has that in spades, at least in its lighter-weight yarns, in part because it's not wash and dry. Though I love Quince, and use it often, it's just not luxe in the way some other yarns are - the kind I'm craving right now.

Here's where this story gets kind of bizarre. A couple of years ago I bought some madelinetosh Vintage to make Miranda this scarf:


I had 140 yards left over that's been sitting in my stash. See that grey-mauve ribbing? It's a pretty accurate representation of the colour - a Tosh Vintage, hand-dyed shade called Tern. Vintage is a highly-spun worsted-weight yarn but it feels more like aran because it's very plump with twist.

Below, you'll find a photo, taken yesterday, of the Tosh (again, Tern colourway = the centre ball and the skein at the left side of the photo). It's accompanied, on the right-hand side, by another yarn altogether - Biscotte & cie in Solid Gris, also heavy worsted-weight.


This photo gives a sense of the lush, plumpness of the yarn and the sheen. But it makes it look much more grey (and much less mauve-undertoned) than it is
Don't these yarns look exactly the same???

You might be wondering how is it that I now have an unwound ball of the Vintage, in addition to the remant and the Biscotte & cie. Well, turns out there was one skein left of the Tosh in the Tern colour at my LYS (Eweknit). I'm sure this stray-ball from 3 years ago was waiting for me. But, even with the second ball, I was 200 yards short to make the Circular Vest. That's where the Biscotte came in.

Here's a shot of the Biscotte label:


This Quebec-made yarn is gorgeous and tightly spun - much like Tosh Vintage. It's exactly the same shade of hand-dyed grey meets mauve as the Vintage. I've never actually seen two yarns from different brands match each other so perfectly. The only distinction is in the texture. Biscotte yarn has a bit of cashmere and nylon, and isn't superwash, while Vintage is. (Yeah, I know I'm against superwash for sweater-like garments but the Tosh doesn't grow like other superwash yarns and it truly is amazing. Not to mention that making the vest with it will provide me with a great way to use my remaining Tern stash in a much more exciting way than otherwise I would have been able to.) The Biscotte is a bit firmer - it's got less drape -and very slightly slimmer than the Vintage but, visually, this is imperceptible. I wasn't thrilled to find my 115g ball weighed only 111g, but c'est la vie.

I intend to stripe every 2 rows to ensure that the yarns integrate seamlessly. Happily, the Biscotte should tone down any potential drape-drag of the superwash Vintage. And, with this project, every yard of yarn should go!

So, for 125 bucks (given a frequent-buyer, 20-dollar discount) I've got 3 projects planned with no remnants to worry about: a totally wearable vest, a great cowl and a pair of 2-tone socks. That's a sweet deal given that I bought very good yarn (Tosh, Koigu, Biscotte).

Alas, this isn't all the spending on yarn I did yesterday. The rest is the subject of my next post, still in keeping with my stash-busting ethic. Till then...

Saturday, March 26, 2016

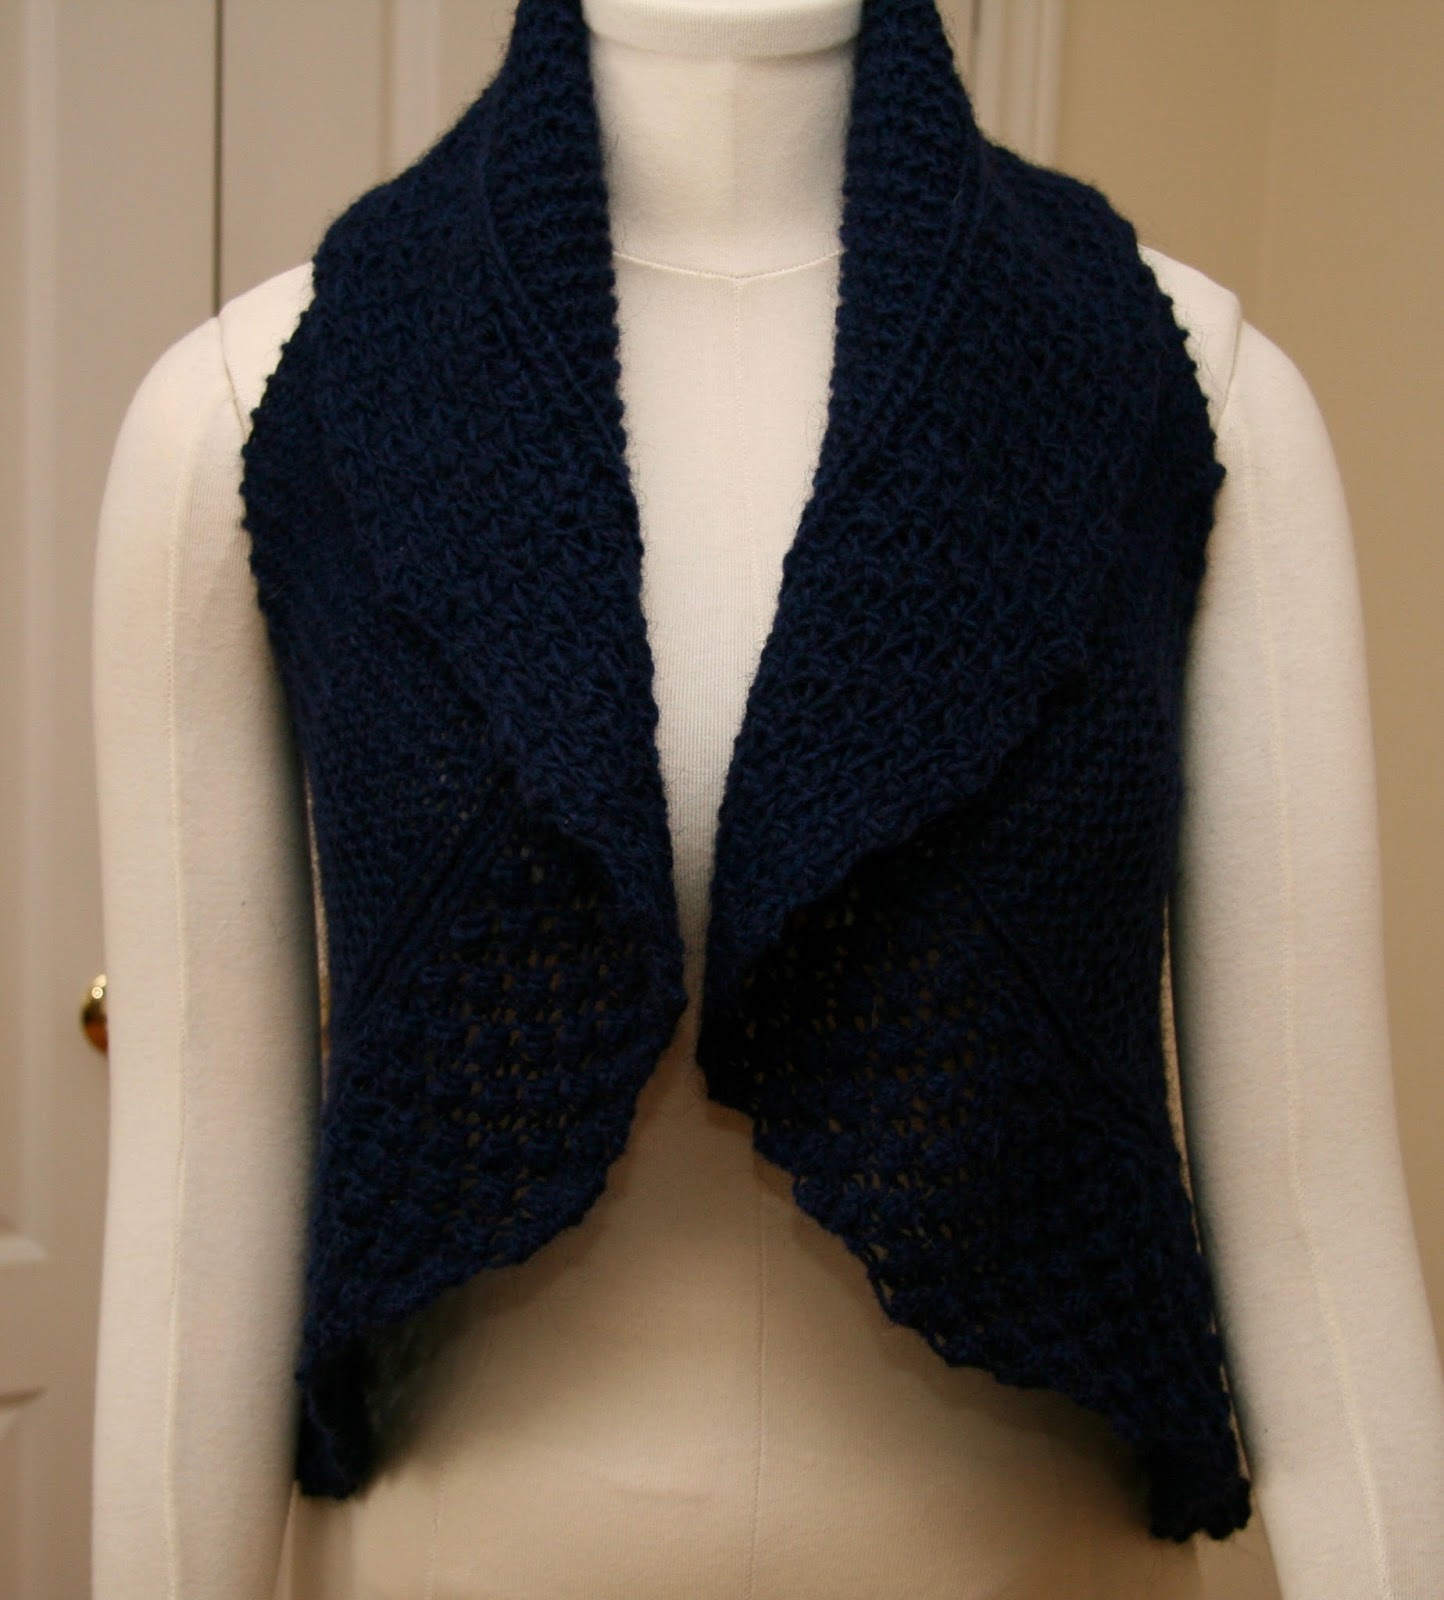
Bust the Stash: Finished Object 12 - Circular Vest

I fucking love this one:


Sometimes stash-leads to kismet. Y'all have to make this garment. It takes about 2 weeks (if you're serious) and somewhere around 500 yards of aran-weight yarn. You could easily make one for your best friend for Xmas and totally blow her mind!


Let's Talk About The Pattern: It's not a difficult knit but it is a bit fussy and it does get tedious at the end. Mind you, it's pretty enjoyable, despite that, because the fabric that emerges from one (reasonably) straight-forward pattern 4-row repeat is pretty cool. With a simple flat-knit, short row technique, the waistcoat becomes a circle which is seamed up at the end and into which a back panel is inserted. The armholes are the unsewn space between the sides of the waistcoat circle and the back panel.

Here's the thing, next time, I'd do this differently. Yeah, I know, next time I do everything differently but hear me out. Instead of seaming up the bound-off edges of the circle at the end, which can be a bit messier than necessary, I'd provisionally cast on, at the start, and 3-needle bind off the 2 edges of live stitches at the end. This would take virtually no additional effort. I'd also consider picking up stitches at the bottom of the waistcoat circle, knitting the required number of rows and then seaming it at the top. Mind you, the back panel is inserted width-wise to match the direction of the garter stitch in the waistcoat, so that consistency would be sacrificed for a neater join...
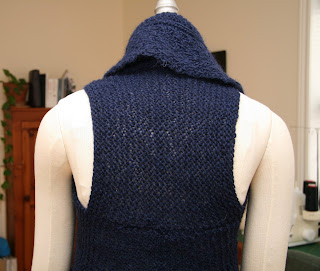

I made the back panel wider than the pattern calls for because I think, as drafted, it looks skinny and strange. I also made it shorter so that the armholes wouldn't be too long for me. What I'd say is that the instructions, from a sizing perspective, are a guideline. I made a modified medium, after starting with a small and realizing that it likely wouldn't be long enough given that I worked with needles 2 sizes smaller than recommended. Strangely, I got gauge with those needles, but gauge is worked in garter and I don't think it translated well to the very nubby blackberry pattern at the edges of the waistcoat circle. Having said that, I like the fabric that the smaller needle size produced so I would definitely use the same needle size again.

Great thing is that every size of this garment starts exactly the same way, by casting on 44 stitches. This allows for easy modification as you go. See my Ravelry notes for more details on what I did to modify the size.


What about that crazy yarn?? As you know, my friend Michael brought me back the Lett-Lopi from Iceland last summer as a gift. He bought it in the grocery store and cheerfully advised that it cost $4.20 CDN per skein. This garment took slightly over 4 skeins so, technically, this garment cost under $20 bucks to make.

BTW, Karen Templer from Fringe Association (a blog you should follow whether you like knitting or not), is a nut for this yarn. She started singing its praises recently (long after it had made its way into my stash) and that gave me confidence to try it out. Part of my issue is that I didn't really have enough to make a sweater and it's not well suited to small accessories that touch the skin.

This yarn is hardcore. It's like wearing a sheep. It's hairy and scratchy (though not as scratchy as it looks - and less scratchy still after blocking, especially if you follow up the wash with a soak in hair conditioner. BTW, don't use a lot of conditioner and don't rinse it out at the end.)

The yarn is unparalleled in its warmth given that shorter and longer wool fibres are carded together to produce a yarn that's spun with a lot of air trapped between these fibres. I mean, this is the stuff the Icelandic fishermen wear. The relatively untreated state of the yarn lends to its waterproof properties (these are somewhat stripped by washing, hence the addition of conditioner at the end. Some prefer to wash with lanolin-enriched Eucalan, but I don't have any and I didn't see how conditioner could hurt.)
 

This yarn is not my jam but I became increasingly enamoured of it as I went. It unrefinement is quite spectacular, if unappealing, like a harsh landscape. You can feel its durability. Furthermore, it's beautifully dyed to provide a very deep, but clear navy blue. It blocks fantastically, better than any springy yarn. On the flip side, it is barely spun. I mean, whole yards come out like carded fiber, simply held together by the strength of the wool, having disparate texture and gauge. Some bits are aran-weight, other bits like fingering. It's odd.

Now, it doesn't have a lot of drape, unsurprisingly, which is why I thought it would either work perfectly, or horribly, with this pattern. Remember, I didn't have a lot of choice given my yardage and the need to keep this second-layer. I thought that the structure could be good for this garment, as long as it didn't produce a stiff end-result.

As of now, I think it has worked entirely adequately - and time/wearing will tell if I think better or worse of it, in the end. Next time I make this, though, I'll use a drapier yarn (not alpaca, but a smoother worsted-spun) because it's the only way to get length in the garment without bulking up the collar.

What do I mean by that? Well, the bodice (waistcoat) is a circle. Whatever part of it allows for its vertical extension also gathers at the neckline to form the lovely shawl collar. I love a shawl collar but this one doesn't have modifiable dimensions because it is not seamed on. I'm already short with a short torso so this means this version has, arguably, too much collar for my proportions. But, I'd like a bit more length in that circle (than I got this time around) without adding to the bulk at the neck. The only way to achieve that is by using a yarn with more drag (i.e. a softer hand). It won't be as durable or as warm, but it may provide a better drape to suit my needs.


I think it's particularly chic with my wooden shawl pin.

Another plus of this pattern is that it can be made to suit a lot of shapes (though some better than others). I mean, a long or wide person will have better luck given how it's drafted, but it's totally achievable for other shapes. I sense it would be least suitable for a wide, short person who carries most of her weight in the middle but careful yarn choice might mitigate that issue.

So what do you think? Do you like this? Would you make it? Let's talk!