Lord, I must have been high on something when I forgivingly suggested that I'd wear the latest version of the Janet Jacket out of the house. Seriously, it's amongst the crappiest things I've ever made. You could not get push me out the door in that thing of ill-fitting splendor. It's taking all of my willpower not to trash it this instant (recognizing I'm going to need it for the next attempt).
It's like I took a perfectly good pattern and hacked it to bits. (Maybe this is a slightly over-dramatic take, but I don't know just at this moment...)
I feel vaguely wallow-ish, nay despairing, like I really can't sew my way out of a paper bag. Never mind one made of fabric.
But, I suspect, no one ever got better at sewing by wallowing in despair over one's lack of talent. Or one's apparent inability to learn.
Whenever I feel this way I turn my mind Kenneth King's sage words (and I'm seriously paraphrasing here cuz I cannot remember where first I heard this): You haven't learned to sew till you've wrecked thousands of yards of fabric.
I feel eight or so yards closer to perfection.
Showing posts with label Tailoring. Show all posts
Showing posts with label Tailoring. Show all posts
Monday, January 27, 2014


Sunday, January 26, 2014
The Janet Jacket: Yeah, This Version Sucks Too
As next week is looking interminable, so posting may be a non-starter, and since I do want this post over and done with - like the Janet Jacket currently is, let's get to it. Here we have the third muslin, the second made in fashion fabric, the first completely finished version:
There is no way to take a good photo of this thing. Trust me, I've tried. Indigo is a bitch to photo. Wool crepe is, well, crepey. And the combo - when you consider my challenges (read on to discover more), is just not good. But honesty is the best policy, so I'm here to tell you how it is.
Here are a couple more shots, on the ground, to show off the lines on something that isn't that wretched dress form. Why did I waste my money on that thing??


Look, I'm not done with the Janet Jacket. Well, I'm done with it for a while cuz I fucking hate everything jacket-related. But I'm going to crack this code eventually. Believe me. Because I can really see the potential. In fact, this jacket is vaguely wearable - if not up to standard - so I may even take it out for a couple of test drives, to further illuminate the issues.
Let's start with the good:
In a previous post, I discussed the sharpei neck issue and indicated that I had to remove .5 of an inch wedge from the centre back tapering at the shoulder. Um, that was not true. On reconsideration, I took out 1.5 inches of wedge. And I still ended up with this:

Do you see those bubbles of fabric? I'm starting to wonder if my problem is that I don't have enough fabric rather than too much - but I don't know how that can be because the sharpei issue is INCREDIBLY improved in this version for all of that fabric removal.
I'm also starting to wonder if my choice of drapey fabric and soft interfacing may be the cause of this. Maybe this jacket could do with a firmer material.
So while we're on the topic, let's talk about wool crepe:
The thing that makes wool crepe a dream to sew with makes it intolerable to tailor. I will not be using wool crepe on this jacket in the future. In fact, it's gonna be a cold day in hell before I use wool crepe on anything more tailored than a sheath dress from here on in.
Crepe is so malleable that it takes every suggestion of fabric manipulation and runs riot with it. It's so sensitive. It's got no backbone, no pun intended and it loves to wrinkle. I don't care if it has nice drape, writ large. It has crap drape on a tailored item where one needs structure to prevail.
On more mundane fitting topics:
There are no awards for making mediocre products, only the potential for winning with persistence.
Today's questions: What's up with the sharpei neck - do I need to take out another wedge? Is it fabric related? Is it something else? Can you share a sad tale of sewing meh-ness? Let's talk.
 |
| Read on for info about why there's torquing at the left centre front. No, it's not about badly aligned closures, alas... |
Here are a couple more shots, on the ground, to show off the lines on something that isn't that wretched dress form. Why did I waste my money on that thing??
Look, I'm not done with the Janet Jacket. Well, I'm done with it for a while cuz I fucking hate everything jacket-related. But I'm going to crack this code eventually. Believe me. Because I can really see the potential. In fact, this jacket is vaguely wearable - if not up to standard - so I may even take it out for a couple of test drives, to further illuminate the issues.
Let's start with the good:
- I made this thing with barely a look at instructions (mainly cuz there are barely instructions to consider, but you get my point). I know how to construct a tailored jacket and I'm pleased by that.
- I do love stretch charmeuse and I'm going to persist with it in silk and synthetic versions.
- I've made a lot of alterations, over 3 "muslins" and the majority of them have improved the fit.
- I have encountered challenge after challenge and I have persisted calmly. That's the only reason we have anything at all to look at.
In a previous post, I discussed the sharpei neck issue and indicated that I had to remove .5 of an inch wedge from the centre back tapering at the shoulder. Um, that was not true. On reconsideration, I took out 1.5 inches of wedge. And I still ended up with this:
Do you see those bubbles of fabric? I'm starting to wonder if my problem is that I don't have enough fabric rather than too much - but I don't know how that can be because the sharpei issue is INCREDIBLY improved in this version for all of that fabric removal.
I'm also starting to wonder if my choice of drapey fabric and soft interfacing may be the cause of this. Maybe this jacket could do with a firmer material.
So while we're on the topic, let's talk about wool crepe:
The thing that makes wool crepe a dream to sew with makes it intolerable to tailor. I will not be using wool crepe on this jacket in the future. In fact, it's gonna be a cold day in hell before I use wool crepe on anything more tailored than a sheath dress from here on in.
Crepe is so malleable that it takes every suggestion of fabric manipulation and runs riot with it. It's so sensitive. It's got no backbone, no pun intended and it loves to wrinkle. I don't care if it has nice drape, writ large. It has crap drape on a tailored item where one needs structure to prevail.
On more mundane fitting topics:
- Do not, imagining yourself a class-act pattern adjuster, forget to take an inch off the bottom of your jacket front and facing pieces. OK, it would have been game over if I'd actually made these pieces an inch too short to begin with. But this "fix" required surgery, far into the process of jacket construction, and the end result is one side that moves slightly off-grain and torques the entire finished product.
- Also: As S. noted, when last she was over, after increasing the full bust depth by like a zillion per cent, I've got to take quite a bit of fabric out of the front princess seam above the full bust. That's what I like to call my small bust adjustment.
- And I've got to take about an .5 inch, somehow, off the back armscye. It's gapey.
- I've got to lengthen the arms by .75 inch.
There are no awards for making mediocre products, only the potential for winning with persistence.
Today's questions: What's up with the sharpei neck - do I need to take out another wedge? Is it fabric related? Is it something else? Can you share a sad tale of sewing meh-ness? Let's talk.
Monday, April 22, 2013
The Spring Suit: Skirts and Buttons, Oh My!
What I can't show you is a finished suit.
What I can show you is the contents of a package that arrived today - self-fabric covered buttons, from California:

This photo best captures the colour of the suit fabric, btw.
I've got to put these on the jacket, currently sporting pretty (but not optimal) rose buttons. I have to say, they're likely to elevate an imperfect garment substantively. I got all of these for 13 bucks, btw.
(Totally off-topic, but a propos of not having any time to sew on new buttons (much less the inclination): When I'm going to have 5 minutes without a headache is beyond me. Did I mention that my gardens are not going to spring-clean themselves?)
I can also show you a bunch of gratuitous skirt shots (is there any other kind??):

True story: When your notes tell you that you need to use 2-inch petersham ribbon at the waist (as you did once before) - LISTEN! I looked at the previous version and thought: That ribbon's not 2 inches - it's 1.5 inches. (Alas, that's the thing about a half-inch seam allowance is that it eats up half an inch.) I am one of those peeps who really benefits from a wider waist-facing because I have a little tummy that begins below my natural waist. I can only assume that this skirt isn't going to last too long (vis a vis the zipper-insertion stupidity), so I'll have a chance to try again.
What I can show you is the contents of a package that arrived today - self-fabric covered buttons, from California:

This photo best captures the colour of the suit fabric, btw.
I've got to put these on the jacket, currently sporting pretty (but not optimal) rose buttons. I have to say, they're likely to elevate an imperfect garment substantively. I got all of these for 13 bucks, btw.
(Totally off-topic, but a propos of not having any time to sew on new buttons (much less the inclination): When I'm going to have 5 minutes without a headache is beyond me. Did I mention that my gardens are not going to spring-clean themselves?)
I can also show you a bunch of gratuitous skirt shots (is there any other kind??):
 |
| The higher left-shoulder of my dress form drives me INSANE |
 |
| You can see how the fabric has not responded optimally. I've treated it with kid gloves and it's still kind of crappy (where I've underpressed it, to avoid what happens to it when I press it right) |
 |
| The waist is rather well-executed. Note that the little wrinkle on the right side of the photo is just that - it's not a permanent flaw. |
 |
| Ooooh, sassy! Gotta love that colour combo, yes?? |
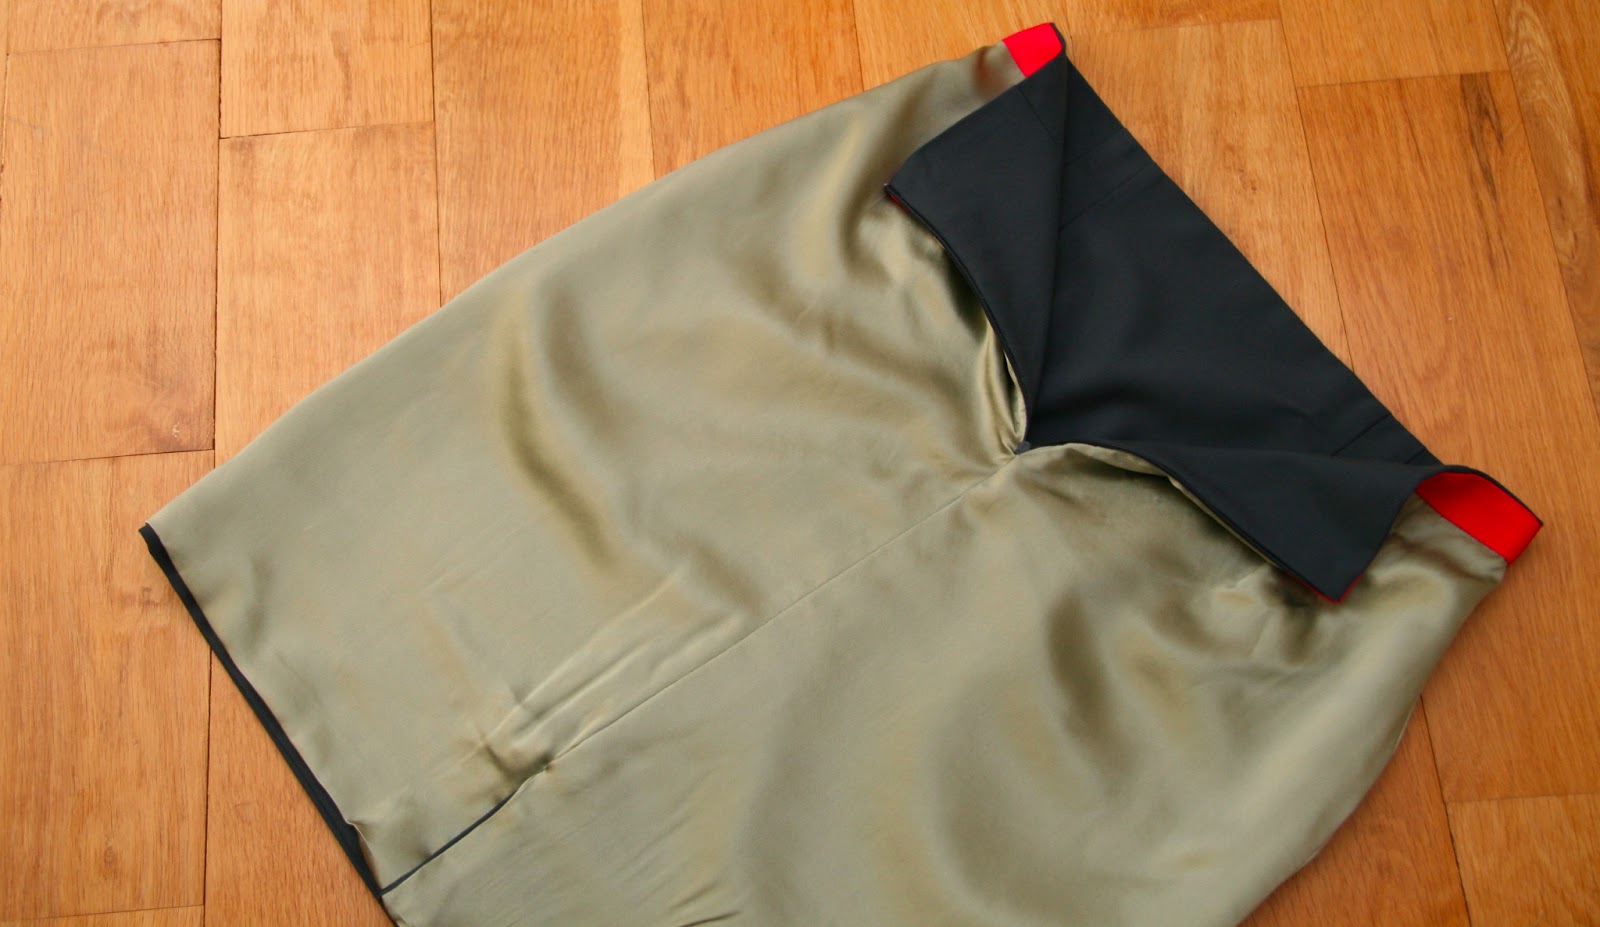
 |
| Oh, the zipper looks alright here... Just don't pull too hard. |
Sunday, March 31, 2013
The Spring Suit: Spoiled for Choice
One of the things I've been debating since I changed tacks (aka opted to make the Burda suit jacket vs. V8333) is how to tailor the jacket.
On the one hand, the materials I've purchased are of good quality, and I have just about every sort of interfacing known to man. On the other hand, the Burda jacket is of an entirely different style. It's softer-looking than the Claire Schaeffer jacket, at least to my eye.
I don't want to use crisp interfacing and underlining just for its own sake, and because I love the process of hand tailoring. I also don't know if I'd be better off hand-working the buttonholes with silk twist and gimp (I've bought both at great expense), or by just using a machine. On the topic of the machine: I've had numerous good experiences with my vintage Singer on this account (it's the only thing the machine actually does well, probably cuz it needs a recalibration, the likes of which my husband and I are unable to undertake ourselves). I mean, I've machine buttonholed numerous sweaters at this point - at the very final moment after having spent weeks on them. So I do trust the Singer. But machine buttonholes, after a very bad experience that torched an entire project, are scary to me. The one option has me learning a new skill (perilous, I suppose). The other has me machining into my finished jacket at the last minute. At least with the hand-worked buttonholes, I will have practiced, it will go slowly and I'll be slightly more in control, she says knowing, um, nothing.
Observe my interfacing options:

From left to right, that's hymo (hair canvas), silk organza, weft interfacing and another weight of weft interfacing (I think that's what those last two are called but, in truth, the interfacing is harder to identify than to use. The first 2 are sewn in. The second two are fusible.
Here's another quick shot of my fashion fabric and lining (in case you've forgotten about them):

I'm ticked that these fabrics look wan and inaccurate in photos. In real life, the slate blue of the fashion fabric is mesmerizing. And the celery-shade of charmeuse is an excellent complement.
In order to keep it all straight (Lord knows Burda "instructions" don't give you any means by which to organize yourself), I've written lots of notes, amongst them all of the fabrics I've got to cut out (by pieces) and ways to prep those fabrics:
BTW, I took this great pic of all the re-traced (clean and beautiful) pattern pieces (including the ones I had to make from scratch cuz Burda doesn't provide them: facings, interfacings, stay, lining - when distinct from the pattern pieces) and then my computer ate it. Fuck. There is no way I'm setting them up again today for another shot. There are like a zillion of them.
Um, talk about burying the lead. I finished the final muslin yesterday afternoon. I returned to the original muslin's sleeves which were much closer to what I needed than the ones I spent hours creating on muslin 3. I did some more tweaking (namely taking lots of height out of the sleeve cap) and decided to call it a day. Is it perfect? Only time will tell. The front armscye is going to be interesting because I ended up needing more fabric there than I'd originally expected (to optimize motion). I altered the pattern pieces accordingly, but I'm not making another muslin. (I did leave more seam allowance in that area, just in case).
Intriguingly, I happened upon the one paragraph in Sarah Veblen's tome in which she urges one to know when it's time to stop fitting (at the risk of overfitting a test garment the properties of which are, needless to say, quite different from those of the fashion fabric). I took it as a sign.
Today I'm off to Hilary's for Easter dinner and tomorrow morning M and I are going for manicures and out for a pre-birthday lunch. I've opted to take Tuesday (M's birthday) and Wednesday as holiday days - in which to sew more - but I will have certain responsibilities and activities that will impinge on my being able to give it 12 hour blocks of time, as I have been able to for the past 2 days.
By Wed, I hope to:
Exciting times, peeps.
So, today's questions: Do you think I should hand-tailor or use fusibles to tailor this jacket? Regardless of whether I use fusibles, do you think I should use my machine for buttonholes, or hand work them? (FYI, the pattern doesn't indicate what kind of interfacing to use, as far as I can tell. You have to look at tiny pictures simply to determine which pieces are to be interfaced at all! I'll be using my tailoring book to walk through the steps - be they hand-tailored or fusible.
On the one hand, the materials I've purchased are of good quality, and I have just about every sort of interfacing known to man. On the other hand, the Burda jacket is of an entirely different style. It's softer-looking than the Claire Schaeffer jacket, at least to my eye.
I don't want to use crisp interfacing and underlining just for its own sake, and because I love the process of hand tailoring. I also don't know if I'd be better off hand-working the buttonholes with silk twist and gimp (I've bought both at great expense), or by just using a machine. On the topic of the machine: I've had numerous good experiences with my vintage Singer on this account (it's the only thing the machine actually does well, probably cuz it needs a recalibration, the likes of which my husband and I are unable to undertake ourselves). I mean, I've machine buttonholed numerous sweaters at this point - at the very final moment after having spent weeks on them. So I do trust the Singer. But machine buttonholes, after a very bad experience that torched an entire project, are scary to me. The one option has me learning a new skill (perilous, I suppose). The other has me machining into my finished jacket at the last minute. At least with the hand-worked buttonholes, I will have practiced, it will go slowly and I'll be slightly more in control, she says knowing, um, nothing.
Observe my interfacing options:

From left to right, that's hymo (hair canvas), silk organza, weft interfacing and another weight of weft interfacing (I think that's what those last two are called but, in truth, the interfacing is harder to identify than to use. The first 2 are sewn in. The second two are fusible.
Here's another quick shot of my fashion fabric and lining (in case you've forgotten about them):

I'm ticked that these fabrics look wan and inaccurate in photos. In real life, the slate blue of the fashion fabric is mesmerizing. And the celery-shade of charmeuse is an excellent complement.
In order to keep it all straight (Lord knows Burda "instructions" don't give you any means by which to organize yourself), I've written lots of notes, amongst them all of the fabrics I've got to cut out (by pieces) and ways to prep those fabrics:
 |
| These notes go on for pages - didn't want to traumatize you... |
BTW, I took this great pic of all the re-traced (clean and beautiful) pattern pieces (including the ones I had to make from scratch cuz Burda doesn't provide them: facings, interfacings, stay, lining - when distinct from the pattern pieces) and then my computer ate it. Fuck. There is no way I'm setting them up again today for another shot. There are like a zillion of them.
Um, talk about burying the lead. I finished the final muslin yesterday afternoon. I returned to the original muslin's sleeves which were much closer to what I needed than the ones I spent hours creating on muslin 3. I did some more tweaking (namely taking lots of height out of the sleeve cap) and decided to call it a day. Is it perfect? Only time will tell. The front armscye is going to be interesting because I ended up needing more fabric there than I'd originally expected (to optimize motion). I altered the pattern pieces accordingly, but I'm not making another muslin. (I did leave more seam allowance in that area, just in case).
Intriguingly, I happened upon the one paragraph in Sarah Veblen's tome in which she urges one to know when it's time to stop fitting (at the risk of overfitting a test garment the properties of which are, needless to say, quite different from those of the fashion fabric). I took it as a sign.
Today I'm off to Hilary's for Easter dinner and tomorrow morning M and I are going for manicures and out for a pre-birthday lunch. I've opted to take Tuesday (M's birthday) and Wednesday as holiday days - in which to sew more - but I will have certain responsibilities and activities that will impinge on my being able to give it 12 hour blocks of time, as I have been able to for the past 2 days.
By Wed, I hope to:
- finalize where the buttons should go on the front
- get the fabric prepped
- get all of the pieces cut
- decide about what kind of tailoring I'll do
- fuse pieces (if that's what I opt to do)
- get set for the sewing (to start next weekend): check my machine and test fabric scraps with needles to ensure I know what my best stitch lengths and tension should be.
Exciting times, peeps.
So, today's questions: Do you think I should hand-tailor or use fusibles to tailor this jacket? Regardless of whether I use fusibles, do you think I should use my machine for buttonholes, or hand work them? (FYI, the pattern doesn't indicate what kind of interfacing to use, as far as I can tell. You have to look at tiny pictures simply to determine which pieces are to be interfaced at all! I'll be using my tailoring book to walk through the steps - be they hand-tailored or fusible.
Sunday, January 20, 2013
The Spring Suit: An Update on Muslin 1
Oh, my pretties, this is a serious project. S and I intended to come armed with pre-made muslins and to work out all the kinks, but it didn't go that way. Instead, we spent the better part of 8 hours making and reviewing and pinning our partially-complete muslins 1, observing where markings aligned and where they didn't (even in this beautifully-designed pattern, we found some notch misalignment in both of our sizes when we "walked the pattern*").
Here's what I can say so far:
Adjustments to follow on muslin 1:
When we've got the shells working, then we'll insert the sleeves. We've read a variety of reviews of this pattern which indicate that inserting the sleeves can be tricky. In certain instances puckering has ensued. Since I haven't read the sleeve insertion instructions in detail, as yet, I don't know if Claire Schaeffer suggests the bias strip easing method. If not, that might be a way to mitigate challenges. However, if she suggests that method and still people have had issues, we may have to consider altering the shape or rotation of the upper sleeve. Mind you, that's a concern for another post!
*What's walking the pattern? This is simply aligning the edges of the seam allowances (on the paper pattern) of adjoining pattern pieces. For example, your side seams on your actual garment, will need to line up when you sew that seam. Perhaps you take it for granted that this should automatically occur. However, some patterns contain drafting or grading errors.
All you do is stabilize a knowable intersection point of both pieces, one on top of the other, and then move the pattern pieces over one another, to the next intersection point i.e. a notch (noting whether it lines up). Start at the hem, move to the underarm. It's 2 parts engineering, 1 part intuition. Sometimes it doesn't work on the first try so you try again, factoring in ease, maybe sewing up the muslin (which is easier to ease than tear-able paper), and verifying how accurately the pieces come together.
Here's what I can say so far:
- We both have finished muslins that, for the most part, align at all of the notch points or which are knowably discrepant at some (but which we've accounted for in terms of overall fit).
- We have the sleeve muslin sewn, but not inserted as first we need to sort out the bodice.
- Intriguingly, though we have very different body types, when first we tried on our finished shells, they fit us both, in broad strokes, very gracefully. Of course, we're going to need to adjust each, but this is a beautifully drafted pattern.
- I'd tell you that the pattern is drafted for a curvy shape, what with how it practically fit, out of the envelope, in the bust (unheard of for me!) but it also fit S's bust quite elegantly and she has but an inch of difference between her under and full bust dimensions (compared to my 7"). We were both amazed by that. On her the jacket is quite equestrian, IMO. On me it's kind of 50s-lady.
 |
| You can see how we've already opened up the princess seam to allow for a bit of extra full bust ease. Note that the amount it opens, on me (narrower and having more projectile breasts than the dress form) is about 0.25" on either side. Not a lot. What we intend to do next is to slash above the HBL (that horizontal line above the bust) to allow the fabric to drop slightly which will account for the extra length I require over the bust... |
 |
| I have to resew this seam because, as you can see, the pieces do not align. (They did on the other side, intriguingly, so it's likely my sewing that's at fault here.) The seam lines - that black pen on the underside of the pieces, should be matching up. |
 |
| The waist HBL is totally level (my dress form is a bit askew here) and the waist of the pattern fits beautifully. I've got the centre fronts pinned here. |
 |
| Waist HBL on the back is also level. |
 |
| Observe how the waist of the jacket does not sit at my waist (or that of the dress form). I will need to shorten all of the pieces above the waist by 1.25 inches - not as much as I usual... |
Adjustments to follow on muslin 1:
- Shorten all pieces at lengthen/shorten line by 1.25".
- Increase full bust at princess seam (the one currently open) by approx 0.25" on each side.
- Slash above the bust to allow the fabric to fall. In the top pic you can see how the HBL (horizontal balance line) is not level. It arches up toward the centre front on each side. Allowing the fabric to fall should mitigate that. In an irony, that means we'll probably add back the 1 inch we've removed above the waist on the front. This particular alteration will be a wedge alteration, unlike the shortening above the waist which is a tuck. Wedge alterations start at a seam (where they're closed) and end at another seam (where they're open) but they aren't even at both sides, like a tuck.
- Take in every seam by 0.25".
- Make an SBA at the princes seam. This will likely be the exact opposite of my alteration i.e. we'll subtract fabric at the princess seam and then shorten the bodice above the bust.
- We may or may not require an alteration at the upper back to account for breadth there.
When we've got the shells working, then we'll insert the sleeves. We've read a variety of reviews of this pattern which indicate that inserting the sleeves can be tricky. In certain instances puckering has ensued. Since I haven't read the sleeve insertion instructions in detail, as yet, I don't know if Claire Schaeffer suggests the bias strip easing method. If not, that might be a way to mitigate challenges. However, if she suggests that method and still people have had issues, we may have to consider altering the shape or rotation of the upper sleeve. Mind you, that's a concern for another post!
*What's walking the pattern? This is simply aligning the edges of the seam allowances (on the paper pattern) of adjoining pattern pieces. For example, your side seams on your actual garment, will need to line up when you sew that seam. Perhaps you take it for granted that this should automatically occur. However, some patterns contain drafting or grading errors.
All you do is stabilize a knowable intersection point of both pieces, one on top of the other, and then move the pattern pieces over one another, to the next intersection point i.e. a notch (noting whether it lines up). Start at the hem, move to the underarm. It's 2 parts engineering, 1 part intuition. Sometimes it doesn't work on the first try so you try again, factoring in ease, maybe sewing up the muslin (which is easier to ease than tear-able paper), and verifying how accurately the pieces come together.
Monday, January 14, 2013
The Spring Suit: What Cost Beauty?
You may recall, when I offered up a bit of "sewing advice" a couple of weeks ago, I suggested that using good fabric is worth its weight, literally. That's a lesson I learned long ago, when it comes to buying RTW clothing, but one I struggled with in my first year or two of sewing.
I don't struggle so much anymore. In truth, it's always a bit of a moment right before you cut into your fabric, whether it costs $3.99 a yard or $39.99. It's that point when potential becomes reality. Sometimes cutting is an easy affair. Sometimes it's a bit of a challenge. But I can't let that dictate the quality of my fabric because, really, I'm gonna have to wear that thing. More to the point, I'm gonna have to sew it for 2 months and then I'm gonna have to wear it.
Furthermore, as I've discussed in the past, making a suit is not a cheap project (particularly), though it's much more cost-effective (if not time-effective) than buying one. To buy a RTW suit of good quality, you're likely to spend at least 800 bucks (full price). Here's what I've spent to make this suit (you can find some photos of the fabrics here):
No, I didn't need to spend 18 bucks a yard on lining. That price is vaguely high on drugs (till I wear the jacket, that is). (Brief sidenote: I ended up using the most beautiful silk to line the Tailored Jacket, gifted to me by Mardel. That's when I knew I could never use anything else again...) The organza was not on the cheap side either, even in this market. However, the suiting was very reasonably priced at $25.00/yd. It's just beautiful and I suspect/hope it's going to drape beautifully (but maintain its shape). Sending out to have the buttons made, which I did last time, is a totally smart idea, and really, quite worth the expense.
I suspect you could (in America, where shopping is less expensive) make this suit out of these materials for @ $125.00, but that's not the reality here. I also know you could make a suit for closer to 100 bucks in Canada, but (unless you seriously luck out with some crazy sales the likes of which I've never seen in TO) you won't get to work with quality materials.
So... today's questions are these: If you've made a suit, what was your budget for materials? Did you stick to it or spend more to find more desirable fabrics? On that topic, do you generally budget for projects or do you let your fabric passions guide you? Have you ever regretted spending lots on fabric? Have you ever regretted not spending enough? Let's talk!
I don't struggle so much anymore. In truth, it's always a bit of a moment right before you cut into your fabric, whether it costs $3.99 a yard or $39.99. It's that point when potential becomes reality. Sometimes cutting is an easy affair. Sometimes it's a bit of a challenge. But I can't let that dictate the quality of my fabric because, really, I'm gonna have to wear that thing. More to the point, I'm gonna have to sew it for 2 months and then I'm gonna have to wear it.
Furthermore, as I've discussed in the past, making a suit is not a cheap project (particularly), though it's much more cost-effective (if not time-effective) than buying one. To buy a RTW suit of good quality, you're likely to spend at least 800 bucks (full price). Here's what I've spent to make this suit (you can find some photos of the fabrics here):
- 3 yards of merino faille suiting at $25.00/yd
- 3 yards of silk charmeuse for lining @ $18.00/yd
- 1 yard of hair canvas and 1 yard of weft interfacing - already purchased for last suit but would be $8.00 each
- 2 yards of muslin for toiles (in addition to the yard I already have) @ $4.99/yd
- 5 Self-fabric-covered buttons (sending these out to be made, approx 20 bucks)
- 2 yards silk organza for underlining @ 15.00/yd
- Notions (shoulder pads, thread, stabilizing tape etc.) $10.00
No, I didn't need to spend 18 bucks a yard on lining. That price is vaguely high on drugs (till I wear the jacket, that is). (Brief sidenote: I ended up using the most beautiful silk to line the Tailored Jacket, gifted to me by Mardel. That's when I knew I could never use anything else again...) The organza was not on the cheap side either, even in this market. However, the suiting was very reasonably priced at $25.00/yd. It's just beautiful and I suspect/hope it's going to drape beautifully (but maintain its shape). Sending out to have the buttons made, which I did last time, is a totally smart idea, and really, quite worth the expense.
I suspect you could (in America, where shopping is less expensive) make this suit out of these materials for @ $125.00, but that's not the reality here. I also know you could make a suit for closer to 100 bucks in Canada, but (unless you seriously luck out with some crazy sales the likes of which I've never seen in TO) you won't get to work with quality materials.
So... today's questions are these: If you've made a suit, what was your budget for materials? Did you stick to it or spend more to find more desirable fabrics? On that topic, do you generally budget for projects or do you let your fabric passions guide you? Have you ever regretted spending lots on fabric? Have you ever regretted not spending enough? Let's talk!
Subscribe to:
Posts (Atom)


 Posts


