Saturday, March 29, 2014

Owner's Manual

I have a secret.

OK, technically, I have many secrets and this one has been as equally well-kept from me as well as from you, until about 10 minutes ago, but the time has come to talk about it.

I have so many fucking clothes it's vaguely horrifying. (And I don't shop on a regular basis by any means?!)

I discovered this, alas, when I started ripping up my closet, shelves and drawers in light of a some bug-eaten clothes I've lately discovered. Although my house is regularly vacuumed, I use cedar blocks in my cupboards, I spray things with cedar spray and I wash things (though not as much as I might) with 3 drops of eucalyptus essential oil in addition to soap - this has occurred. And not for the first time.

The truth is, when you live in a densely populated place, in a home that's 125 years old and practically everything you own is made of wool, it's bound to happen occasionally.

Doesn't make it any less hideous.

So, here's my strike-back plan:
  • Have begun the labour intensive process of shaking out all of my clothes. Only 1/3 of the way there - and I worked for 2 hours today.
  • After shaking, and looking carefully at the clothing, I'm prioritizing my daily hand-washing. Those things that have bites (about 4 garments out of 50 so far, and the holes are manageable) have fast-tracked for hand wash. Darning will follow. Mind you, everything, eventually, will be washed. Seriously, I have an assembly line system - I can wash and dry 2 things at a time (as the drying requires a spacious flat surface). This will likely continue till May, at this pace.
  • I'm off to the health food store to get some cedar oil to rub on my cedar blocks (apparently the scent wanes and either re-dousing or sanding is required).
  • Happily, I am the kind of woman who keeps massive quantities of food-grade lavender in her cupboard at all times. (What?! You never know when you're going to need to infuse some dessert with flower-flavour...) Next up, I'm making a zillion sachets with ends of fabric - or maybe cooking muslin if I can find it. I want something airy to allow the scent to diffuse and torment those fuckers, should they still be around.
  • I haven't found any larvae. I did see a fragment of one little exoskeleton on one garment (a garment without holes, weirdly). But I'm very aware that I must look for them, and draw conclusions from where I may find them. In truth, I really hope I don't find anything else - alive or dead. You cannot imagine my dislike of insects.
But back to my well-kept secret. I do not know how I can be the owner of so many things. It's particularly ridiculous as I cannot even remember the gorgeous garments 3-deep on the shelves (the tiny edge sliver of which is all that's visible).

I have zillions of freakin' awesome things - RTW, hand made, vintage... But what's the point? I'm either too fat for this thing or too over that thing. Some other thing just hasn't come out of hiding for 2 seasons. Honestly, I have sweaters that cost hundreds of dollars that do not see the light of day on a regular basis because I'm wearing other sweaters of the same description.

At this point, I don't even know how I can justify making new things. But making things keeps me sane, so stopping is not in the cards.

And don't think I never give things away. Routinely, I put stuff on the front walk (admittedly, not for 6 months now as we haven't had a moment without snow) and within a day (usually an hour) everything goes. What do you do, however, when all the things you have are gorgeous and you love them and you do not want to give them away?

At any rate, I'm looking for your feedback: Do you share my little secret? Does it bother you? How do you continue to make things without being awash in them (literally!)? I do give many things away but, really, you have to keep some of what you make, no? And - on a side note - how do you deal with bug-eaten clothes and the process of ensuring that those bugs get the fuck out of town? I thought I had a good system - I do! - but sometimes even systems fail.

Please, let's talk!

Thursday, March 27, 2014

Mental Block

Over a couple of recent posts, the venerable Yarn Harlot (Stephanie Pearl-McPhee) has unapologetically set out her perspective on wet blocking newly-finished knits. 

The upshot (though, really, read the posts - I can't provide a better synopsis) is that wet blocking is the only way to go when it comes to final finishing of one's beloved hand knits.

These YH posts have elicited some very interesting comments, for example, one wherein the commenter described blocking as the difference between homemade and handmade. Strong words! Another commenter referred to Catherine Lowe, the owner of a new England yarn operation, whose philosophy is unique. Apparently, Ms. Lowe believes that one should knit a garment "too small" and then "couture block" to size (a theory with which I don't suspect the Yarn Harlot would agree, as Ms. Pearl-McPhee posits that blocking and stretching are not the same activity). 

What I can tell you is that I fall into the category of knitter whose gauge grows mysteriously as she goes. The YH references this "type" in her post, the type that fears blocking due to the potentiality for massive garment growth after submerging in water.)  As a side note, given that I always wet block, and I have certainly experienced horror as my sweaters turned into short dresses (at least until they dried and recovered), I'm actually down with the philosophy of knitting "too small". Now that I've started doing this - within careful parameters and not in any way as an alternative to doing the math - I'm finally making sweaters that fit. (Keep in mind, I also enjoy very close fit and I'm short, so this method suits me well.)

Here's the thing - wet blocking is divisive!

In full disclosure, I completely concur with Ms. P-M: wet blocking is not optional. IMO, it's the final step on one's path to knitted-object completion. I spend lots of time soaking and pinning and smushing and measuring. I roll wet wool - which smells hideous, btw - carefully, in multiple towels, to protect my precious stitches as they absorb excess water. I watch that blocking garment like a newborn. I fuss and I do think it's worth the outcome.

I'm on one end of the spectrum.

On the other end of the spectrum are those who espouse something between no blocking and steam blocking* (something I sense the YH doesn't consider blocking, even though many fantastic and knitters of gorgeous finished garments do).

I've steam blocked a variety of garments in my day. They looked much better after steaming than before. But they did not look half as good as they would have, had I wet-blocked them. There's something about using water to remove hand oils and extra dye as one actually cleans a garment that may have landed on some dicey surfaces in the course of knitting. There's something about pinning it out to size, or positioning carefully for optimal fiber recovery as the garment dries flat. The impact on the finished product is alchemical.

In all the instances I've steam blocked, I did so because I intuitively knew my final fabric was going to grow and morph. Sure, it saved my ass in the short-term, but I still needed to wash those knits eventually - at which point, my fears were generally realized. Now I knit on smaller-than-suggested needles (I don't even swatch on the recommended needle size, no point). I make the smallest size (rather than the 2nd smallest - which is my best size on paper). I often also use a yarn with thinner gauge than is called for. As I go, if I feel things are getting loose, I change up the pattern to address the issue. I'm not saying that my challenge is everyone's - I mean, many knit very tightly, and for them my plan would be a disaster - but for me it's made the difference between things I can't wear and those I love.

And keep in mind I do swatch! Swatching just isn't that useful for me, 90 per cent of the time. Because I'm a "responsive" knitter - because I consider the garment every step of the way (vs. swatching followed by knitting what I see on the page by rote) - and because I'm not afraid to make changes as I work - this produces better outcomes for me than any other method I've tried. Of course, if anyone has alternative suggestions - I'd love to hear about them.

You might believe that wet blocking can occur when your first wash the garment, after you've worn it for a while My perspective is that this does your fabric a disservice. When you wear before blocking, you alter the fabric in such a way that blocking may not be optimally effective when finally you undertake it.

At any rate, I've engaged in lively debate with my knitting friends about this topic, on a number of occasions, and I'm always amazed by the disparate and passionate opinions. I should concede, I've seen gorgeous finished projects that were steam blocked and I can't imagine there would have been any benefit, other than washing, to wet blocking those projects because they were so perfectly produced in the first place.

But I'm curious to know about you! Do you wet block? Steam block? Never block? What's your rationale?? Let's talk!

*As you likely know, one should be very careful using steam to block synthetic fibers. Synthetics tend to melt which will, at very least, change the way your fabric feels and wears.

Wednesday, March 26, 2014

Polka Dots and Espadrilles

I bought this yarn to keep myself off the ledge re: over-extended, semi-regular interaction with large blocks of unmelted street ice (laced with pollution):

Tosh Merino Light in Espadrilles
More to come on this, but (shh...) I'm using it to make a fantastic shawl that just screams spring:

Mizutama Shawl by Olga Buraya-Kefelian
(Blogger won't let me link to this deceptively simple pattern at the moment, but you can find info through my Ravelry page.)

It's my first time knitting with this single ply yarn. It is very popular and very reasonably priced at about 22 bucks for 420 yards. I'll let you know my thoughts as I knit.

Monday, March 24, 2014

Shop Versus Drop

The Svalbard is almost finished wet-blocking - a state for which I am grateful because knitting it drove me to distraction. In full disclosure, I am at my most compulsive in late winter (just before the spring arrives). Alas, in 2014 this may bode particularly badly as the winter is likely never to end and then I may have to insane-craft forever. My body needs a break, to say nothing of my brain.

On the plus side, I knit up an advanced-design in 3 weeks.

Photos to come, natch, but while I wait for the creature to stitch-set, I'll tell you about a few new purchases. Remember when I got pertussis and all I did for 3 5 months was to online shop by way of making myself feel like I would live to see another year? Well, I'm not quite at that state of shopping to mood alter*, but this winter is so phenomenally demoralizing that it's all I can do to stop myself from buying a new house in an entirely different country. When you consider that kind of damage, buying some yarn and shoes doesn't seem so extreme.

For starters: yarn. Look, I love to buy small-batch hand-dyed yarns at the LYS or at online boutiques but I knit a lot and so I choose to stock the basics. When I purchase for a specific project, I'm apt to buy very specific yarn. But I need sizable stash for when the mood strikes to, say, make a sweater on a whim. I try always to have 1000 yards of fingering and sport/dk on hand, in chic neutrals, for those moments. Since I just knit 2 sweaters, using stash yarn, I'm in the market for a top up.

My go-to yarn, for this purpose, is Quince and Co. - specifically Chickadee (the dk/sport weight) and Finch (the fingering). The yarn is reliable, strong, well-dyed (if not hand-dyed), comes in numerous beautiful colours, does not have a halo, does not tend to pill, recovers to size after blocking and supports a local economy (if not mine). Furthermore, the price is very reasonable. It's the highest-quality yarn at the price-point, IMO. And the shipping charges are reasonable.

Which is why I bought these:
Finch in Petal - when you see this knit, it's a very pale pink...
Finch in Twig
Petal isn't a colour I would generally go for - it's a very cool, ballet pink. But I think it will go perfectly as an accent colour for the Twig - and with these, I can make another version of the yoked Indicum Pullover (a sweater  I love, even though, last time I made it I used the wrong yarn). I can also use the Petal to pair beautifully with the extra skeins I have of Slate and Lichen. And one of these days I'm going to have occasion to knit another baby gift. What colour yarn could be better for that?

I bought the sport/dk weight in Storm, a blue tinged grey (as opposed to Slate - which used for the blocking Svalbard - a grey-tinged blue):
Chickadee in Storm - when you see this knit, it's a grey...
Additionally, and on a whim (since you know I am an online adventurer), after considering the Ferragamo bow flat for a long while, and then seeing it look totally chic on a woman of my age at the coffee shop, I decided to take the plunge with these:

Etsy Vendor: Feelz Like Home
Note: I love buying mega-$ shoes on Etsy, pre-loved (or even vintage), because I can try out a venerable brand (one that's supposed to produce long-lived goods) at a fraction of the cost. Ain't no way I'm spending 600 bucks on a pair of bow flats. (That's how much they sell for here...) I mean, I may not even find a meaningful way to include them in my wardrobe. But at 50 bucks (for a very gently used version), I can experiment with little repercussion.

Having said this, these shoes may not fit me in the end. The label indicates that the shoe is narrow and, though my foot measures a scant 0.2" wider than the shoeprint - and I strongly suspect the soft leather will relent - I might be wrong. Note: The Ferragamos I bought about 18 months ago, also via Etsy, have the exact same width measurement and those shoes do fit. I don't often wear those, however, because the heel is just too high for walking to work.

Finally, since I seem to be on a ballet pink kick, I purchased some more pretty buttons:
Etsy Vendor: Add Vintage
Sure, I hate making clothing with buttonholes, but you can never have too many pretty vintage buttons, right?

So, North Americans compatriots (stuck in a polar vortex): How are you managing not to kill yourselves over the misery of this weather? Are you shopping? Eating? Traveling? All of the above? Are you just made of grit and fortitude? I wanna know!

* To clarify, shopping to mood alter is not stupid shopping. I continue to subscribe to the belief that one should aim to buy the meaningful things. For me, those are craft building-blocks, things that are sustainable or edible (ahem) or things that enrich one's ability to live in the world (books). And lingerie is always fair game.

Saturday, March 22, 2014

Goings On

So, more snow on the ground this morning - stupid, stupid snow. Yeah, it's the kind that just makes everything unpleasant, it's not accumulative. But it puts one in the worst of moods.

Mind you, sitting on the couch and knitting does seem de rigeur. (All of you knitters in more southern climes are so disadvantaged when it comes to the breadth of knitted objects you can actually make to use regularly). That's what I'm telling myself.

OK, there is progress on the Svalbard:

Keep in mind that this shell is still unblocked, which is why the ribbing is fluttery. Bind off is tough on something so unstructured and having approximately 450 stitches. The fabric will recover once it's been soaked and dried to size.


Some things of note:
  • Once you get past the underarm gussets (those little triangle-shaped things at the underarms), it's a very uncomplicated knit. Mind you, it's insanely tricky until you get to that point, which is why I do not recommend this unless you are a very confident and active knitter.
  • My error - right at the start of the yoke - has moved the underarm gusset on the affected size (the left) over by one stitch. It's not observable but I do wonder if it's going to torque the fabric as, effectively, I've made the fabric very slightly "off grain". I don't think it's going to be a problem - which is why (though I've known this since I realized the error) I've continued on. 
  • I am very pleased with my fitting efforts to the extent that they are in my control. I altered the size by using DK-weight yarn (vs. the instructed, thicker worsted-weight). Given that I knit so loosely (even using my newish flicking method) it meant I could stick with the recommended needle size for the body. I did have to go down 2 needle sizes for the rib, vs. the one needle size recommended, because rib is where my loose knitting goes crazy. I also shortened the body to suit my dimensions and it's the perfect length in the back. The dilemma with this knit is that the back dimensions are entirely linked to the front (as this is all knit in one piece). Sure, I could have used short rows to lengthen the front but that would have added a layer of complexity to the construction I was entirely disinterested in taking on.
  • The net result of the ingenious construction is that the front panels are proportionately very wide, no matter what you do, and the sides of the body, moving towards the back are too wide for most. This is why the pattern favours a straight, slender frame though, in truth, it would work well on a person with a thick middle having a small bust. In that instance the extra fabric would be uptaken by waist thickness but that thickness would not be over-emphasized by large breasts.
  • My point is, I've done the best I can with a pattern that doesn't necessarily favour my shape - and really, doesn't favour most shapes, truth be told. Because my version is even smaller than the smallest size, it fits very well in the shoulders (which is to say, very closely). Most of the versions I've seen are just too big in the shoulders (which then makes them too wide in the arms, given the dictates of the unaltered pattern).
  • The key to this will be in the blocking. I may opt to block the front panels longer than they currently sit, to move the widest volume of the front away from my widest part (my full bust). That will also restructure the fabric so that it becomes less wide as it becomes longer, though not too much (alas) as the fabric is SO stretchy it's ridiculous. Really, this thing has about 100% stretch factor given the rib. Practically everyone should be making the smallest size - regardless of their dimensions - unless they have very wide, broad shoulders and thick arms.
So, this weekend I hope to finish the sleeves and block this sweater. And then we'll see if it flatters. If not, someone's gonna have a nice new sweater with very little effort...

Thoughts?

Thursday, March 20, 2014

Carpe Diem

I just wrote an entire post and Blogger ate it. It was a really good post, btw.

At any rate, my mood was greatly improved when I got home today and found a box on the dining room table containing this:

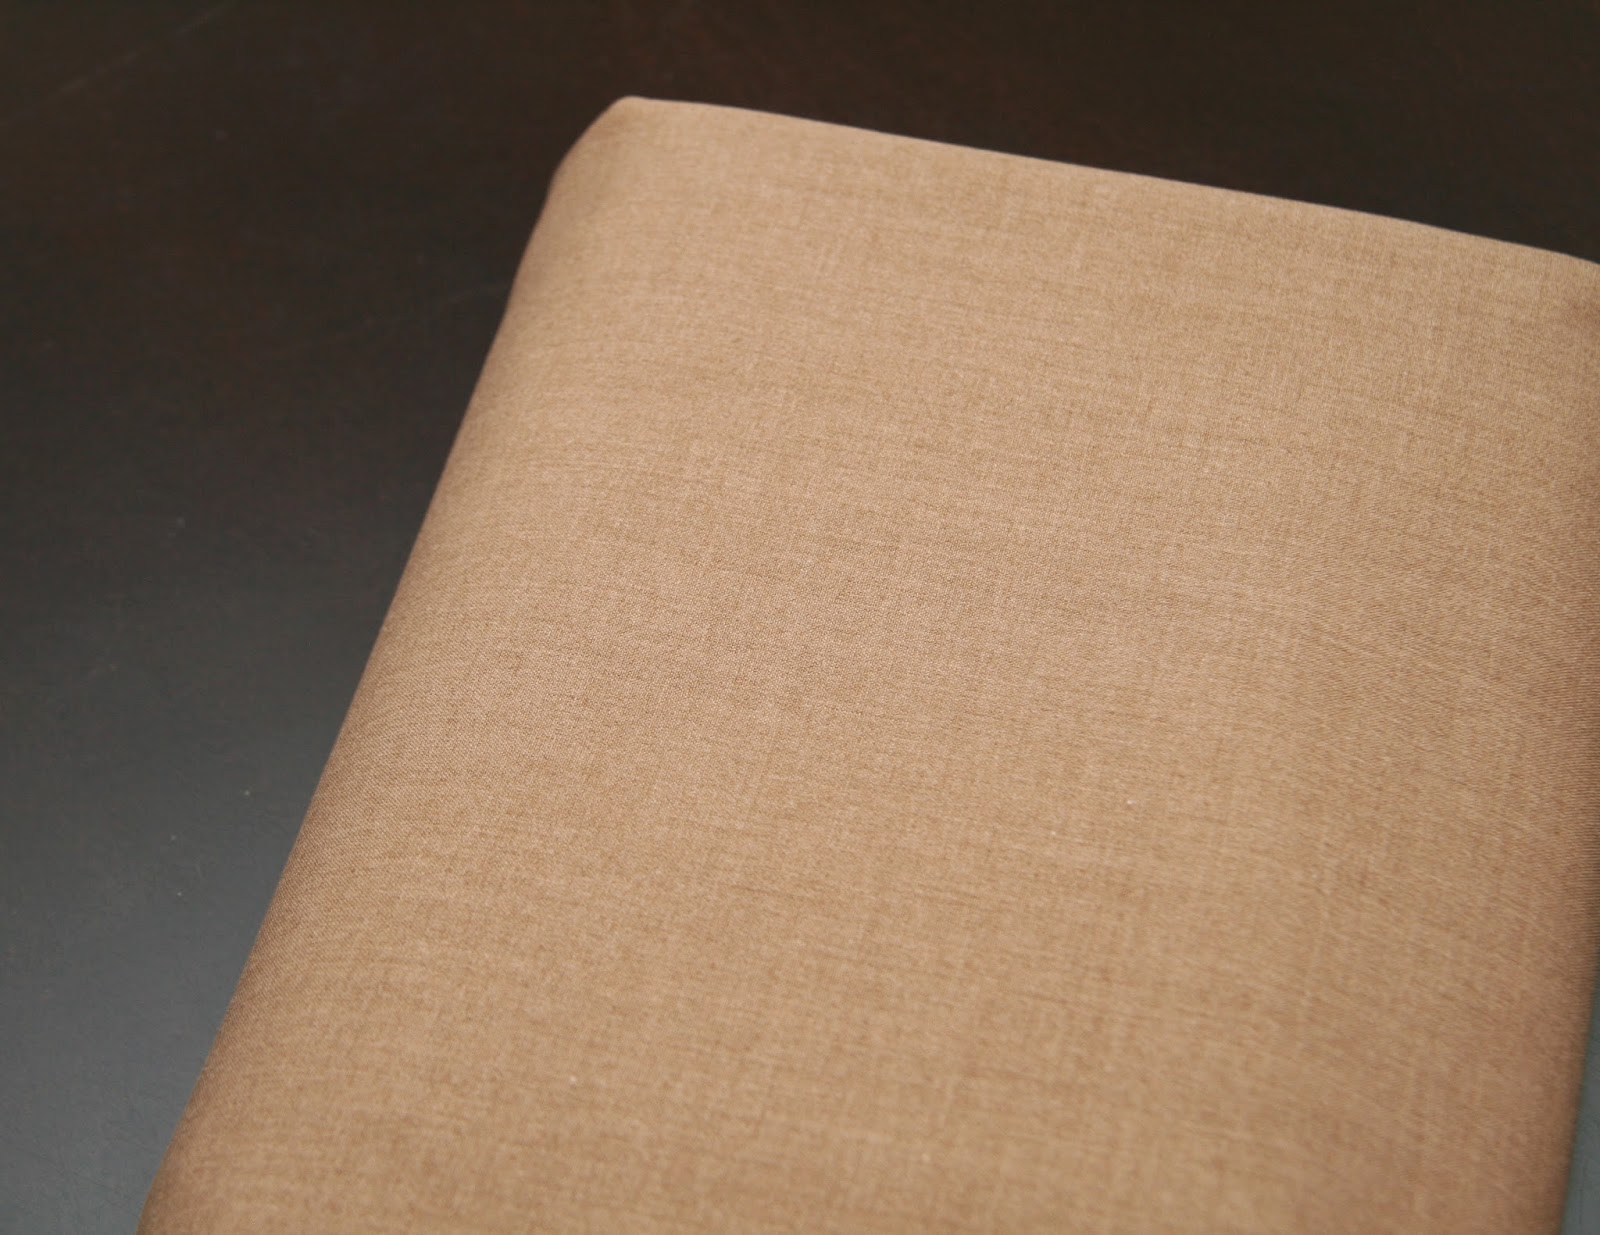
Fabrics from Fabrications Online... The fabric really arrived folded just like this in perfectly creased tissue paper.

The package arrived in less than a week and escaped the eye of Customs!

Here are a few close ups:


This navy wool twill, having 5-10 per cent stretch, has a lovely hand but needs to be washed a couple of times before I can determine how it's going to drape. May be best for a skirt or dress... Of course, the pic is over-exposed to show some semblance of colour, but in real life, it's a bit truer to navy - but a rich navy.


This salmon-shade rayon jersey is some of the nicest jersey I've ever felt. It's not too thin so it would make a great dress... It would also be perfect for the Issy top. It's more pink than the wool jersey I bought from Fabrications a while ago.


And finally, the taupey-beigey merino wool suiting with approximately 12 per cent stretch. Lord, it's gorgeous. The stretch factor is perfect and the fabric looks ridiculously expensive. I cannot believe it cost 18 bucks a yard. It would have been cheap at twice the price. I got the end of the bolt, I believe. (Sorry.)

Almost forgot to mention, you get 6 free swatches with every order and they're nicely presented (for ease of ordering):


So, there you go. It may still feel like winter, but this delivery warmed my heart.

Sunday, March 16, 2014

Svalbard Sweater: Still in the Game

Honestly, you think I'd be more hateful about this project - given how it tortured me and how, frankly, I'm hateful about everything these days.

Alas, it's so ingenious, I am in its thrall. And I did manage to fix the error of doom which is how I'm at this point:


You can see the tiniest amount of weirdness at the height of the underarm, along the back of the sweater, in this overexposed photo. That's not because there is error, but because, in fixing the error along that row, the stitch tension was messed with. I believe that this will disappear altogether in blocking. Note: You cannot see it when you look at the sweater itself, only in the photo, given the lighting...
Cartridge stitch makes for an incredibly spongy and stretchy knit. I am happy I went with the smallest size - and that I'm using DK weight yarn (instead of the recommended, thicker, worsted weight). Purposefully, my version will be even smaller than the dimensions of the smallest size, and I will achieve my required armscye depth of 6.5" (vs. the 7.5 inches that the pattern would produce, were gauge achieved on the smallest size) and the required narrowness at the shoulders so that it doesn't look like a boob-highlighting sack. That's the theory, anyway.

I cannot abide 8 inches of positive ease - even if that's the look of the sweater. I think it is too slouchy and unfitted on the majority of wearers whose photos I've seen - and many of those wearers corroborate this perspective, regardless of the sizes they've made.

Keep in mind, there will be a rib border of 3 inches - preceded by a stockinette border of approx 0.5 inches added on to the edge of the sweater, so it's still going to be pretty wide in the end... And I do hope that 3 inches isn't too tall at the back of my neck or I might be forced to make my rib border a bit narrower than 3 inches.

In addition to my concern about ensuring that this garment fits perfectly in the shoulders (so that it emphasizes my smallness where it is visible (cuz I'm not going to be able to play up my waist or underbust when wearing it), I'm not concerned about it fitting over the full bust. It's an cardigan that will stretch to close with a pin (should I choose). But when it's open, I don't want a ton of bulk at the sides of my boobs or over my chest or it's going to look bad on me.

So, what do you think of it so far? Do you think I've got a chance at producing this such that it will work with my shape?

Friday, March 14, 2014

Siesta - Once Removed

You know that fabric siesta I'm on? Um, it's on a siesta.

I appear to have purchased a bunch of new fabrics but, I assure you, they have already been tagged for new projects.

To wit:

3 yards of Stretch Twill in Navy - Brushed on one side

1.75 yards of Rayon Jersey in Dark Salmon (like a cerise)

This wool suiting in taupe, with 10% stretch, is gone now - so the photo was removed from the webside (hence this tiny little image)... I bought 3 yards.

I got these at Fabrications Online, that vendor I learned about from Andrea and Gail, and I have to say I am even more impressed after this shopping experience than I was the last time I purchased from Fabrications. As you know, I'm not a discount fabric shopper. These fabrics are very well-priced for their quality. At regular price, the wool suiting was $18.00/yard. (Locally, or via other online vendors, I'd pay more like 25 bucks/yard for the same fabric.) The rayon jersey was $12.00/yard, regular price (that's the going amount) and the stretch twill was also $12.00/yard , regular price. I would pay, locally, $14.00/yard for the twill.

Why didn't I buy local? Well, the last 2 times I have bought local suiting fabric in TO, I've been disappointed in the way it responded to tailoring. I can buy excellent product locally, but it will cost me upwards of $35 bucks a yard, and I'm trying to keep things less pricey than that. Rayon jersey is hit and miss in our garment district. I can find it, but not necessarily in a solid colour that I like having the quality I expect. And the twill, which I can find here, was frankly an impulse purchase. I just added it into the batch, in the hopes that it will be a new bottom-weight fabric I can use in the future. Next time I shop local, I'll be sourcing the 10% stretch, bottom-weight fabrics that work in lieu of denim. (That's my new thing.)

Before buying, I called the shop because I was concerned about ensuring the degree of stretch in the pants fabrics - specifically the suiting (as I will also make a jacket from it). While chatting I learned about the rayons, about coding on the website (so that I can navigate it better going forward), about various other fabrics that might be of interest... I was blown away by the client service.

But what makes this an even nicer experience, above and beyond good fabric and good service, is that the shipping is a flat 20 bucks to Canada, by USPS, no matter the size of the order or its dollar amount. Oh - and you can order in fractions of yards so you're not committed to, 2 yards, let's say, if you only need 1.25 yards. That goes a long way to keep the price in check...

The wool is slated for the next attempt at the Janet Jacket. If it works, I'll use the extra to make a skirt or pants to complete a spring suit. The rayon is to make my next attempt at the Issy Top. I bought 1.75 yards as this top takes about 1.5 yards - I only have 1 yard cuts of rayon jersey in my stash right now so buying more was necessary. And the twill is a bottom-weight fabric to make another pair of Claudia pants, the most recent Bengaline version being entirely nasty in both size and feel. Since I already have a "denim" pair (albeit rayon denim), and my other denim has no stretch, I need a new fabric with which to experiment.

I did try to shop my stash before I purchased. I didn't have what was required to continue working with my most recent patterns - those I spent effort "perfecting" fit-wise, or continue to spend time improving.

Really, though, after this next batch of new sewn items, I'm going to have to work with some pre-purchased fabrics in the stash. They have projects attached to them too, after all...

So, today's questions: What do you think of my latest fabrics? Have you shopped Fabrications online (or in store) and, if yes, what was your experience? How much are you willing to pay for online shipping of fabric - regardless of where you live? What are the fabrics you find hardest to source (either online or in shop)? Let's talk!

Wednesday, March 12, 2014

Svalbard Sweater: Five Photos and A Zillion Words are Worth, Um...

For what it's worth (and I suspect not much), I won this battle of erroneous cartridge stitch. I'm able to tell you about it from the comfort of my own home, which is where I am right now, as there's a blizzard outside and it's considered unsafe to be traveling later in the day. Yeah, you read that right. There's a half a foot of snow on top of a foot of compacted snow and ice. And we're not even at the bad point.

Anyway, enough about the most depressing weather ever, let's talk about how I've prevailed on the knitting front.

I emailed back and forth 16 times with the Brooklyn Tweed tech support (Christine). In case you're interested, she doesn't knit every BT pattern - though she can help you with all of them. She's simply bizarrely mathtastic. In the course of our discussions, and since I am the one who made the teensy error to take me completely out of phase, I determined some things (feel free to skip this if you're not intending to make this sweater... It's technical.):
  • Cartridge stitch is a 4 stitch + 1 stitch repeat wherein two stockinette columns separate three stitches that are done in a kind of moss pattern. Generally that pattern is KKKP etc. on the right side and KKPK etc. on the wrong side.To complicate things, though the pattern isn't tricky unless you fuck it up, the columns of stockinette are in a different spot on the right side of the fabric, than on the wrong side of the fabric. When it goes wrong, the errors are SO visible it's ridiculous. Alas, it's hard to see until you're 2 rows into the wrongness. 
  • Actually, now that I've spent hours deconstructing the stitch pattern, I can tell you that the wrong side will always advise you if the right side is correct. And the right side will do the same for the wrong side. But it takes a while to figure out what's going on.
  • Think of each stitch in parallel with the one below. The first stitch is in rib (with the one below), the second in garter (with the one below), the third in rib and the fourth in garter.  Consider also, by way of ensuring that you have things right, that every rib column produces that long line of stockinette either on the right side or on the wrong side. The columns are always separated by one stitch of garter.
  • In order to figure out where I was - so that I could move forward - this advice, from Christine, was critical: You have a center knit column on both the wrong and right sides - this knit column is always the center stitch of the knit 3 in the pattern. On either side of the knit 3 is a purl 1. So when you come to work a row after increasing, if you focus on the knit column and figure that is the 2nd stitch of a knit 3, you can work backwards from there.
What you need to understand is that I made an error, early on in the process, that isn't very visible but has had implications for the stitch pattern.

You can actually see it in this photo (and I'm only disclosing this for science):


Near the heart of stockinette stitch (at the centre of the piece), on the left side of the photo, two columns went out of phase. I knew something was up (because, after this point, in order to get it to work, I had to revisit cartridge stitch every row and base it on the mirror image of what I had done on the other side - aka working from the centre point outwards), but I didn't realize what had happened until I was hours on the other side of the error. And seriously, I don't think you would have noticed it if I hadn't pointed it out because I didn't notice it and I'm a freak about these things!

But let's get back to the place where the problem really clarified itself - at the point where that flat piece, above, gets bigger and wider and the side bits of cartridge stitch fold over into sleeves...

First I had to decide on my course of action: I could unknit those 2 set up rows (350ish stitches), which are the hardest ones to tink because there's also set-up to reverse engineer. I could scrap the whole thing (which was my first choice, but seemed rash). I could scrap it and start again (this was at the bottom of the options, popularity-wise). Or - and this I came up with at the last minute - I could knit the next row (the one after the 2 set up rows) as my newly set-up sleeves were error free, and then with each of the 71 stitches on the back section of the sweater (where the problem was), I could undo the two stitches below the one I was working, to aright the cartridge stitch.

Yeah, I'd have to rework 213 stitches, but I didn't have to take the whole thing back to the studs.

So that's what I did. But easier said than done.

I had to make a chart showing what cartridge stitch should be on my back panel:


Don't try to detangle it, it's a working document - which is to say, if you didn't make it, you likely won't understand what it means. I will tell you that the first row of the set up, which the pattern refers to as the "Pick up for Fronts" row is the bottom row on my chart and one reads it from right to left. The second row, the one the pattern calls the Set Up row (in the middle) is read from left to right (as it's a wrong side row). The top row, again read from right to left, is the one I had to work as I went. I mean, that's the row I was on. As I worked each stitch in the top row, I undid the two stitches below (if required) to aright the pattern.

But it wasn't that easy. This only dealt with the back portion. I also had sleeves at this point, being past the set up...

Those I charted differently, because I've made no errors in that part of the pattern:


What happens here, is that you read from right to left, bottom to top, stopping in the middle to shift to the pattern chart for the back body when you get to that spot. (The blue highlighting is the reminder to do this).

Oh, but it wasn't that easy either.

Cuz row 3 is a "chevron increase row". This means, I also had to work increases in the stitches bordered by the sleeves and the back - the underarm gusset which is worked simultaneously.

That's why I wrote myself an order of operations for just row 3:


And now, perhaps you can understand why my brain hurts.

Mind you, I think the problem's fixed:


Now here's hoping I don't make another mistake...

Thoughts or feelings?

Tuesday, March 11, 2014

Support

OK peeps. When Brooklyn Tweed rates a pattern as difficult, take it under advisement. Especially when all of the reviews you read corroborate this perspective. Don't assume that, cuz a pattern looks simple it is simple. (Not that I did, but really, it looks so simple!)

I'm in the dark hole of this knitting process,trying to establish the set up row where the yoke turns into the fronts, sleeve place holders, underarms, and back. Last night was 2 hours of work on this one freakin' row, followed by an emotional breakdown, followed by ripping back without considering that tinking (knitting backwards) was the right course, followed by the horror of discovering two strings of yarn hanging on both sides of the back panel (the only part currently on the needles) - one attached to the skein, the other to the back panel. The only way to "start over" is to put the sleeve stitches (now on waste yarn) back on the needles and then knit backwards some more. Instead, I'm inclined to work with the finite length of yarn I've got in front of the back panel (it was enough to pick up and knit a bunch of stitches the first time around) and then keep going from there. But it's going to be a tense ride.*

There is, so far, nothing relaxing about making this garment. I mean, it would seem that it's very purpose is to keep one on one's toes.

And yet, it's not a bad pattern. It's just freakin' detailed. So detailed that most everyone fucks up somewhere and has to either fix it on the fly or rip back. I mean, it's never taken me so long to knit 50 odd rows (the yoke portion).

Apparently, it gets easier after this set up row which is good because I'm entirely distracted by the thought of it. That unfinished row is currently tormenting me.

At any rate, this post is not just to bitch about knitting trauma, but to tell you the most heartwarming story. At 10 pm, I sent a flurry of emails to tech support at Brooklyn Tweed, imagining I'd get feedback the next morning. (My questions were about the pattern instructions - not my stupid method of ripping back which is, natch, in no way BT's concern...) In actual fact, I got feedback in 5 minutes. Yeah - 5 minutes. I was so shocked I had to know if I'd simply caught a staffer late at the office, or if this is one of the Brooklyn Tweed value-adds. Apparently, it's the latter.

So, in addition to having the hippest website, the coolest designers, the best-documented patterns, the wooliest yarn and the most covetous look books, BT gives you perfect customer service.

Really, support this brand. We need more like them.

*It doesn't help that I fucked up the cartridge rib at a certain point (at the outer edge on one side - it's not that I worked the pattern incorrectly, but that I started it one stitch early for a while). So now, my every row requires a visual confirmation that I'm in pattern. I just can't rely on the cartridge pattern outlined the instructions. Trust me, I considered ripping back to the problem point, but I the likelihood is that something else would have gone wrong the next time. Like I said, it's like jumping from one plank (over a pit) to another.

Sunday, March 9, 2014

When Things Don't Go As Planned...

As relatively craft-successful as the previous two weekends have been, this weekend was rather unproductive. My goals were lofty: another Issy top, Claudia pants made with stretch Bengaline, knitting past the yoke of the Svalbard cardigan...

How did that go?

The Knitting:

Well, here's my latest knitting on the needles:

Most of the yoke of the Svalbard cardigan by Bristol Ivy - I know the centre panel looks odd. It's unblocked and the "V" of increases isn't showing well. I swear, in real life, it looks normal (if a bit uneven as it hasn't been blocked)...
Since Friday I have worked precisely one row and rolled 3 balls of yarn. Note to reader: That ain't gonna get me to the end. I do have a post on this project in the works. The Svalbard is something I was compelled to cast on because it's like a scarf with sleeves - an elegant one. I just want to be warm right now, not constrained - and I don't feel like mathy-fitting my ass off.

Of course, this is a dicey garment from the vantage point of my shape. But I'm living on the edge and I have a couple of work arounds.

In brief: This pattern is polarizing (just read the Ravelry projects pages). It's very simple-looking but very complex to establish, as one knits the entire sweater from the top down. It's rated 4/5 starts in difficulty (by the pattern designer) for a good reason. Everyone seems to have to rip back two or three times before establishing a groove because it's fucking complicated. Mind you the end result is refined. And once you figure out how it works, it's SO smart - like solving the problems of the universe on two needles. This sweater is much more challenging than the Blanche Too, but so much better envisioned. Some people suggest that the pattern should be more streamlined (it's 12 pages or so - standard issue for Brooklyn Tweed designs) but honestly, I don't think it's reasonable to expect that it could be. To have access to the pattern in multi-sizes, one must switch from section to section for info. What's so good about the instructions is that they explain how to do this. Sure, it's tricky, but it's not a mystery and it's beautifully thought out.

The Sewing:

Now I did end up sewing two things - but one went straight in the bin and the other is just meh (who knows if I'll ever wear it).

The thing that went in the bin: Another version of the Issy Top made in blue rayon jersey. Here's the thing - I really struggle with the construction of the neck unit on this top - so that was a nightmare. Furthermore, I over-estimated my required centre-back narrowing alteration. I believe, in this pattern, I need 2 small darts on the neckline, not one large one, and a smaller decrease in neck-width than originally I estimated, so I diminished the impact by half - one inch of narrowing vs. 2 inches. Finally, there was a flaw in my rayon fabric - right in the middle of the piece. I didn't notice it when I checked it on receipt, but it was deceptively hard to see - more like a serious run than a tear. I don't know if my washing somehow might have caused this or if it arrived this way. I worked around it but the flaw, coupled with only a yard of fabric (the Issy really does need a yard and a half of 60 for the size 10), meant I had to cut a sleeve against grain and to shorten everything. It was suboptimal.

I am bummed to have trashed a yard of fabric and a day, but I did learn a few things that should help me on my next go round.

The Meh Thing: The other garment I sewed this weekend was a second pair of the Claudia pants. I can't even be bothered to photo them - though I will soon, if only to show you Bengaline (not that you can really see how it feels in a picture).

I don't like Bengaline - and I'm working with the "good" kind - the rayon blend (not the poly blend). I can only imagine how hideous the poly stuff must feel. There's so much fucking stretch that I can pull the pants off without opening the zip. My highly modified (for me) Claudia pants pattern is suited to fabric having a max of 20 per cent stretch and probably 10 per cent stretch factor would be better.

The only things I can imagine wearing in Bengaline are panels in a dress (for stretch and contrast), a tailored jacket (that fits with the ease of a cardigan) or VERY close fitted pants. Seriously, you want at least 2 inches of true negative ease, maybe more. I'll try my other yard with the Elle's or "denim" leggings, but I don't suppose I'm going to be a convert.

The fabric feels untenably fake. It's a bit sheeny - equally on both sides, IMO, so I couldn't figure which was which. I have no idea if the lighter colours are less or more sheeny but  that would make a difference going forward. (I want matte finish.) Bengaline seems never to iron completely. I mean, it presses a nice seam, but it's almost like you iron-in the wrinkles as you go. It didn't take my fusible interfacing well so there's a bit of weird overstretch bubbliness on the underside of the facing (not a deal breaker but ugly).

It doesn't so much drape, as stretch and contract, so a garment with too-loose fit is both wasted, from a fall of fabric perspective, and bulky-seeming.

Furthermore, and I've known this for a long time, though it really hit home today: I don't like black pants. I think they're the dullest, most ubiquitous thing ever. They just don't pop (like blue denim, my favorite fabric in the world). They're designed, 9 out of 10 times, to fade into the background. Why would I sew something that is so dull-looking no one will notice? I don't like black RTW pants any more than the hand-made kind. Sure, occasionally, one may observe someone wearing a beautiful pair in a beautiful suiting fabric (generally with a matching jacket) but, for goodness sake, if you're going to make black pants, they'd better be in fabulous textile and the fit's gotta rock.

Whatevs. Live and learn. This weekend is gone. Let's move forward...

So what's next this week, craft-wise?
  • Gotta buy some more rayon jersey - yeah, I only have one-yard pieces?! - to sew my next iteration of the Claudia top. I'm making this as part of the Sew Sexy Sew Along that Clio and Sown Brooklyn are hosting. Sure, not feeling outrageously sexy right at the moment, but sexy is as sexy does - right?
  • Gotta find some pants fabric to make a second pair of the Claudia pants (also for the Sew Sexy Sew Along) - I'm doing an outfit peeps! Note: It will not be black. But man, how much more denim can I wear??
  • Gotta get past the yoke of the Svalbard and move onto whatever comes next. I think it's the front panels but honestly, I don't even know. I just know it gets less complicated as you go, which is my kind of pattern!
Today's questions: What do you think of the Svalbard cardigan? How do you feel about Bengaline, if you've tried it? Are the lighter shades shinier or matte-r? What other pants fabrics are there in the world, besides denim and Bengaline, to make stretch woven pants? I'm thinking 10-20 percent stretch. I'm open to different colours or patterns. Let's talk!

Friday, March 7, 2014

Style Arc Issy Top: Another Alteration (The Centre Back / Neck)

It never pays to speak too soon. There I was all high on me, having merely tried on the Issy top, and not yet having worn it in the world. Now that I have worn it, I have found a new fit dilemma.

Don't misunderstand, my cheetah-print version is the most wearable of muslins, but it's still a muslin. See, a semi-regular challenge has reasserted itself in this pattern. The back neck falls backwards as if there is too much fabric lengthwise. It appears, however, on experimentation, that the issue is about back and neck width. I'm narrower in this place than are the dimensions of the original pattern.

Here's the thing, when I pull out a dart that starts on the collar and moves into the centre back of the top, the issue resolves itself.


Below is a makeshift pinned-up version for a quick visual. Ignore the pull lines, I didn't organize the top well on the dress form so it's caught on the fabric of the form. Of course, in the finished version, the neck will come together evenly, not askew as it shows below:


But this alteration is not that simple to enact on the flat pattern, given that the neck band has a highly unusual construction. It has to be done on 2 pieces (back and front) .

As you can see in the (unaltered for this fix) version (below), there are two tabs on the front piece that come together to produce the collar band, on the top left and right of the pic. Fold lines indicate how the neck doubles on itself.  The sides, parallel to the fold lines, eventually form the piece of the collar band that attaches to the neck of the back piece. What is challenging to imagine is how those neck tabs come together to form the back neck unit. Effectively, the top parts (on the diagonal) form a seam that will run perpendicular to the neck of the back piece. Trust me, it works.


Now here's my altered flat pattern version of the collar band (remember - this is on the front piece of the top):

Part A of the Centre Back Narrowing alteration
What I had to do, and it was really counter intuitive, was to determine how to cut the collar part of the dart wedge, seen in the photo, second from top. It involved removing fabric but also tapering it to form a slightly arrow-like shape.

Below, you can see a loose representation of how that arrow will eventually dart into the back piece. Of course, when you seam the collar band to the neckline of the back piece, you have both tabs connected and folded over - I cannot represent that visually with the paper which won't mold like fabric.

Part B of the Centre Back Narrowing Alteration - the centre back dart.
In total, I had to take out 3 inches of fabric in the collar band tapering to a 2 inch dart on the back piece. The overall length is about 4.5 inches stopping at the part of my back that gets a bit round (and therefore needs more width/length). I'd prefer to make 2 smaller darts, but I truly have no idea how the back neck would adapt to 2 darts.

Another alternative is to make a centre back seam (currently the back is one piece) and just remove the paper at the dart.

I'm kind of amazed that the required alteration is so relatively extreme - especially given that the cheetah-print version looks pretty good (this issue aside).

I also wonder what this means in terms of how I fit into tailored jackets - for example the Janet (with which I had so much trouble in the collar area). I don't recall having this dilemma with patterns other than those by StyleArc, but then, I didn't know as much about fit a year ago as I do now.

Pls. note: I have completely made up this alteration. I don't know if it works yet. So I suggest you let me take the risk and provide more feedback once I do.

Today's question: Does any of you have a really narrow upper back, more so at the centre point (spine) than at the shoulders? How do you deal with it??

Sunday, March 2, 2014

Roar

This is one of those sewing projects that took me all weekend. Four hours on Saturday and 8 hours today and I only just finished the Issy top. Anything that could go wrong, did. I had difficulty figuring out how to alter the pieces. I had difficulty figuring out how to put them together. I had difficulty sewing the rayon jersey (you know how rayon jersey can be). I'd finally figure something out (something nit-picky and critical) and realize that my bobbin was shot. My entire body is in knots.

But I fucking love this top.


Don't you love the drape of the neckline??
See these gathers? I set them by pulling basted stitches and then basting the front gathers to the back gathers. Then I serged. It took a while...


OK, here's the lowdown:
  • Next time I'm making this in a solid colour - there's too much fabulousness in the construction to obscure with (an admittedly fantastic) pattern.
  • I fucking nailed the alterations. I'm a convert to the sloper concept. Yeah, it took hours to figure out where exactly to remove the fabric from but I did it and the shoulders are perfect.
  • Yeah, this pattern fits smaller than the envelope measurements but I still needed to pull out almost an inch in the shoulders, remove a bit of fabric from the arm circumference and to raise the armsyce by another inch. I didn't make any other alterations. It fits in the boobs. It fits in the waist. It fits in the hips. I appear to be a consistent size 10 in StyleArc knit tops - with alterations, of course. I might be able to get away with an 8, based on experience, but then I'd have to fit by increasing the bust and waist (and doing other things potentially that I cannot predict). I'm happy using the 10 as a starting point.
  • If you don't like people staring at your tits, this probably isn't the top for you.
  • Some have mentioned that they're not nuts about the asymmetric hem (in addition to the asymmetric neck and asymmetric gathers). I LOVE it. I even love it at almost tunic-length, which is the length of the garment currently. I might shorten the next version (for a different look) but this would be great with leggings or skinnies.
  • This looks like it would cost $150.00 at some cute boutique (or $500.00 at Holt Renfrew). It's TOTALLY au courant. I cannot say enough about StyleArc from the vantage point of chic and modern design. Sure, I've had a few challenges with the company (largely because of business-growth, growing pains), but you cannot fault the silhouette. And much of the time, the drafting is very good also. This is why I joined the Club and will likely order mainly from StyleArc for a good long while.
  • The instructions are more fulsome than they generally are with StyleArc, but I trashed them by ironing the thermal paper, so it was a slog for me. And really, I was not at my spatial best. What can I say? There's a reason that Anne has a blog called the Clothing Engineer and I do not have a blog called the Clothing Civil Servant.
  • Given all the challenges I had figuring out the construction, this fabric took a beating and the inside is not my neatest work. Mind you, I worked out the glitches and figured out what to do so, next time, I should be able to produce a neat interior.
  • The rayon jersey is lovely and the stretch factor is optimal for this top. If I'd understood things better, I would have used my seam interfacing strips along the entire front and back neck to stabilize things. Then I'd have had a chance at stitching the underturned back neck, in the ditch, from the right side. As it is, I had to use a short zig zag on that area and it's not gorgeous. But no one but me will notice it, I'm sure.
No question, I will be making this again. I mean, after all the time I spend on alterations, it would be crazy not to make everything at least twice.

So, whatcha think??

Two Socks, One Week - Fine Finished Objets!

Let's celebrate the hideousness of this eternal (and I do mean ETERNAL) winter with a long overdue look at some beautiful socks! Lord knows, we need them...

(To all my KAL co-participants, apologies for the delay in posting this. I've been on my own planet lately and it somehow slipped my mind?! I also realize that some of you are still working on your socks, per recent email exchanges, so keep on and let me know when it's time to show off your finished wares.)

Enjoy the gorgeousness and - if you haven't sent me your photos or linked me to your blog as yet, please do and I'll add your pics to these.


Chris turns hot pink into a perfect new neutral...
Andrea's socks - made for her very lucky brother!
Cheryl's socks (almost there in time to ring in the New Year - now that's the way to spend your hols!)
Clio's socks - made for her very lucky self! That's Tosh yarn...
Joanne decided to bring on the Easter colours! (Very smart, IMO.)

And Barb used this incredible self-striping yarn to make her socks. I do love the muted colours. Very Icelandic!
May I suggest that you go out today and purchase some of the nicest sock yarn you can get your hands on. Then sit down, with a lovely drink and some yummy snacks and let your needles take you away.

Here's a look back on how I felt last year at this time (note: it involves a fantasy and not being anywhere near freakin' Canada).